
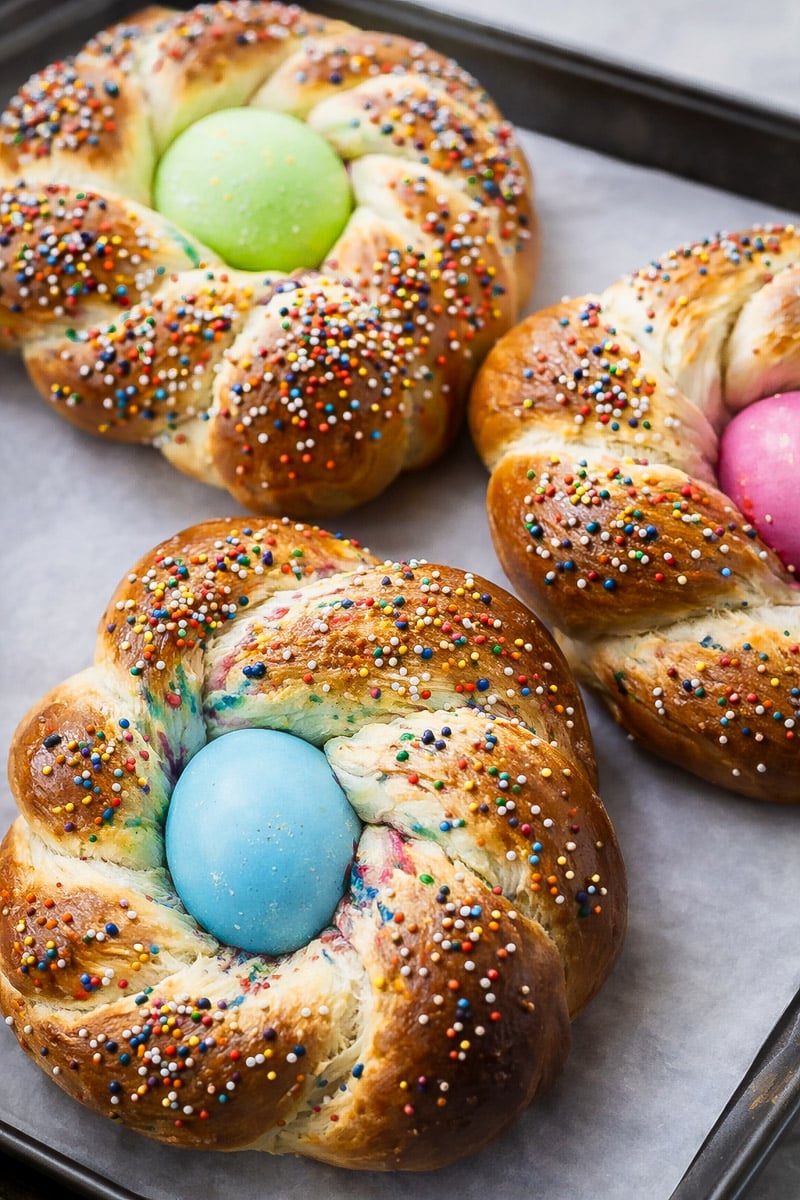
Braided Italian Easter Bread (Pane di Pasqua) is one of those Italian Easter bread recipes that I look forward to making every single year. It's soft, slightly sweet, and filled with so much tradition, colorful eggs nestled right into the braided dough, fresh out of the oven just in time for Easter Sunday. Whether you're making this for the first time or it's already a family staple, this is the recipe that belongs on your Easter table.
If you're putting together a full Italian Easter spread, be sure to also try my Casatiello and Torta Pasqualina Italian Easter Pie alongside this bread.
This article contains affiliate links which support us at no extra cost to you.
Jump To
- What Is Pane di Pasqua (Italian Easter Bread)
- Ingredients for Italian Easter Bread
- How to Make Italian Easter Bread (Pane di Pasqua)
- Should I Use Raw or Hard-Boiled Eggs?
- Tips for Making Italian Easter Bread
- Tips to store and make this Easter bread ahead of time:
- FAQ'S
- The Italian Easter Bread My Mother-in-Law Makes Every Year
- More Easter Recipes:
- Italian Easter Bread (Pane di Pasqua)
Why You'll Love This Italian Easter Bread Recipe
- It's a true family tradition. This is the recipe my Italian mother-in-law makes every Easter - passed down exactly as she makes it in Italy.
- Easier than it looks. The braided shape is impressive but the dough comes together simply with basic pantry ingredients.
- Perfectly soft and slightly sweet. The texture is tender with just the right hint of sweetness and lemon - not too rich, not too plain.
- The eggs bake right in. No extra steps - the raw colored eggs cook perfectly inside the bread as it bakes.
- Great for making ahead. The dough can be prepped the night before, which makes Easter morning so much easier.
What Is Pane di Pasqua (Italian Easter Bread)
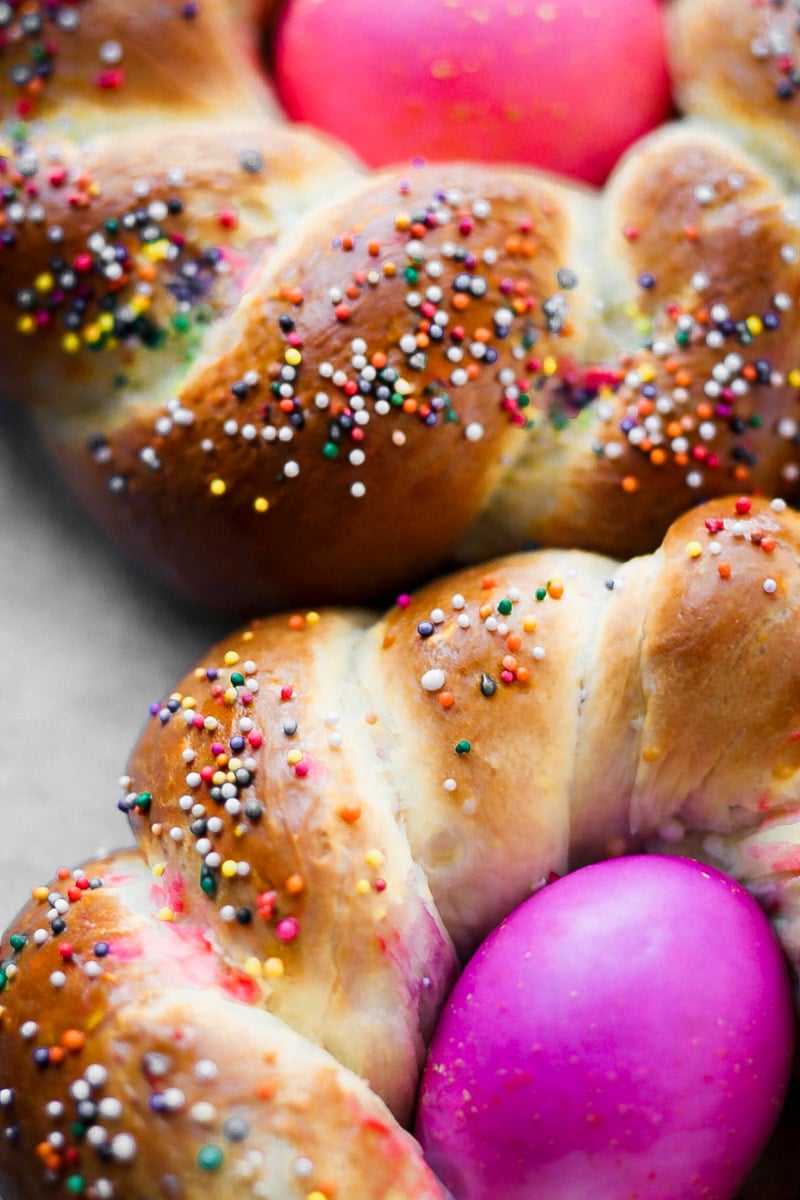
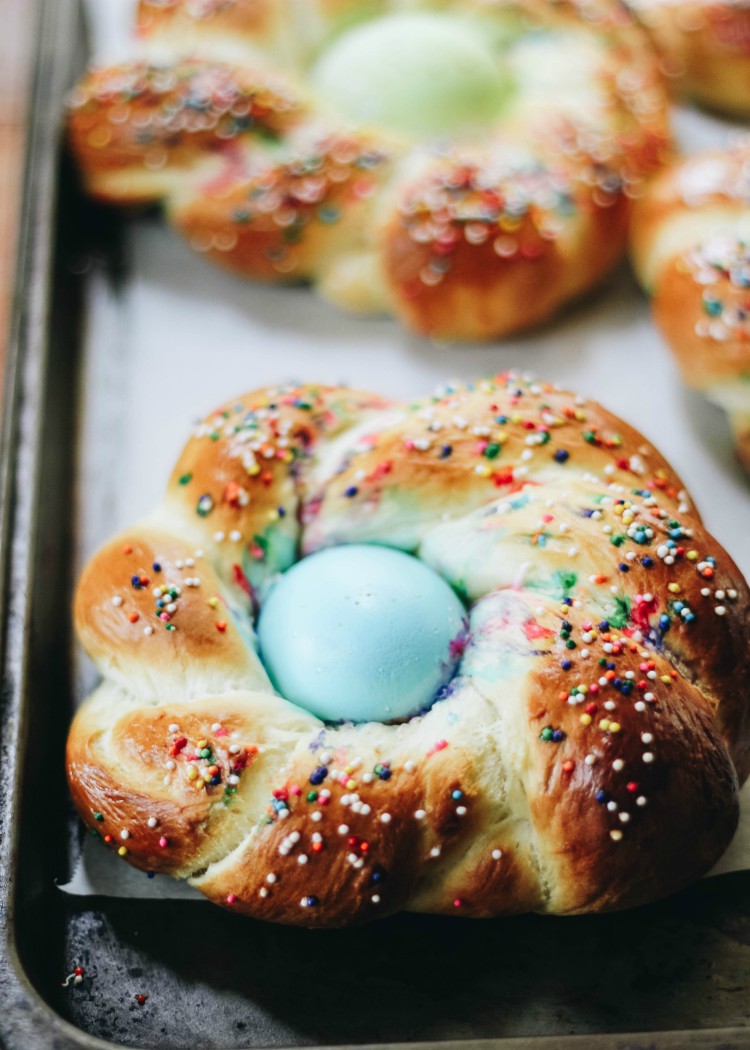
Pane di Pasqua, or Italian Easter bread, is a soft, slightly sweet braided bread traditionally made in Italy to celebrate Easter. You'll often see it shaped into wreaths or braids with colorful eggs baked right into the dough, which symbolize new life and the arrival of spring.
In my experience, this bread is as much about tradition as it is about flavor. Growing up around Italian kitchens, Easter always meant the smell of sweet dough rising on the counter and loaves of this beautiful bread coming out of the oven, ready to share with family after Sunday mass.
This is a family favorite recipe I've been making for years. It's a recipe my mother-in-law makes for us when she is here visiting from Italy for Easter.
She is not too much into the colored eggs or even the sprinkles, but she does know how to make some really cool designs and shapes. She cranks out this Easter egg bread and I am finally starting to catch up with her speed - well, just a little.
Ingredients for Italian Easter Bread
Don't let the pretty appearance of this braided Easter bread fool you into thinking it has a lengthy ingredients list! Here's everything that goes into this Italian Easter bread recipe:
- Milk
- Active dry yeast
- Eggs
- Vanilla extract
- Granulated sugar
- All-purpose flour
- Lemon zest
- Kosher salt
- Unsalted butter
- Dyed eggs
How to Make Italian Easter Bread (Pane di Pasqua)
I've given detailed instructions on how to make Italian Easter bread in the recipe card below, but here are the basic steps for making this Easter sweet bread:
- Dye the Easter eggs.
- Mix together the yeast and warm milk. Set aside until foamy.
- Add the eggs and vanilla to the milk mixture.
- In a separate bowl, whisk together the flour, lemon zest, and salt.
- Using an electric mixture with a dough hook attachment, add the milk mixture to the flour mixture.
- Add the butter to the dough a little at a time.
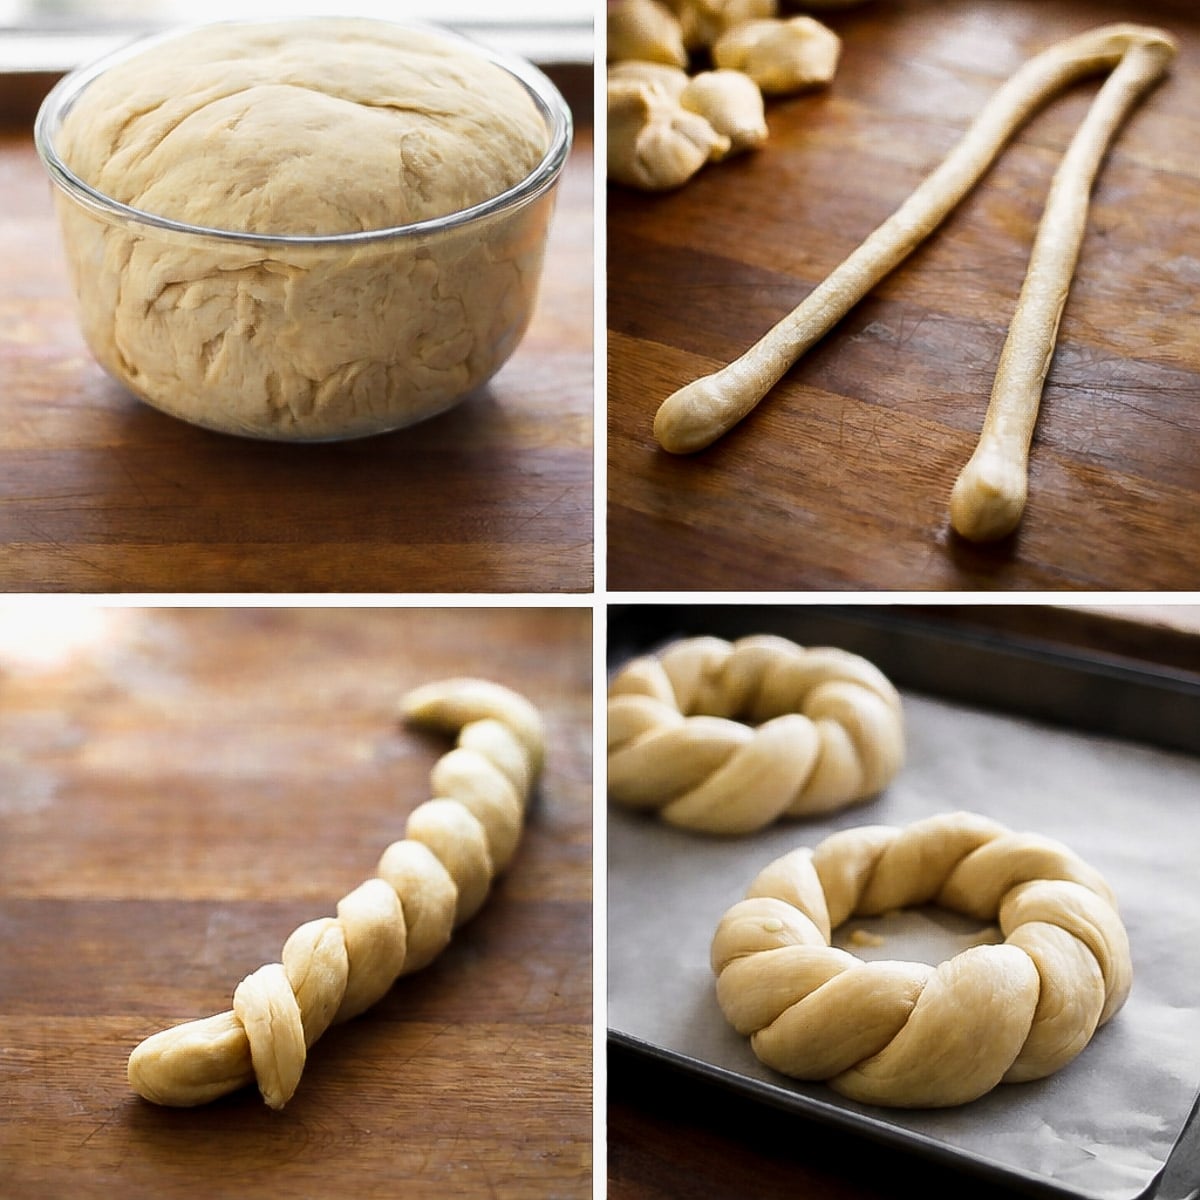
- Once the dough comes together, turn it onto a floured surface and shape into a ball. Place in an oiled bowl and let rise for an hour to 90 minutes.
- Once risen, gently punch down the dough and shape into the braided Easter bread (I've given specific instructions on how to shape the dough in the recipe card below).
- Brush the braided dough with egg wash, then let rise for a second time.
- Bake the Italian Easter bread until golden.
Should I Use Raw or Hard-Boiled Eggs?
I color the eggs while they are uncooked. When you nestle them into the dough and place in the oven to bake, they will be completely cooked when you take it out. If you do have hard-boiled eggs and decide to use them in the bread, the eggs will be very cooked after it bakes inside the bread. I think the texture of the eggs when you put them uncooked in the bread and bake them is the right texture.
Tips for Making Italian Easter Bread
- Shaping the ropes. When you make the ropes, make sure you don't make them too long, otherwise your little nests to hold the eggs will be too wide. The dough ropes do shrink as you roll them and then shrink again when you stop. I would measure them and make sure they're not over 12 inches long. If the ropes are too skinny, the nests will be too wide.
- Measuring the flour. I use between 4 ½ and 5 cups of flour, but never more than 5 cups. If you add more than 5 cups, the dough will be too dry. I do mention in the recipe to start with 4 ½ cups and add a tablespoon more of flour at a time until it is a pliable dough, not too sticky, and not dry.
- Sweetening the bread. For the sweetness, ½ cup of sugar is perfect for our taste. You could add another ¼ cup if you like your dough more sweet. You could also add a powdered sugar glaze on top after baking and add sprinkles on top (if you do the glaze, don't add sprinkles before baking). The sweetness depends on your taste.
Tips to store and make this Easter bread ahead of time:
This bread will stay fresh in large zipped lock bag or in an airtight container, for up to 5 days. Stores for up to 2 months in the freezer. Make sure it is wrapped tightly. Do not freeze the bread with the eggs.
FAQ'S
I always use raw eggs. When you nestle them into the dough and bake, they cook perfectly inside the bread. Hard-boiled eggs will work too, but they'll be very firm after baking - so I prefer starting with raw ones for the best texture.
Yes! You can make the dough a full day ahead and refrigerate it overnight. When you're ready to bake, let it come back to room temperature, then shape and proceed with the second rise as usual.
Absolutely. Shape the braided nests and freeze them before baking, or freeze after baking without the eggs. Wrap each one tightly in plastic wrap and store in a freezer bag. When ready, thaw, let them complete their final rise, and bake as directed.
In Italy, Pane di Pasqua is rich with meaning. The braided dough traditionally represents the Holy Trinity, and the eggs symbolize rebirth and the resurrection of Christ. It's as much a spiritual tradition as it is a delicious one.
The Italian Easter Bread My Mother-in-Law Makes Every Year
We were so lucky to have my in-laws spend a few Easters here with us. Since we couldn't go to Italy this year, it was just as good to have a little taste of Italy here as soon as they arrived at the airport. My mother-in-law is just the best!
She barely brings any clothes (a totally no-fuss, low-maintenance kind of a lady) and instead brings a suitcase FILLED with goodies for all of us. And I mean, GOODIES!
When I say goodies, I mean just food things. Like pasta and different chocolates. She brings us various canned goods that she makes.
Oh, and a ton of hot peppers that she grows! She makes a sauce with them and also brings them whole and dried. There are still some left from their visit to us last April.
Since my in-laws couldn't make it to visit this year for Easter, I had to get started a little early on the baking!
The kids were wondering when we would color eggs and when they could shape their own rolls. This Italian Easter bread is so wonderful that my mother-in-law even makes it in the summer when we are there (minus the Easter eggs). It's the perfect sweet bread to enjoy with a hot cappuccino!
More Easter Recipes:
- Sicilian Ricotta Pie
- Lemon Ricotta Cake
- Fresh Strawberry Bundt Cake
- Pastiera Napoletana (Neapolitan Easter Pie)
- Tsoureki (Greek Easter Bread)
- Lemon Bundt Cake with Lemon Curd Filling
Did you make this and love it? Please RATE THE RECIPE below:)
I would LOVE IT if you can leave me a star rating and a review down below and let me know your thoughts! It means the world to me to hear how you liked it.
Please Subscribe and give a follow on Instagram, Facebook, Pinterest, and TikTok xx

Italian Easter Bread (Pane di Pasqua)
Ingredients
- 1 cup milk
- 1 packet active dry yeast (¼ ounce envelope)
- 4 eggs , room temperature
- 1 teaspoon vanilla extract
- ½ cup granulated sugar
- 4 ½ cups unbleached all-purpose flour (may need more as mixing)
- 1 Tbsp. lemon zest
- 1 teaspoon kosher salt
- 8 Tbsp. butter , melted and cooled
- 7 dyed eggs (follow instructions on the food coloring)
Egg Wash:
- 1 egg
- 1 Tablespoon water
Instructions
- If you are adding colored eggs, now is the time to color them. Follow the dye directions on the box or use natural dye and let the eggs sit for an hour. The longer they sit the more vibrant the color.
- In a small saucepan heat the milk over medium to 110 F (I just test the water with my finger and know it's the right temperature…warm like the temperature of a baby bottle, not hot). Add the yeast to a small bowl with the warm milk and whisk it around with 1 tablespoon of the sugar. Let sit until foamy (about 5 minutes).
- Whisk in the eggs and vanilla and set aside.
- Pour the flour mixture in the bowl of a mixer. With dough hook attached and mixer on medium speed, slowly add the milk mixture (*the milk mixture has the milk, yeast, 1 tablespoon sugar, eggs, vanilla) to the flour mixture.
- Hold onto your mixer! Now you will add the butter 1 tablespoon at a time. I tell you to hold onto it because it will move around if you are mixing it on too fast of a speed. Start on medium-low speed. If you notice the mixer moving too much, you can lower the speed and let the butter get gently incorporated into the dough. If you have the mixture at a faster speed at this point…do not leave it alone while it's mixing. It could bounce off the counter.
- Be sure to mix well when all the butter is added (about 3-5 minutes). You may need to add more flour. (Start with 4 ½ cups of flour. If you need more flour, add more a Tablespoon at a time until it is no longer sticky. Don't worry about the total amount of flour, keep adding until your dough is stiff and elastic, and it is not sticky.)
- Put a little flour onto a clean counter and scrape the dough out of mixer onto the counter. Knead the dough a little and shape the dough into a ball (you won't be kneading the dough too much…just a bit to shape it into an elastic ball of dough).
- Oil a large mixing bowl and place the dough into the bowl.
- Rub a little oil on top of the dough and cover it to rest in a draft-free area for a bout 1-1 ½ hours.
- Punch down the dough.
- Divide the dough into 14 portions. Roll each portion into a strip about 12 inches long. You could also make one large braid with this dough. If you are making one large braid, roll each piece into strips about 15 " long. If you are making two braids, the strips will be a bit smaller (sorry, I did not measure the strips)
- Start with two pieces: pinch the ends together of the first 2 ropes to secure the strips together Bring one side over to the other and tuck it in to make a small ring shape. You're making a little nest for your colored egg to nestle into. Make sure your ring is not too big and not too tight.
- Preheat oven to 350 F.
- Repeat process with the next 6 sets of 2 ropes that you will make. You will have 7 little nests to hold your eggs.
- Place on two baking sheets lined with parchment paper (or a silpat mat).
- In a small bowl, whisk together the egg and water for the egg wash. Brush on the egg wash.
- Cover the dough with a kitchen towel to proof for about 40-45 minutes.
- When dough is ready to bake, brush on some more egg wash. Sprinkle on the sprinkles. Place an egg in the middle of each little nest.
- Bake for about 18-20 minutes. If you are making one very large wreath, it should be done in 25-30 minutes.
- Don't forget to eat the yummy eggs that are baked in the middle of the bread. My kids fight over them! In order for the raw eggs to cook, they will need 18-20 minutes in the oven. If you prefer to add eggs already cooked, hard boil them and color them (according to color instructions)and add them already cooked to the bread. *If you have left bread out with eggs for a couple hours, just discard the eggs, and eat the bread.
Nutrition Disclaimer
Please keep in mind that the nutritional information presented below is an approximation and may vary depending on the exact ingredients used.
Notes
Eggs, milk, and butter blend into the dough more evenly when they aren't cold, which helps the bread rise better and stay soft. Let the dough rise fully.
Don’t rush the proofing time. I always let the dough double in size so the bread bakes up light and fluffy instead of dense. Braid the dough loosely.
Leave a little space when shaping the braid. The dough expands during the second rise and in the oven. Brush with egg wash.
A simple egg wash before baking gives the bread that beautiful golden color and slight shine. Let it cool before slicing.
Nutrition
THIS POST CONTAINS AFFILIATE SALES LINKS
I made these both this year and last year and the dough is good but the bottoms tend to bake rather fast and almost burn no matter what the location in the oven. Any tips? Thank you
Hi Andrea-I just baked mine again this weekend and did it as usual at 350F (never had a burned edge issue). What if you start at 350 and then lower after a few minutes? I know every oven is different so that could maybe help out. Good luck and happy baking!
It's a shame I can't post photos because I'm so proud of the wreath I made using this recipe. 🙂 It is delicious and so fluffy. I'll definitely make this again. Thanks for sharing it and happy Easter!
Hi Petra-that's so nice to hear! I'm sure they were gorgeous. If you're on Instagram, post it in your stories and tag me @savoringitaly. Happy Easter to you! XXX
Hi I don’t usually leave comments, and having a baker first generation Italian mom(same as your mother in law), l am very particular about Italian recipes. I also have neve made any type of bread or used yeast! There’s a first for everything. All this to say thanks for the recipe as it is the best easter bread I’ve ever had. I’ve sent it to my children and other family members and have already been asked for the link to the recipe 4 times.
Hi Lisa-that is amazing to hear. So happy you explored baking with yeast! It's not so scary once the yeast proofs and you let it work its magic in the dough. Thank you for sharing the recipe...that is very kind of you. Buona Pasqua! Happy Baking! XX
This reminds me of the Easter bread my mother-in-law makes. As we can't be with her this year due to Covid-19, I am going to make this. How would you suggest we store it (as so don't think my little family will eat all of these in one day ... Although we'll try!)? Thanks
Hi Jennifer-It's a sad Easter where we can't be with our family. I'm going to make extra to drop off at my mom's and brother's. If you know you'll eat within a few days, you could leave on counter (just don't eat the eggs after the 2nd day). You could also store in fridge and heat the bread up a little if you like it a little warm (just not with the egg). If you want to make to store in freezer, just don't add the colored eggs. Wrap in plastic wrap and place in a zipped lock back to freeze for up to 3 months. Happy Easter and stay safe XX
May I make one large loaf of braided bread or two loaves instead of the individual loaves?
Yes, you could make one very large loaf or two smaller loaves. Happy Baking! XX
These are on my must-make list! Oooh…I love these!
This was fabulous on Easter! Thank you for the recipe!
Thank you, Allyson! Happy you enjoyed the Easter bread!
Should I put my hard boiled colored eggs in the nests before baking? Even though the eggs are already cooked? Just making sure!
I use uncooked eggs, as they cook while they're baking in the bread. I explain about it in the post. If you use cooked eggs, they will just be very cooked by the time it bakes nestled in the bread.
These look delicious!
Your Easter Bread is so beautiful! Thank you for sharing this with us. Easter Bread is on my to do list since I haven’t made it before.
Love Easter bread so much! This is always a must make this time of year!
Such a great idea for Easter! I'm going to shoe horn this in to my Easter baking extravaganza tomorrow.
Made these breads today. So easy. Of course, mine didn't come perfect
rolling them for the first time. Browned too fast. Either have to lower
temperature or bake for a lesser time. They really looked nice with
the colored eggs. Thank you
Francine
Ciao Francine-I'm happy you found the recipe easy!! That makes me happy! If you're making the smaller nests you could check on them at about 15 minutes. Every oven is different. I stay in the kitchen and glance at them usually around 15 minutes. But my oven has them ready at about 18 minutes. We are excited to bake them this weekend again! Happy Easter!!
I too made Italian Easter Bread I love making them, your recipe is great too.
This is such a beautiful bread and it will be so much fun baking these with my boys. Perfect for the Easter brunch and love that you bake the eggs with the bread.
Thank you, Sandhya! Yes, it makes it easier to make and the kids love to eat the eggs!
These are lovely. I love this bread, and have not made it myself. This recipe looks like a fantastic place to start.
This Easter bread is so cute. I am sure it's very tasty too. I would like to have one for Easter!
I followed your recipe and I loved it! It's one of the most tastiest bread I ever had!
These look so cute and so perfect for Easter table. I always buy those in store. But this Easter I will make it homemade. Thanks for the recipe!
Beautiful bread. And I bet it tastes good, too! My friend makes a braid rather than rolling. Like you said, there are many different shapes. Can't wait for next Easter to try your recipe!
My mother made this every Easter. When she passed I couldn’t find the recipe. I am so happy to have this one.
I'm so happy you will make this special Easter bread. Sending you many hugs!
I made these delicious wreaths last year and look forward to them this year! Thank you and happy Easter, D