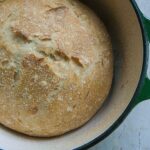
This easy homemade crusty No-Knead Bread recipe is incredible! It's just like the bread my Italian mother-in-law makes!! All the hard work is overnight when it slowly rises...the next day you have delicious bread is made in your Dutch oven! Perfectly crisp crust and soft on the inside. You will fall in love with this beautiful bread!

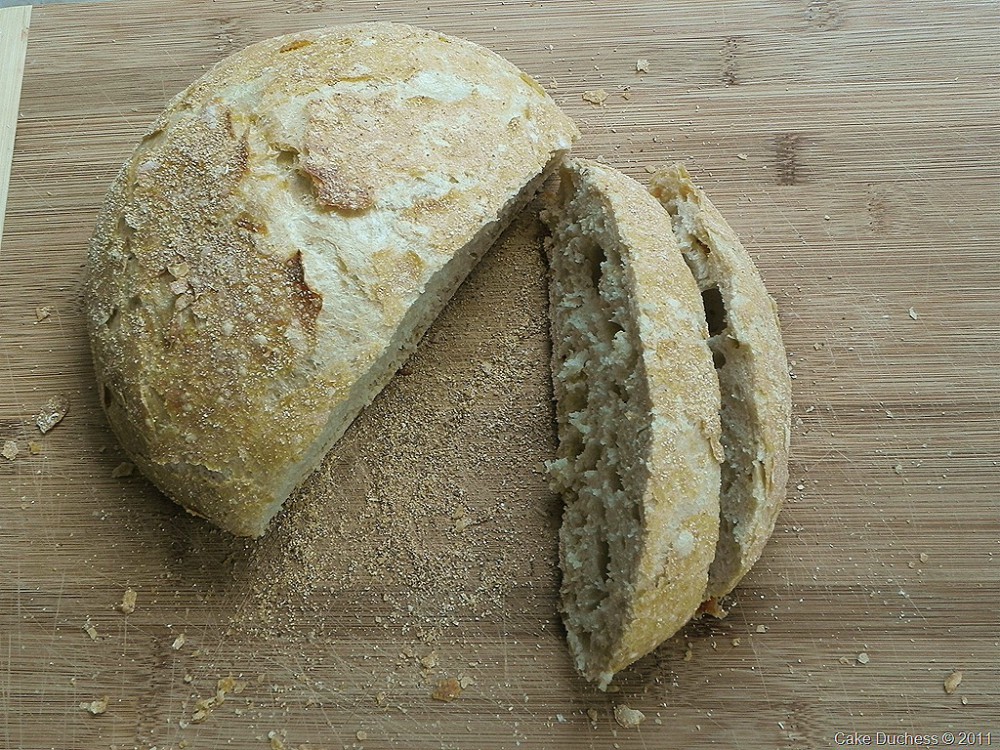
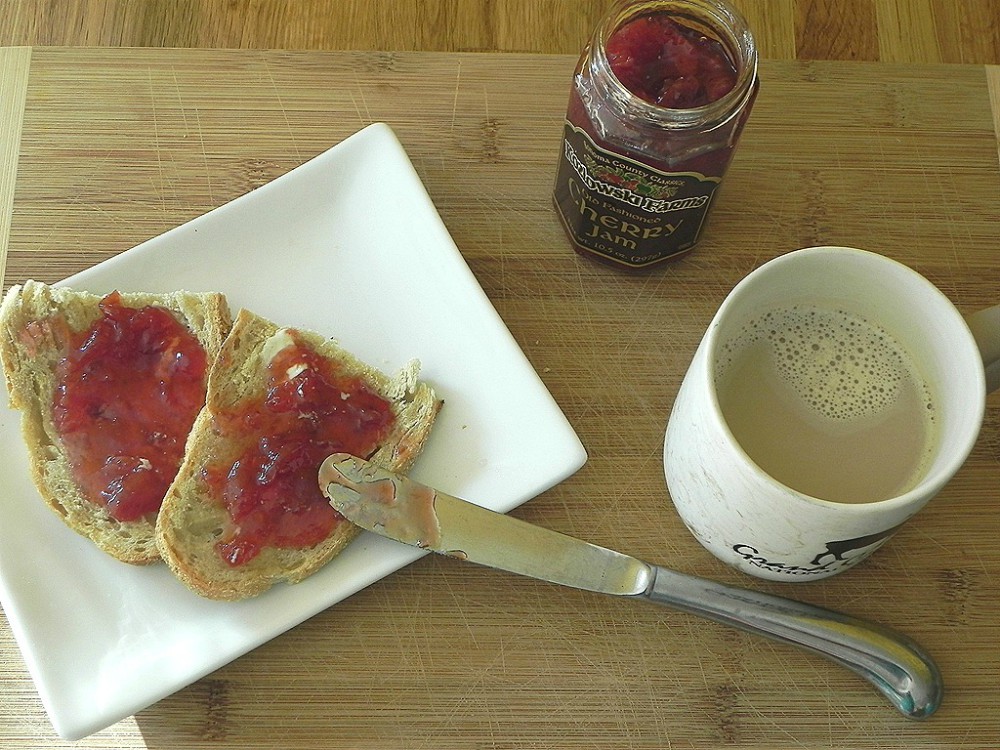
I couldn't even wait a second to let this bread cool. Instead of pretty, thin slices…I cut chunks!
Breakfast was all I was thinking of the next day. The bread was much easier to slice. It was just perfect with my cherry jam and steaming hot caffe' latte. I can't forget to mention the thick pats of butter I spread on it first.
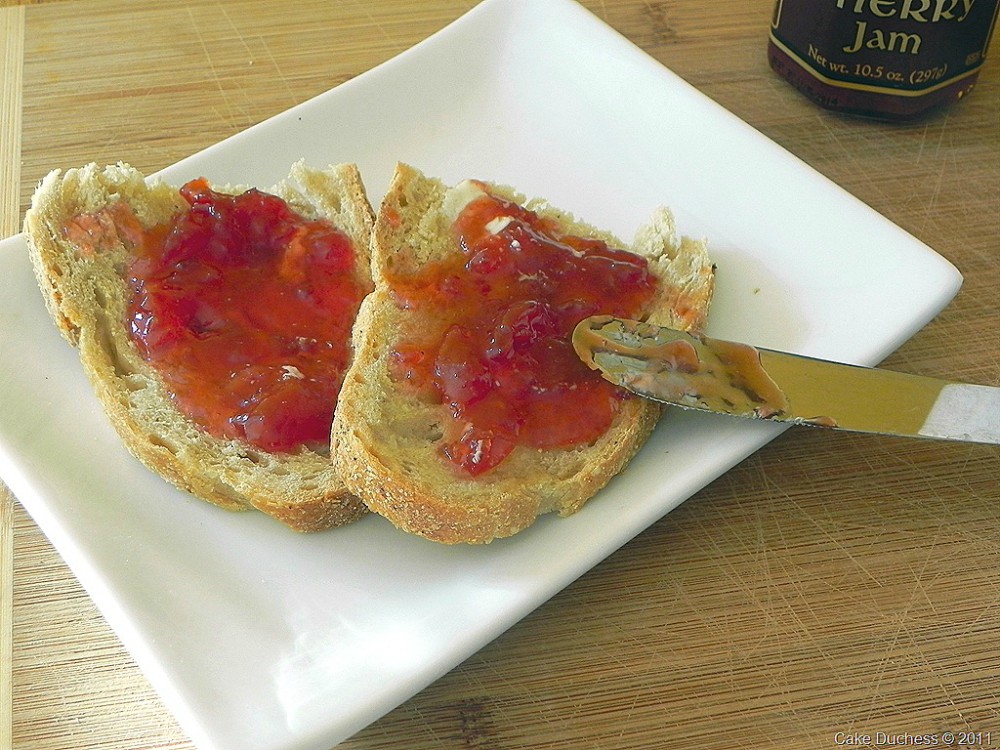
Oh! The butter and jam...mmm!
This was Nicole's bread. She used whole wheat flour with the bread flour.

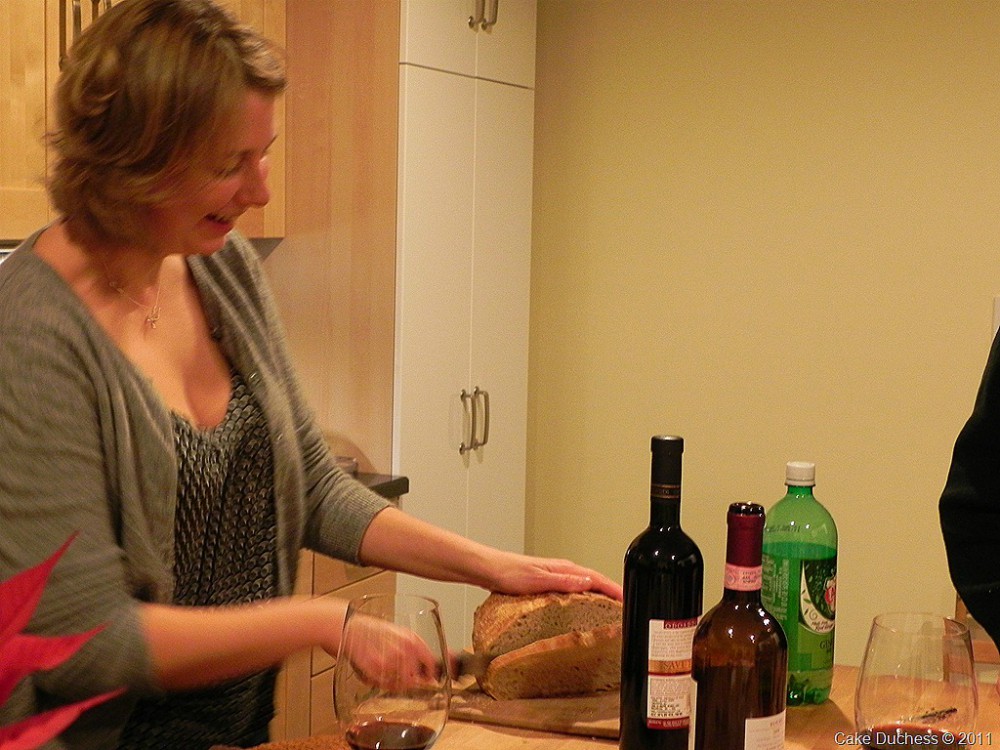
The table was just lovely by their fireplace and the Christmas tree that they left up for us to see. It was a delightful evening spent with old friends.

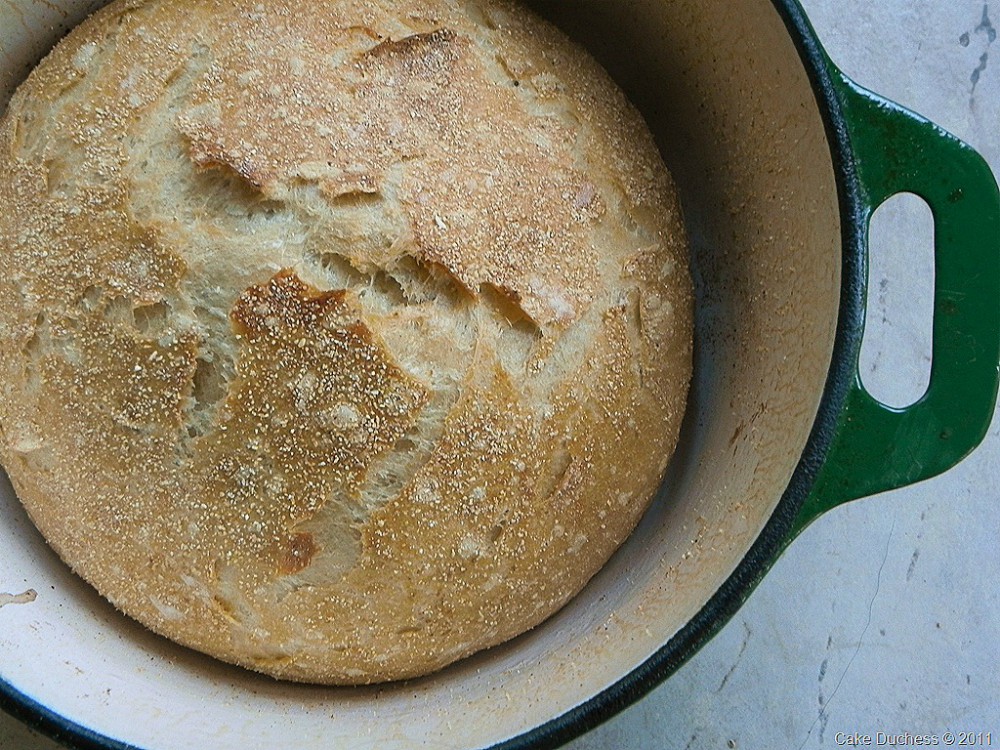
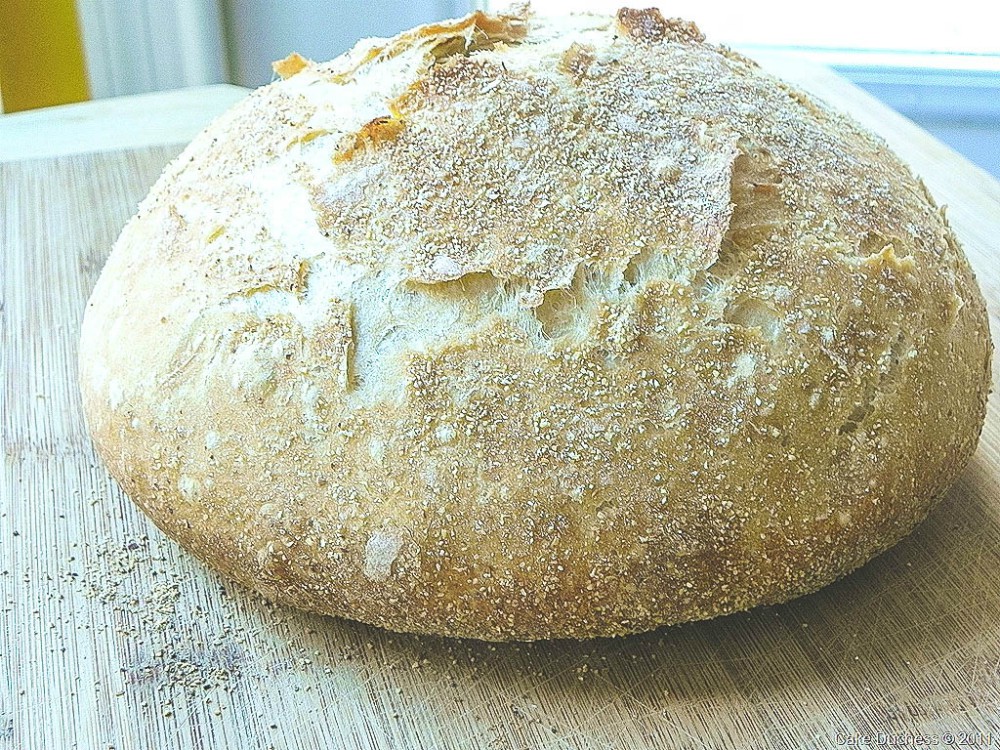
This bread has a crunchy crust and soft inside. My husband wasn't too thrilled that the oven was on such high heat for two hours. We don't have a gas stove. I won't make this every day…but definitely once a month because it is a bread I will be craving often.
Recipe: The Tastemakers -Pane Integrale (Whole Wheat Bread)Martha Stewart Living
No Knead Bread
2 ¼ cups unbleached bread flour, plus more for surface and hands
¾ cup whole-wheat flour (I used AP flour-I ran out of whole wheat)
1 ¼ teaspoons salt
one ¼ ounce envelope yeast -0.8 grams (recipe in Martha Stewart's magazine says ½ tsp-I measure approx 2 tsp)
1 ⅓ cups cool water (55-65 degrees F)
wheat bran, coarse cornmeal, or more flour, for dusting
Directions
1. Stir together flours, salt, and yeast in a medium bowl. Add water, and mix well using a wooden spoon or your hand until dough is wet and sticky. Cover with plastic wrap; let stand at room temperature until dough doubles in volume and the surface is dotted with bubbles (approximately 12-18 hours).
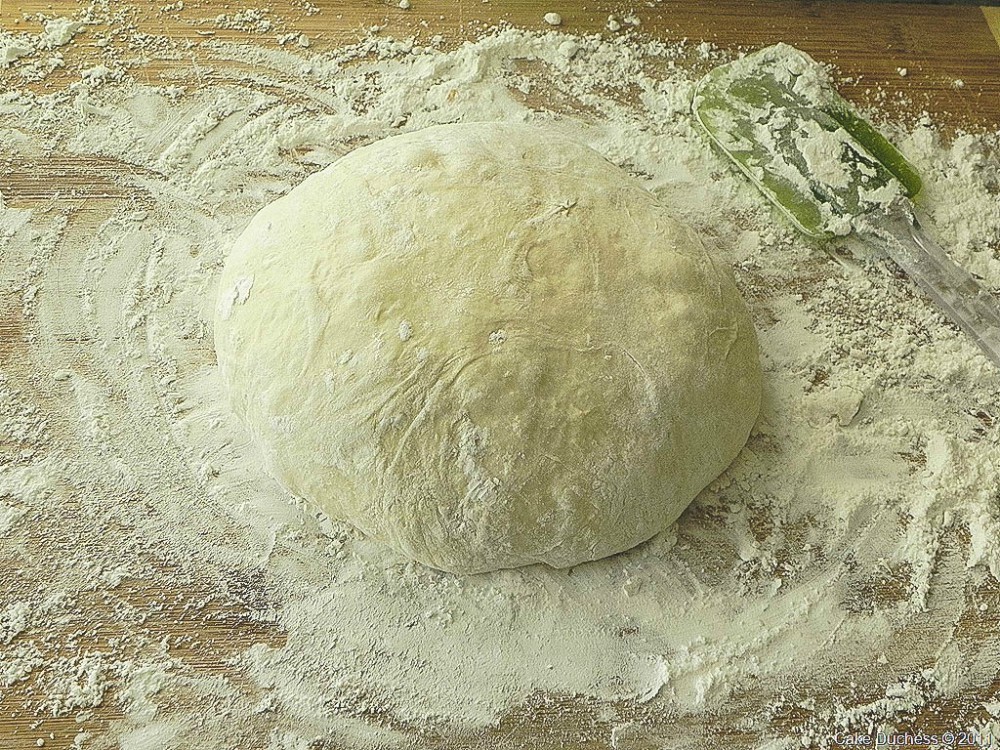
2. Transfer dough to a floured surface using a rubber spatula or a bowl scraper to scrape dough from bowl.
3. Fold dough using lightly floured hands, lifting edges toward the center. Shape dough into a loose round.
4. Generously dust a clean kitchen towel with wheat bran, cornmeal, or flour (I used cornmeal). Gently place dough on towel, seam side down. Dust the top lightly with wheat bran, cornmeal, or flour.
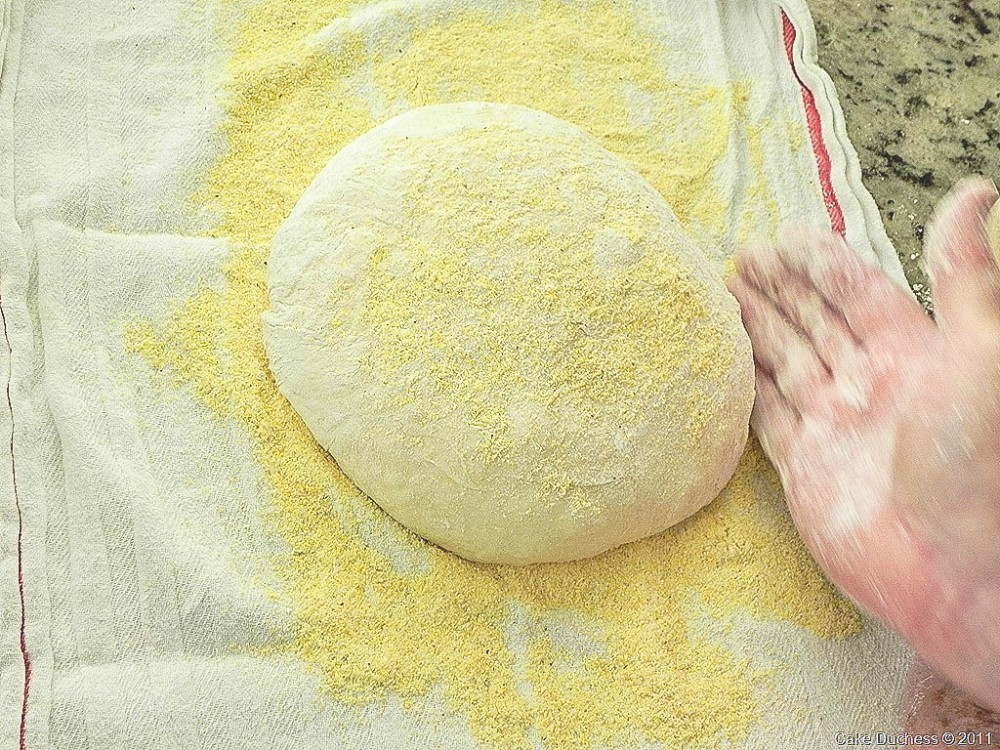
5. Loosely fold ends of towel over dough to cover. Let stand in a warm place until almost doubled in volume, 1-2 hours (the dough should not spring back when pressed).
6. After dough has risen for 30 minutes, preheat oven to 475 with rack in lower third of oven. Heat a covered 3 ½ quart heavy ovenproof Dutch oven (9 inches in diameter) for 30 minutes or until dough is ready. Carefully remove preheated pot from oven, and uncover. Unfold towel, and quickly but carefully invert dough into pot, seam side up.
7. Cover with lid. Bake for 30 minutes.
8. Uncover pot, and bake until bread is dark brown (mine was golden brown)but not burned, 15-20 minutes.
9. Carefully lift bread from pot using metal spatulas, and transfer to a wire rack to cool completely.
Thank you for the kind words on my last post. I appreciate your friendship and support. It means so much to me.
Thank you for stopping by today. Hope your week was full of good food and happiness!
Some other delicious homemade bread recipes you'll love:
No Knead Bread
Ingredients
- 2 ¼ cups unbleached bread flour plus more for surface and hands
- ¾ cup whole-wheat flour I used AP flour-I ran out of whole wheat
- 1 ¼ teaspoons salt
- one ¼ ounce envelope yeast -0.8 grams recipe in Martha Stewart's magazine says ½ tsp-I measure approx 2 tsp
- 1 ⅓ cups cool water 55-65 degrees F
- wheat bran coarse cornmeal, or more flour, for dusting
Instructions
- Stir together flours, salt, and yeast in a medium bowl. Add water, and mix well using a wooden spoon or your hand until dough is wet and sticky. Cover with plastic wrap; let stand at room temperature until dough doubles in volume and the surface is dotted with bubbles (approximately 12-18 hours).
- Transfer dough to a floured surface using a rubber spatula or a bowl scraper to scrape dough from bowl.
- Fold dough using lightly floured hands, lifting edges toward the center. Shape dough into a loose round.
- Generously dust a clean kitchen towel with wheat bran, cornmeal, or flour (I used cornmeal). Gently place dough on towel, seam side down. Dust the top lightly with wheat bran, cornmeal, or flour.
- Loosely fold ends of towel over dough to cover. Let stand in a warm place until almost doubled in volume, 1-2 hours (the dough should not spring back when pressed).
- After dough has risen for 30 minutes, preheat oven to 475 with rack in lower third of oven. Heat a covered 3 ½ quart heavy ovenproof Dutch oven (9 inches in diameter) for 30 minutes or until dough is ready. Carefully remove preheated pot from oven, and uncover. Unfold towel, and quickly but carefully invert dough into pot, seam side up.
- Cover with lid. Bake for 30 minutes.
- Uncover pot, and bake until bread is dark brown (mine was golden brown)but not burned, 15-20 minutes.
- Carefully lift bread from pot using metal spatulas, and transfer to a wire rack to cool completely.
Nutrition Disclaimer
Please keep in mind that the nutritional information presented below is an approximation and may vary depending on the exact ingredients used.


This looks amazing! Wish I could have a slice for breakfast right now 😉
I am new at baking breads and recipe like this is a great way for me to start. I cannot wait to give this a try. I love the smell of freshly baked breads.
Yum! That looks so delicious! And no kneading! Fantastic!
This bread looks so crusty and yummy! One of the most annoying parts about baking bread is the kneading, so I def have to try this recipe!
I am lucky to have numerous wonderful bakeries in my neighborhood but sometimes I get the urge to make it myself. Your bread looks delicious and I love the fact that it's so easy! I have a dutch oven that I have been dying to use too!
There is NOTHING better than homemade bread. I've seen a few no knead recipes but have yet to try any of them out. But that was before I saw your wonderful post... now I must try it
Hi Roxana-I changed it.That's exactly how it is typed in the Martha Stewart's magazine. I do measure about 2 tsps in 1 of those 0.8 gram packets. 🙂
Lora,
Love the story and you really transport us there with you. I've thrown snowballs and helped with the bread and joined you with a lovely glass of wine. Thanks for sharing and bon weekend!
i love home made bread and yours look so good.
i think you mistyped the yeast quantity 1/2 tsp is way less than 1 package dry yeast. I think in one package there are almost 2 tsp.
have a wonderful day Lola and thanks for sharing the recipe.
Hi Lovely Lady...what a wonderful evening you had with friends. Hearing about the food, their place, and the joy you shared brought warmth to my heart. I've only heard great things about this bread...but kneading is my favorite part of bread-making...I will send this recipe to Ryan though! I hope you have a wonderful Friday. I can't believe the weekend is almost here! Thank you for sharing, my sweet woman. Many hugs from Austin!
Oh I love no-knead bread, it has the crispiest crust and the softest interior crumb - so good!
There really are no excuses for not making bread after reading this post! It looks fantastic and it's a no knead bread? perfect for those days with long hours of work 🙂 Thanks Lora!
Wow is that loaf of bread gorgeous, I LOVE the first photo. Just beautiful! I'm quite happy to see that you cut your bread into big chunks 😉 That's the best way, yum! And the butter and cherry jam just makes it oh so better. 🙂
That looks great and doable since I'm just learning to knead properly these days. I'm still wary of using yeast, I've failed a couple of times, but got to keep trying!
p.s. it's weird see a post with Christmas decorations lol
what a beautiful loaf of bread!
what a nice looking loaf of bread....where's my peanut butter??? I may have difficulties waiting that long for bread and have to bake a quicker loaf while waiting! Looks fabulous!
Hi Lora
now thats a great loaf of bread, I have not used the pot method but no knead are the only breads I make so far....I will have to try this one
Sounds like it was delicious!
Dennis
Looks awesome! I am bread addict LOL!
No knead I am there. 🙂 Looks really good so surprised at the wonderful rise. You are a miracle maker/baker:).
I love homemade bread, there's no better!