How to revive sourdough starter- learn how to bring your beloved sourdough starter back to life (even if it's been months!). Whether you're new to sourdough baking or a seasoned pro, I'll show you how to revive a sourdough starter using some basic techniques that I've discovered over time.
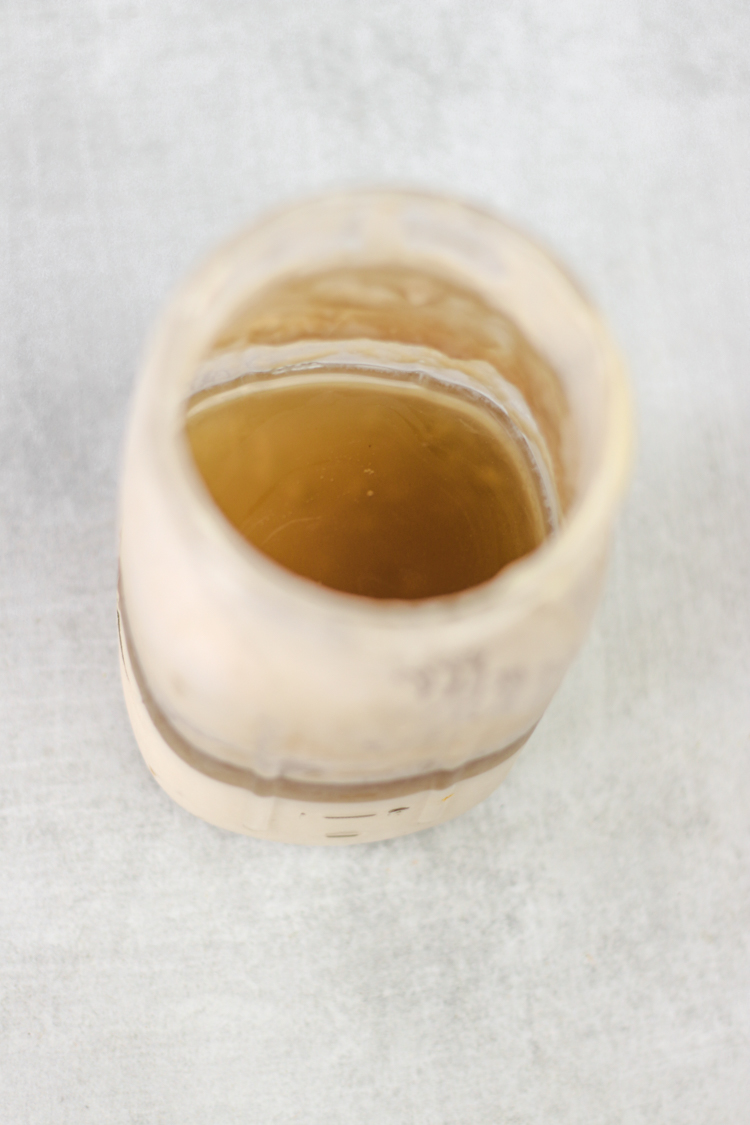
Reviving Sourdough Starter
If you've ever dabbled in the art of bread making, you'll recognize sourdough as one of the tastiest and most versatile of all breads. The heart of sourdough lies in its starter – a fermented mixture of flour and water that serves as the leavening agent.
If you have a dormant or 'dead' sourdough starter, or one that has been languishing in your fridge, don't worry! It's possible to revive a sourdough starter from the fridge, and bring back that tangy flavor and airy texture we all love.
Reviving sourdough starter from the fridge is not as intimidating as it might sound. With the right tools and some patience, you'll be able to restart your sourdough starter and get back to baking in no time. Whether you're reviving an old sourdough starter or a frozen one, the process is pretty much the same. Keep in mind that a sourdough starter is a living thing. It's a wild yeast, and it needs feeding and a warm environment to thrive.
Sometimes, you might find your sourdough starter exhibiting signs of neglect - perhaps a sourdough black liquid on top or a smell that's a bit off. This doesn’t necessarily mean you have a bad sourdough starter or that your starter has gone bad.
This is known as 'hooch', a natural byproduct of fermentation, and can simply be stirred back in or poured off before feeding your starter. Remember, don't get discouraged if your starter doesn’t immediately spring back to life. The key to reviving sourdough starter is patience and persistence.
You may be wondering if your cherished sourdough starter you’ve forgotten about has gone bad. Or you may even be convinced that it is ready to be tossed out.
If you're interested in trying some delicious sourdough recipes, we have\ a wonderful selection that you're sure to love. Here are a few to get you started, Easy Sourdough Banana Bread, Easy Sourdough Discard Pumpkin Bread, Sourdough Discard Apple Galette, Sourdough Discard Challah Bread, and Sourdough Pizza Margherita.
Jump To
- Reviving Sourdough Starter
- Should I throw away my sourdough starter if the liquid looks pink?
- What is the dark liquid formed on top of my sourdough starter?
- The three ways I dealt with hooch on my starter
- How do you revive a sourdough starter step by step:
- What temperature is best to get sleepy starter active again?
- Do I feed the starter in a different container?
- How do I know if I should throw out my sourdough starter
- How to revive a sourdough starter from the fridge?
- Sourdough starter requires love and patience
- Best Tips for Reviving Sourdough Starter
- FAQ'S
- Some recipes to use with sourdough starter discard
- How to Revive Sourdough Starter
I’m here to tell you that sourdough starters are practically indestructible! Yes, they will stay as your faithful friend through thick and thin. Worst case scenarios can happen. But it is hard to get to that point with your starter.
Here is the sourdough starter recipe I used.
In case the worst case scenario happens to your starter, the good news is that there's likely a simple fix for your inactive sourdough. And...it just requires a few steps and a little love!
Every time I opened the refrigerator to grab something, there was my sourdough friend staring at me, and very neglected. I knew I would soon have to tackle the little project. When I was ready, I opened the jar and checked out my starter.
Are you wondering how long did I neglect my faithful friend? Since we've been spending more time in Italy (months, yes months!), my starter was very neglected.
I reached in and grabbed the jar hidden in back of my refrigerator. I took off the lid...and voila...this is what I encountered. The poor thing was famished!
Believe me when I tell you, you could get your starter back to its glorious, bubbly, yeasty, beautiful self. It probably just needs a little TLC from you that it's been missing!
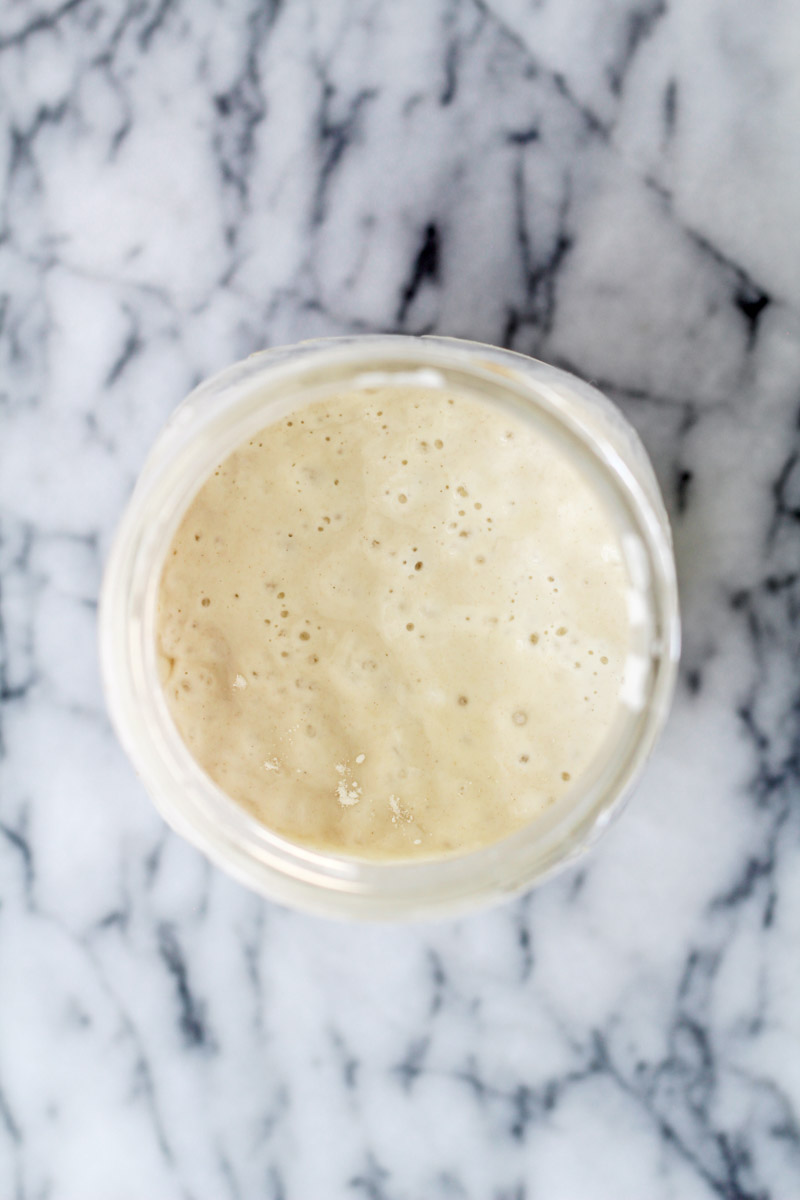
I checked out the starter. There was no funky mold like smell or any visible pink mold. It did stink, but a good stink. A vinegar-acidic kind of a stink. It was time for action!
First thing to note:
Should I throw away my sourdough starter if the liquid looks pink?
Any sign of PINK (pink liquid, pink color), yucky smell, THROW the starter away. Yes, the whole thing needs to be thrown out. I know, it’s sad. But you can start your sourdough affair all over again!
It really didn't look that good (you see in my photos all the dark liquid=hooch). But the smell was fine! Yes, hard to believe. The smell was of a very strong vinegar smell. It was acidic. And surprisingly, there wasn't any scent of mold or that it was off.
No signs of any pink liquid. So this starter was still safe to use! What I decided to do is pour off most of the liquid on top. I left a thin film of that dark liquid.
Next, I stirred in that thin film (hooch) remaining liquid. After that, I removed and discarded 1 cup of the starter I just stirred together with a wooden spoon.
The final step in the process was to feed it with a scant cup of all-purpose flour and 1/2 cup of lukewarm water. That is all I did...but I'll go over more ways to revive it below.
What is the dark liquid formed on top of my sourdough starter?
The black liquid is called: hooch. Hooch is natural and is a fermentation byproduct (alcohol) that is formed by the bacteria and yeast that needs to be fed again. It will smell very acidic (sort of like vinegar).
Hooch= very hungry sourdough starter.
My first time revisiting my old yeasty friend, it was topped off with hooch (I know, funny name). It was filled with the hooch on top and screaming to be fed again! A hoochie sourdough starter is a very acidic starter.
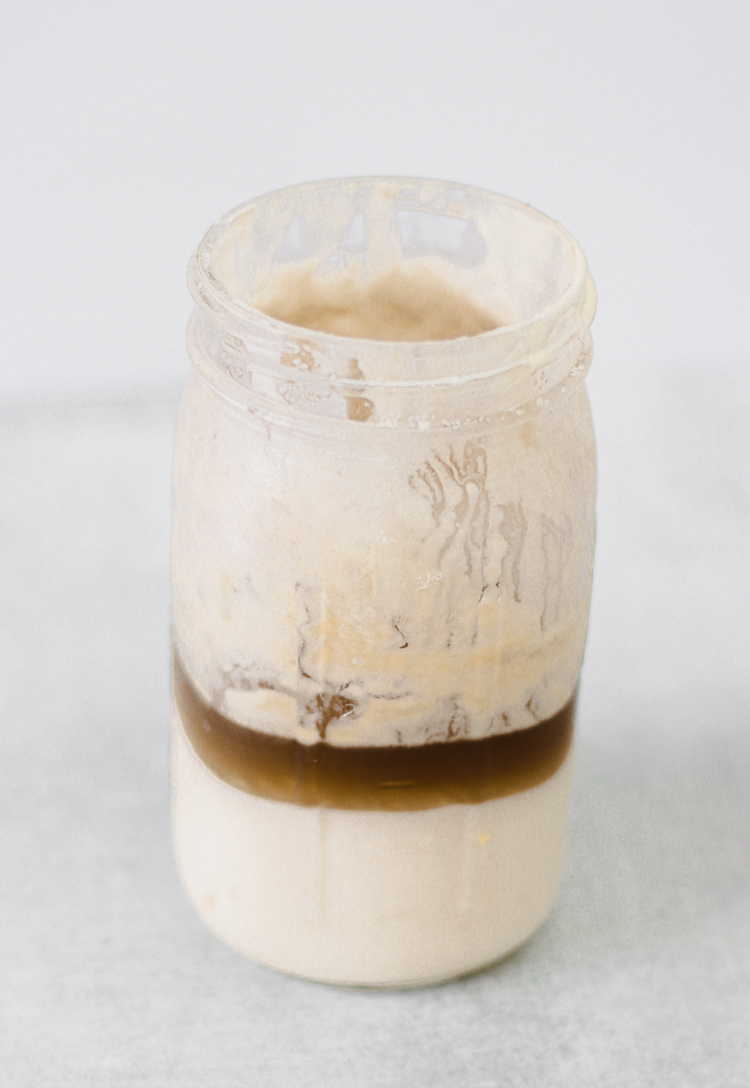
I have approached the hooch three ways (multiple times)and each time had excellent results.
The three ways I dealt with hooch on my starter
Method 1: I stirred it right back into the starter. Yep, ALL of the dark liquid! I stirred it in, and then I took out about a cup of the starter (I baked with the discard, so there was no waste!). I added into the sourdough starter jar a scant cup of flour and 1/2 cup warm water. I used my wooden spoon and stirred it together.
- review of this method: stir in all of the hooch
- take out 1 cup of the starter (and I used it in a discard recipe)
- used the same jar and refreshed starter with flour + water.
- leave on the counter with lid off and then return with lid on back to the fridge.
Method 2: I dumped out all of the hooch liquid. Stirred it together and I took out about 1 cup of the stirred together starter (used this discard in a recipe). I added in a scant cup of flour and 1/2 cup warm water and stirred it into this jar.
After that, I scraped down the sides of the jar while stirring (always using a wooden spoon). I then spooned out this whole refreshed starter and added it to a nice and clean jar.
Now, here is where you have to use your best judgement. Look at your jar and check out the top of the jar. Does it look like it should be changed? You will know. Of course, if there is any signs of mold, change the jar!!
Method 3: So, this is what I did this time, for this post, and what you see on these photos. I dumped out almost all of the hooch (I left a film of hooch on top). I stirred it all together, and removed about 1 cup of this to use as a discard in another recipe.
Next, I added in a scant cup of flour and 1/2 cup warm water and stirred it all together.
I checked out my jar and it looked good to me! The sourdough starter didn’t need to be transferred to a new, clean jar. It stayed in this jar. I left it on the counter, with the lid off, for most of the afternoon until the evening.
Not much was happening with the starter. Not many bubbles formed and I was worried that the next day it wouldn’t be happy and revived. I put the lid back on the jar and sealed it closed. That evening, I placed the jar in the refrigerator.
The next day when I opened the refrigerator door, BUBBLES! Gorgeous, yeasty bubbles lined my jar and my starter was back in action!
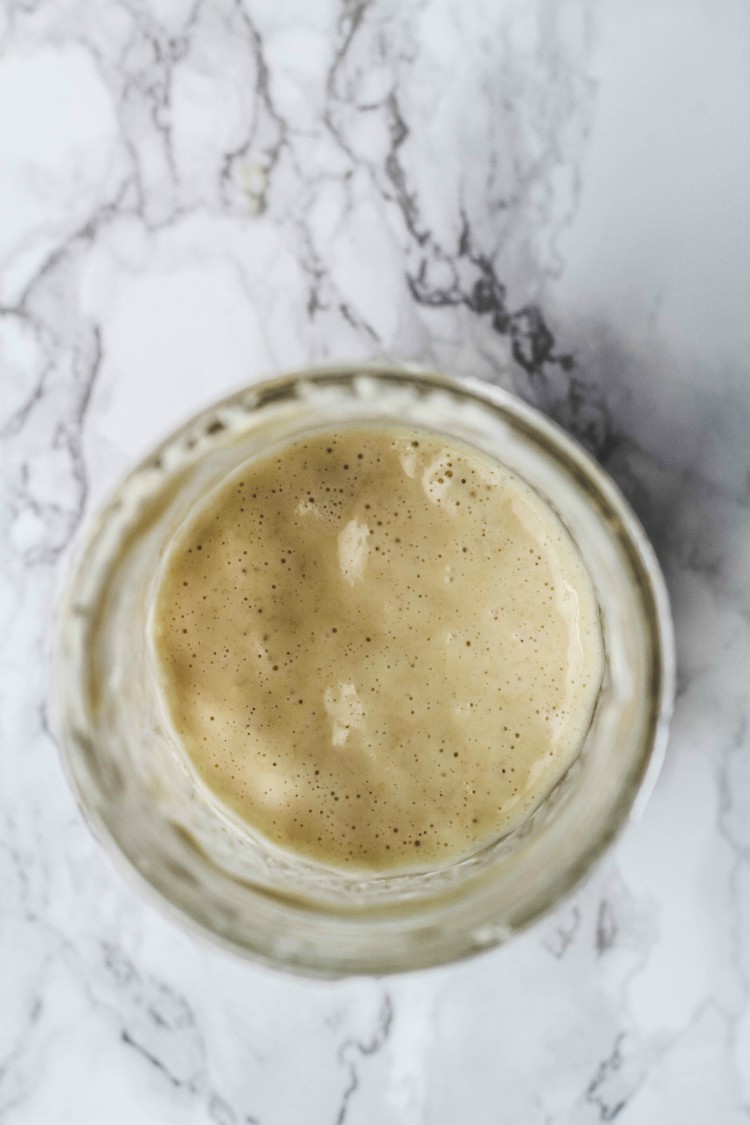
How do you revive a sourdough starter step by step:
Step 1: In order to restart a sourdough starter, first assess the starter in the jar. Open the lid and see if there is any mold (PINK color is not good, so toss it out). Also, smell and if it is not acidic or vinegar like but you detect mold, toss it!
Step 2: Take out 1 cup from your jar and set it aside (make a sourdough discard recipe).
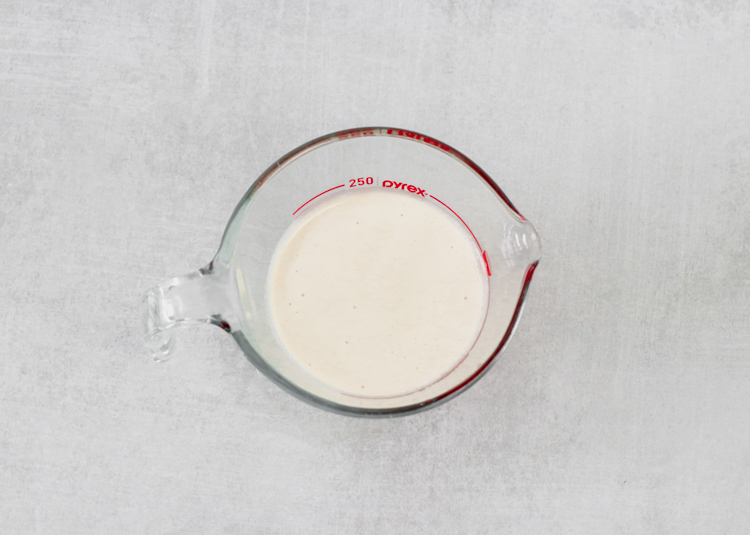
Step 3: Add in a scant cup of flour and 1/2 cup of lukewarm water.
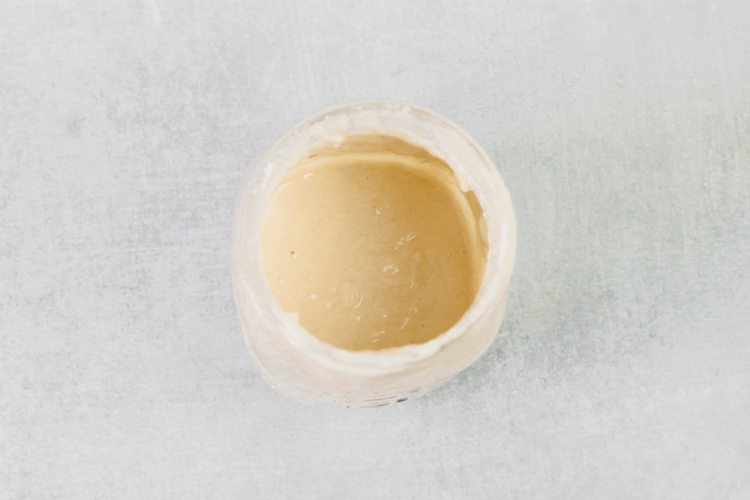
Step 4: Use a wooden spoon to stir it and combine. Be sure to scrape the bottom and sides of the jar and combine it well (use your best judgement...change to a clean jar if it's time to).
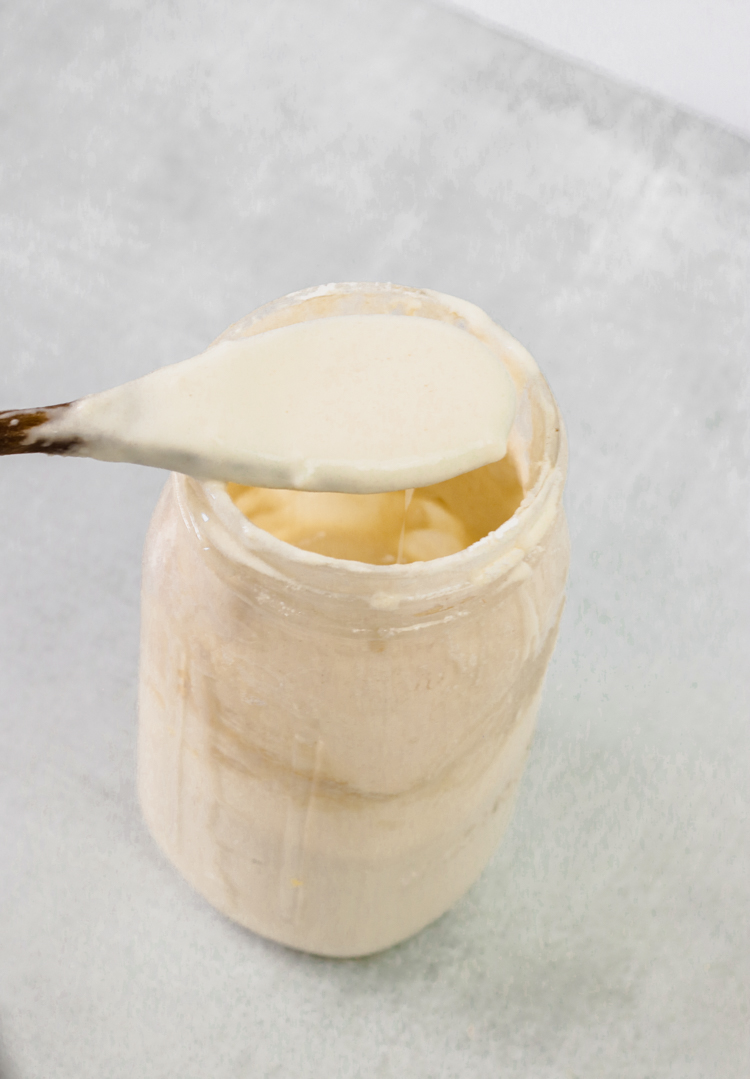
Step 5: Leave the jar with the lid off on the counter for a few hours (I leave my lid on top of the jar, but it is not sealed). I left mine for about 6 hours. Close the jar with the lid, and place in the refrigerator. Do not fret...there is no need to check on it every 30 minutes (yes, I have been known to do that!).
What temperature is best to get sleepy starter active again?
When you're prepping your starter to bake with it, your kitchen should ideally be 70-75 degrees Fahrenheit. This is the temperature that will help your starter get to peak bubbly activity.
A cold kitchen will actually slow down microbial production.
So find the warmest spot of your kitchen, and leave your jar there before baking.
By the next morning when you wake up, it should be a bubbling, yeasty beauty again! If it is not, you repeat the process a second and maybe, third time.
Do I feed the starter in a different container?
This is completely a matter of choice. Some bakers do add the starter, fresh flour and water into a clean bowl to combine and then add into a jar (or storage container).
Some bakers use the actual jar the starter is stored in (that is what I usually do)to combine the starter, fresh flour and water.
If you’re using the same jar, you have to assess it and make sure not too much starter is built up on the sides of the jar. That could lead to the production of mold (especially if you’ve neglected your starter for a while).
When my jar has too much starter on the sides, that is when I start all over in a clean jar.
How do I know if I should throw out my sourdough starter
Mold of any kind means it must be tossed out! Any pink, or any thing fuzzy that is black or green on the top by the hooch or by the side of the jar, the starter has to go!
That is when it is time to create a whole new starter. Maybe you have a baker friend that will share some of their beloved starter with you to begin the process again.
How to revive a sourdough starter from the fridge?
If your sourdough starter has been in the fridge for a while and is starting to look a bit sluggish, there are a few things you can do to revive it. First, take it out of the fridge and let it come to room temperature. Then, feed it with equal parts flour and water (by weight) and let it sit at room temperature for a few hours. After that, it should be ready to use in your baking!
Sourdough starter requires love and patience
Do not get disheartened! Maintaining your starter takes some patience. The more you use your starter, the more you'll get to know it.
If your starter is used frequently and fed on a regular schedule, it will come back to life and rise pretty quickly after feeding it (like in a couple hours). Keep in mind, if you have a very neglected starter, it could take more than 24 hours for it to bubble and come to peak activity.
Best Tips for Reviving Sourdough Starter
- Use high-quality flour: The type of flour you use will affect the taste and activity level of your starter. It's best to use unbleached, all-purpose or bread flour for a strong and active starter.
- Keep it warm: A warmer environment will help speed up the revival process. You can place your starter near a heat source or wrap it in a towel to keep it warm.
- Use bottled water: Tap water sometimes contains chlorine or other chemicals that can harm the natural yeast in your starter. Using bottled or filtered water will ensure a healthier environment for your starter.
- Be patient: Reviving a sourdough starter takes time and patience. Don't rush the process and follow the feeding schedule consistently for best results.
- Discard regularly: As your starter becomes more active, it will also grow in size. It's important to discard a portion of the starter before each feeding to prevent it from overflowing and becoming too acidic.
- Experiment with different ratios: Every flour and environment is unique, so don't be afraid to experiment with different feeding ratios to find what works best for your starter.
- Keep a journal: Keeping track of your feeding schedule and any changes you make will help you understand how your starter reacts and allow you to make adjustments as needed.
FAQ'S
Reviving a dormant sourdough starter is a simple process. Begin by discarding all but 1/2 cup of the old starter. Then, feed the remaining starter with fresh flour and water. The feeding ratio should ideally be 1:1:1 (starter:flour:water). Leave the mixture at room temperature until it becomes bubbly and active, which usually takes about a day.
To reactivate a dry sourdough starter, mix equal parts of the dry starter and lukewarm water by weight, and let it sit in a warm place for 24 hours. After 24 hours, begin the feeding schedule as detailed above.
Your sourdough starter might have died if it has not been fed in a long time and shows no signs of activity (no bubbles or rise) even after several feedings. A strong, unpleasant smell and the presence of a pink or orange tint, which indicates harmful bacteria, can also be signs of a dead starter.
Replenishing your sourdough starter involves feeding it with equal parts of flour and lukewarm water. It's crucial to maintain the ratio to ensure your starter stays healthy. After using your starter in a recipe, replenish it by discarding all but 1/2 cup of the remaining starter and then feed it with fresh flour and water.
Reviving a sourdough starter usually takes between 3-4 days, depending on the temperature and humidity of your kitchen. Remember, a warmer kitchen will accelerate the process while a cooler one slows it down.
Forgetting to discard starter before feeding isn't disastrous, but it might affect the feeding ratio. The starter will be more diluted, potentially making it less active. To remediate this, continue with the regular feeding schedule and ensure to discard the correct amount next time.
Congratulations on your active sourdough starter! Now, you can begin using it in recipes. Remember to feed and maintain the starter regularly, even when not in use. Store it in the refrigerator when not baking regularly and feed it at least once a week to keep it alive.
Some recipes to use with sourdough starter discard
- Sourdough Discard Challah Buns
- Sourdough Discard Challah Bread
- Sourdough Discard Pumpkin Bread Recipe
- Sourdough Discard Apple Galette
This recipe was published May 2022 and updated January 2024
Did you make this? Please RATE THE RECIPE below:)
Please Subscribe and give a follow on Instagram, Facebook, Pinterest, and TikTok xx
How to Revive Sourdough Starter
Ingredients
- ½ cup sourdough starter
- ½ cup water room temperature to lukewarm, make sure it's filtered + non-chlorinated
- 1 cup scant, just under a cup unbleached all-purpose flour
Instructions
- Take your starter out of the refrigerator and let it sit on the counter. Let it warm up (you could leave it out a few hours, or even, overnight).
- Pour off the hooch from top leaving a thin film.
- Use a wooden spoon to stir it all together.
- Place ½ cup of the stirred together starter into a clean container. Set aside the rest of the starter and you could use it in a sourdough discard recipe (or you could toss this discard out).
- Add into the container with the starter a scant cup of flour and ½ cup of filtered water. Stir together to combine.
- Close your container and place it in the warmest spot of your kitchen (I put the top on my jar but I don’t seal it closed).
- After a few hours, close the container tightly and place in the refrigerator. The next day, your starter should be very bubbly and happy. Mark the height of your container to keep a better track of how it’s rising.
- In case it’s not bubbly the next day, use a wooden spoon to stir the starter together. Remove most of the starter, leaving about a ½ cup.
- Add into your container a scant cup of flour and ½ cup of filtered water (room temp to lukewarm). Stir together to combine. Leave on the counter (I leave on the counter with the jar lid loosely on top) for a few hours and then transfer to the refrigerator (seal the jar tightly).
- The next day, your starter should be bubbling and ready. In case it is not, repeat the process one more time.
- As soon as your starter is at its peak activity, it’s ready to bake with.
Nutrition Disclaimer
Please keep in mind that the nutritional information presented below is an approximation and may vary depending on the exact ingredients used.
Notes
- For a larger amount of starter, keep similar ratios and scale up, as needed.
- When your starter has been properly revived and you start actively using it and feeding it again, it will rise to double in size much faster.
- If your starter seems to be sluggish after reviving it and feeding it, you could substitute half of the unbleached all-purpose flour with rye or whole wheat flour.



Pam says
My starter does get pink, but it's because I feed a mix of unbleached white and dark rye (100g) with 100 g water. Starter loves rye.
Lora says
Hi Pam, Yes, great point that sometimes rye flour can cause a slight pink tinge of color to the entire sourdough starter. But I'm referring to the pink streaks that are harmful caused by the bacteria serratia marcescens.
As long as you are using rye and know your starter and what to look for in the color, that is great. I didn't make mine with rye flour, so I'm not referring to the safe pink tinge of color that could happen due to using rye. Happy Baking!
Joanne Ashford says
Thank you, especially for the pics of neglected starter. I always thought when it looked like that, I had to start again... much appreciate the info.
Jess says
Hi, will this work if my starter has been left on the counter for a couple months? Or is best to pitch it and start over?
Lora says
You don't mention if you've been using your starter or what condition it is in. A starter could be left out for long periods, as long as it's not above 78 degrees in your kitchen. BUT most importantly, you must feed it every day. Depending on those factors, you will have to decide. If it has visible mold and you haven't used it daily, toss it and start over. Hope that helps.
Philo says
I've gotten mixed feedback on my sourdough starter as to weather to cover it with a towel in the refrigerator or to keep it sealed. Then as for feeding it. Do I put it in the refrigerator right away or let it rise? I know I leave it out if I'm gonna use it later that day. And again, when leaving out on the counter, towel or seal?
Lora says
Hi Philo-I store my starter in a sealed jar in the fridge. When I feed it I leave it out on the counter with the lid off for a little bit (covered). I typically feed it after I take some of the discard out and I'm baking, so I like it on the counter while I'm in the kitchen doing baking things with a clean loose towel over it. Once it's back in fridge, it's sealed tightly. Keep in mind that refrigerated starter does need to be fed once a week, and if you keep sourdough starter stored on the counter, you have to feed it daily! Hope that helps!
Aurora says
Very helpful thank you!
Lora says
Hello Aurora-Great! Thank you for taking the time to let me know you like how to revive this sourdough starter!Enjoy!
?