This Easy Chocolate Espresso Cake is one of our most loved cakes on the blog. As soon as you take a bite, you will see why! A beloved rich chocolate cake with just the right amount of espresso and frosted with mom’s marshmallow frosting recipe. It’s a hit at every special party!

Originally published April 13, 2015, updated on February 3, 2024.
Jump To
There's something undeniably magical about the combination of chocolate and coffee that always brings a smile to my face. Whether it's the rich depth of a chocolate coffee layer cake that teases the senses or the bold, inviting aroma of an espresso coffee cake that fills the kitchen, these flavors have a way of coming together in perfect harmony.
Recently, I've been on a quest to perfect my espresso cake recipe. It's been a delightful journey, blending the robust notes of espresso with the velvety smoothness of chocolate, creating a symphony of flavors that is simply irresistible.
Where there is a special occasion around here, you can bet there will be a at least 2 different cakes. If it's one of the kids' birthday (when I say kids, I mean even neighbor's kids), there is a request for a layer cake. If it is one of the adults birthdays, most likely, it will be a chocolate espresso layer cake.
Since it's already February and you may or may not have CHOCOLATE on your mind...I thought it might be fun to explore some amazing chocolate recipes we just love! Like this spectacular chocolate layer cake! Another chocolate cake we adore is this Chocolate Rye Crumb Cake...the crumb topping is fantastic!
I have so much fun making layer cakes! I really do! If I didn't feel compelled to have to actually take a nice photo of it, I would be making more of them. I much prefer a simple bundt cake or a single layer cake with a luscious layer of frosting on top. Those kinds of cake are so easy to slice and photograph.
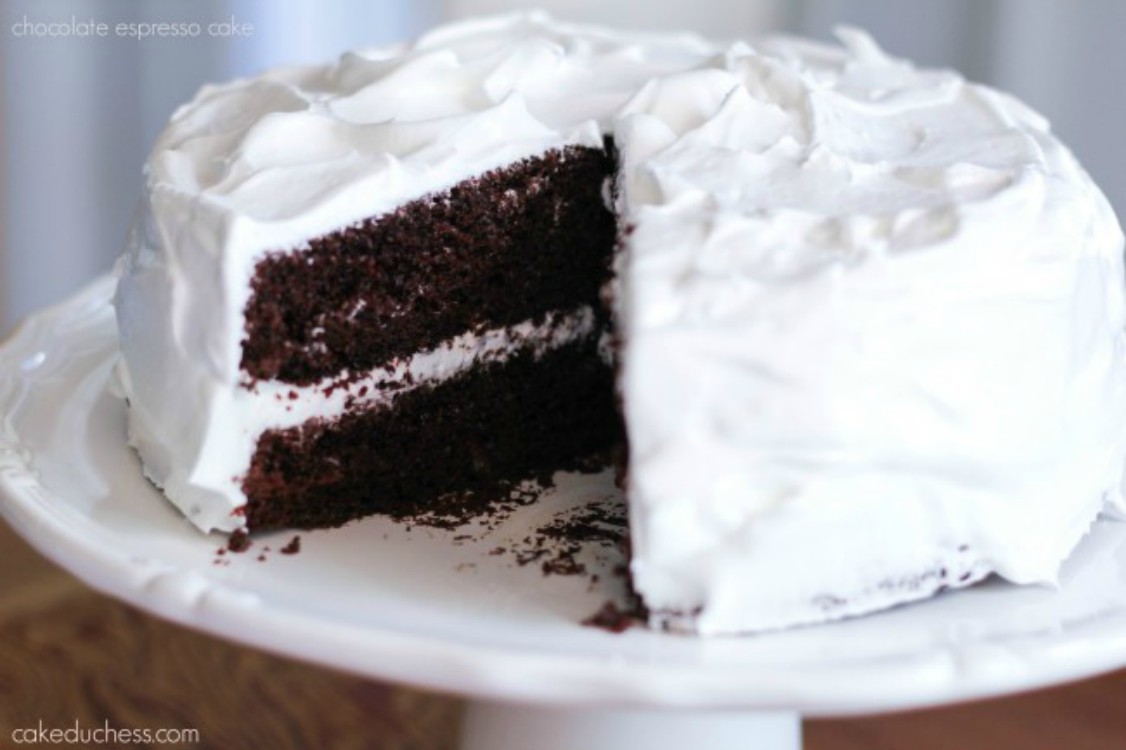
It's slightly nerve-wracking to think about slicing that first slice. I want to take a photo of the finished cake so badly and share it here, but what if it looks awful when I finally take that first slice out? I probably should've used a q-tip and cleaned the frosting in the middle here a little, but who am I kidding? I'm not a professional food photographer.
I created this cake out of love for a special birthday (actually, we were celebrating 2 special March birthdays!!), and it didn't matter how pretty the cake looked for photos to anyone but me! Just a warning, this post is a little longer than normal because I'm sharing a story. Carry on to the recipe if you only are here for cake (I won't be offended!).
🍰✨Why we love this espresso coffee cake
- 🍫 Rich Chocolate Flavor: Combines cocoa powder and chocolate chips with hot espresso for a deep, luxurious chocolate taste.
- ☕ Espresso Infused: The addition of hot espresso enhances the chocolate flavor, making it more intense and satisfying.
- 🥛 DIY Buttermilk Trick: Easy hack to make buttermilk at home with just milk and white vinegar, ensuring a moist and tender cake every time.
- 🍰 Perfect for Celebrations: With its impressive layers and marshmallow frosting, it's ideal for birthdays, holidays, or any special occasion.
- 🍬 Marshmallow Frosting: Fluffy, light, and dreamy frosting that adds a sweet, cloud-like finish to the rich cake.
- 🎨 Customizable: Suggest adding food coloring to the frosting for a fun twist, making it versatile for different themes or preferences.
- 📚 Easy-to-Follow Instructions: Clear, step-by-step guidance makes this recipe accessible for bakers of all skill levels.
🛒 Ingredients needed for this chocolate espresso layer cake
- The cake:
- Cocoa. There are two options for cocoa powder: Dutch-process unsweetened cocoa or regular unsweetened cocoa powder. Usually, I go with Dutch-process as it has such a lovely color and rich flavor. Go for the unsweetened cocoa powder if that's all you have on hand. The cake will be fantastic!
- Oil. I went with sunflower oil. Sometimes I use coconut oil. Another fantastic idea is olive oil (extra virgin). It does have a stronger flavor and my kids aren't too crazy about it.
- Coffee. I used freshly brewed espresso. You could use decaf if you don't need any extra caffeine kick. Also, hot water is an option.
- Sugar: The sugar sweetens the cake, and its crystalline structure also contributes to the tenderness and golden-brown crust through the caramelization process.
- All-Purpose Flour : Flour provides the fundamental structure; its proteins form gluten when mixed, giving the cake its body and ability to rise.
- Semi-Sweet Chocolate Chips : They add pockets of melted chocolate throughout the cake, enhancing the chocolate experience with every bite.
- Baking Powder & Baking Soda: These leavening agents produce carbon dioxide when heated, causing the cake to rise and resulting in a fluffy texture.
- Salt: Salt is a flavor enhancer; it sharpens the other flavors in the cake, including the sweetness and complexity of the chocolate.
- Eggs: Eggs are a binding agent providing structure and helping to emulsify the batter, resulting in a smooth and uniform crumb.
- Buttermilk: The acidity tenderizes the gluten, resulting in a softer texture, and interacts with leavening agents for added loft.
- Vanilla Extract: Vanilla rounds out the flavors of the cake, adding a subtle complexity that complements the chocolate.
- Marshmallow frosting:
- Granulated White Sugar: In the frosting, the sugar provides sweetness and is the primary structure for the formation of a fluffy marshmallow texture.
- Egg Whites: When whipped, egg whites transform into a light and airy foam that's stable and forms the base of the marshmallow frosting.
- Water: Water is used to dissolve the sugar to create a syrup, which when beaten with the egg whites, gives the frosting its glossy and smooth consistency.
- Cream of Tartar: This acid stabilizes the whipped egg whites, increasing their heat tolerance and volume, making a more stable frosting.
- Vanilla: Just like in the cake, vanilla enhances the overall flavor of the frosting, offsetting the sweetness with its warm and aromatic qualities.
🎂 How to make this chocolate espresso cake
Preparing the Cake:
Step 1: If you don’t have buttermilk on hand, add one tablespoon of white vinegar to a liquid measuring cup. Add milk until it reaches one cup. Let the mixture stand at room temperature for about 5 minutes until it curdles, then give it a stir.
Step 2: Preheat your oven to 350 degrees F.
Step 3: Spray two 9-inch round cake pans with baking spray. Alternatively, butter the bottom of each pan and line the bottoms with parchment paper. If using the butter/parchment paper method, dust the pans with cocoa powder, then shake out the excess.
Step 4: In a medium-sized bowl, add cocoa powder and chocolate chips.
Step 5: Pour hot espresso over the cocoa powder and chocolate chips. Stir until you have a smooth chocolate mixture.
Step 6: In the bowl of your stand mixer (or a medium-sized bowl if you don’t have one), mix together on low speed the sugar, flour, baking powder, baking soda, and salt until combined.
Step 7: In a small bowl, mix together the eggs, buttermilk, vegetable oil, and vanilla. Stop the mixer and scrape the sides of the bowl with a rubber spatula to combine all the flour mixture.
Step 8: Add the buttermilk mixture a little at a time into the flour mixture and mix together until combined.
Step 9: Slowly add the melted chocolate mixture and mix until combined. Stop the mixture and scrape the sides of the bowl with a rubber spatula to incorporate all of the chocolate mixture.
Step 10: Pour the batter into the prepared cake pans and bake for 30-35 minutes, or until a toothpick inserted in the center comes out clean.
Step 11: Cool cakes in their pans for about 20 minutes.
Making the Marshmallow Frosting:
Step 12: In a medium saucepan, bring 1/3 cup of water, sugar, and cream of tartar to a boil. Do not stir the sugar mixture.
Step 13: Boil until you have thick clear bubbles, about 5 minutes and a temperature of 245°F. Be careful not to boil for even 1 second longer.
Step 14: In a metal bowl, add all the egg whites, and beat until they start to get a little thick and form soft peaks.
Step 15: Set your timer for 7 minutes.
Step 16: Slowly add the sugar syrup only a little at a time and beat on high speed for 7 minutes.
Step 17: On the last minute, beat in the vanilla extract. The frosting will be fluffy and light.
Assembling the Cake:
Step 18: Place the first layer of cake on a revolving cake stand. I like to have a layer of foil paper under the cake or even a cardboard round. The foil paper is just pieces of foil that can be pulled out easily without messing up the bottom of the cake when you’re done frosting.
Step 19: Spread about one cup of the frosting on the cake using an offset spatula. Spread it around evenly. Add a little more if needed until you like how thick the middle layer will be.
Step 20: Carefully place the second layer of cake on top.
Step 21: Use the offset spatula to spread on the rest of the frosting evenly around the sides and top of the cake. Make sure you evenly spread it around the sides of the cake.
Step 22: You could toss on some fresh raspberries on top (like I did) or even grate on some chocolate on top. Cake is best served at room temperature.
🍰 Storing this chocolate coffee layer cake
- Store the cake in an airtight container or cover it tightly with plastic wrap.
- Refrigerate for up to 3-4 days.
- Alternatively, freeze individual cake layers wrapped tightly in plastic wrap and aluminum foil.
- Label with the date and freeze for up to 2-3 months.
- Thaw overnight in the refrigerator before serving.
- Enjoy the cake slices at room temperature for the best taste and texture.
📃Variations and Substitutions
- Flour Alternatives: Experiment with gluten-free flour blends or almond flour for a gluten-free option.
- Milk Substitute: Replace buttermilk with yogurt or a non-dairy alternative like almond milk or coconut milk for a dairy-free option.
- Flavor Enhancements: Add a splash of flavored extract such as almond, mint, or orange for a unique twist to the cake batter.
- Frosting Options: Explore different frosting flavors like cream cheese frosting, chocolate ganache, or a simple buttercream.
- Toppings: Customize the cake with various toppings such as fresh fruit, chopped nuts, or shredded coconut for added texture and flavor.
- Decoration: Get creative with cake decoration using edible flowers, sprinkles, or chocolate curls for a visually stunning presentation.
- Size Variation: Adjust the recipe to make cupcakes, mini cakes, or a sheet cake depending on your preference and occasion.
☑️ Lora's Tips:
- Room Temperature Ingredients: Bring eggs, buttermilk, and butter to room temperature before baking for better incorporation and texture.
- Quality Ingredients: Use high-quality cocoa powder, chocolate chips, and espresso for a rich and flavorful cake.
- Proper Mixing: Mix the batter until just combined to avoid overmixing, which can result in a dense cake.
- Even Baking: Rotate the cake pans halfway through baking for even browning and rising.
- Cooling Technique: Allow cakes to cool in their pans for 20 minutes before removing to prevent crumbling.
- Frosting Application: Apply a crumb coat of frosting before adding the final layer for a smooth finish.
- Personalization: Customize the cake with your favorite frosting, toppings, and decorations for a personalized touch.
FAQ'S
Yes! It is a keeper! This recipe is a Hershey's chocolate cake recipe. I've seen it around the web since I originally posted it here some years back few years back: Hershey's Perfectly Chocolate Cake with Fluffy White Icing. Other bloggers have made it and their post has been pinned millions of times. But the actual recipe source is from Hershey's with a slight tweak that I like to do sometimes, adding the espresso, buttermilk, and decrease the sugar amount a little.
Yes! The chocolate cake is very similar to my mini chocolate espresso bundt cakes (that happens to be vegan if you need a good vegan chocolate cake recipe). Just don't use the fluffy white frosting. Simply dust with a vegan confectioner's sugar for the best vegan chocolate dessert!
Will anyone notice that the cake is a little lopsided? Did I frost it evenly around the sides? Is there enough frosting in the middle? All very important questions to those that look at my photos, but to those that are going to get to enjoy a slice, completely irrelevant information.
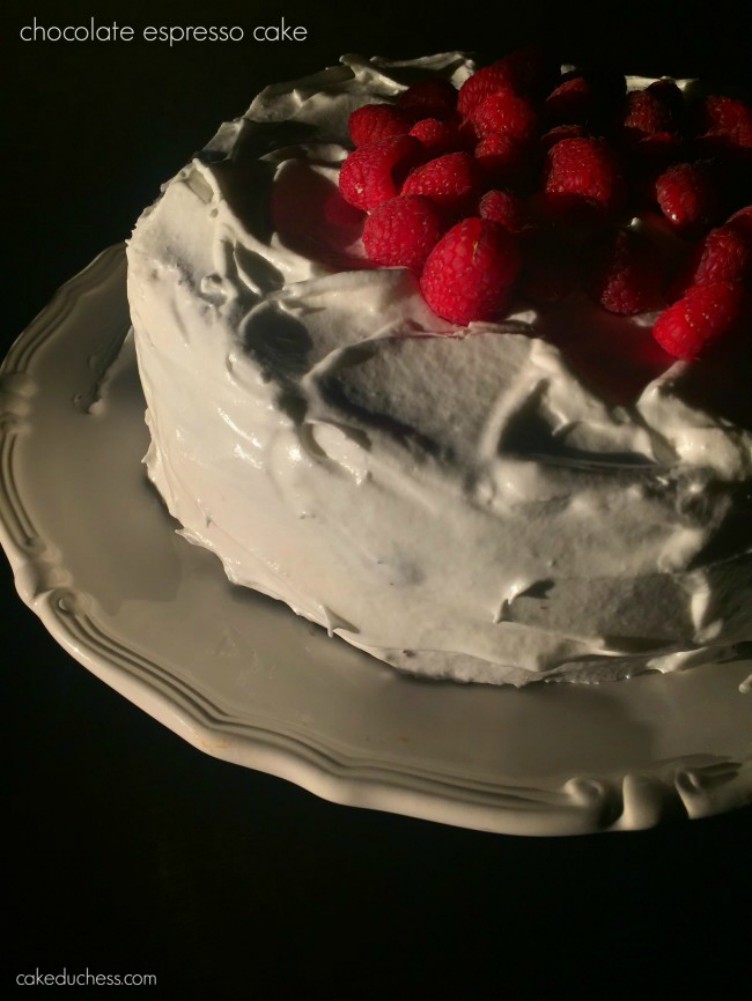
I had some gorgeous raspberries and added them on top for a pop of color. You could omit that part and keep it just fluffy white frosting and absolutely nobody will complain. I guarantee! Another simple idea is to toss on some colored sprinkles! That is always a hit with the kids if you're making this a birthday cake (just skip the espresso and use hot water if making for the kiddos!).
That is a great question! In our house, hands down, it's the fluffy white frosting! It's the frosting I grew up with mom's flufy white icing-marshmallow frosting. It's a keeper recipe.
Yes, you can! Here is Orangette's Chocolate Cake with Chocolate Frosting. It is practically the same cake in a single layer and it has a chocolate frosting.
I had some gorgeous raspberries and added them on top for a pop of color. You could omit that part and keep it just fluffy white frosting and absolutely nobody will complain. I guarantee! Another simple idea is to toss on some colored sprinkles!
That is always a hit with the kids if you're making this a birthday cake (just skip the espresso and use hot water if making for the kiddos!).
Unless you're dealing with my best friend's father-in-law (from Sicily, no less!), who used to own many different restaurants and is quite the chef and quite the expert pizza maker.
He sat at the end of the table and giggled and told me in Italian that the cake was leaning a little to one side, while tilting his head to look at it. Did anyone else care? Not really. Did he care? Not so much. He told me he was just letting me know, as he dug into his second slice.
Pin for later!
This is Hershey's famous chocolate cake with a couple of adaptions.
Some other cake recipes to enjoy:
Did you make this? Please RATE THE RECIPE below:)
Please Subscribe and give a follow on Instagram, Facebook, Pinterest, and TikTok xx
Easy Chocolate Cake with Coffee
Equipment
Ingredients
Cake
- 1 ½ cups sugar
- 1¾ cups all-purpose flour
- ¾ cup Dutch process cocoa powder
- 2 ounces of semi-sweet chocolate chips
- 1½ teaspoons baking powder
- 1½ teaspoons baking soda
- 1 teaspoon salt
- 2 eggs room temperature
- 1 cup buttermilk
- ½ cup sunflower oil
- 2 teaspoons vanilla extract
- 1 cup hot espresso use decaf if you're worried about the caffeine or even just boiling water instead
Marshmallow Frosting
- 1 cup of granulated white sugar not powdered sugar
- 4 egg whites room temperature
- ⅓ cup of water
- ½ teaspoon cream of tartar
- 1 teaspoon vanilla
Instructions
Cake
- Preheat oven to 350 degrees F. Spray two 9-inch round cake pans with baking spray (or if you prefer, butter the bottom of each pan and line the bottoms with parchment paper and butter the parchment paper).
- If you don’t have buttermilk on hand (I usually never do), simply add one tablespoon of white vinegar to a liquid measuring cup. Add the milk to the vinegar until it reaches one cup and let mixture stand at room temperature for about 5 minutes. It should be curdled. Give it a whirl with your spoon…look, you just made your own buttermilk!
- If you use the butter/parchment paper method, dust the pans after adding the butter to the parchment paper with cocoa powder. Shake out the excess and set the pans aside while you prep the batter.
- In a medium sized bowl, add the cocoa powder and chocolate chips.
- Pour in the hot espresso and stir together until you have a smooth chocolate mixture.
- In the bowl of your stand mixer (if you don’t have a stand mixer, in a medium sized bowl), mix together on low speed the sugar, flour, baking powder, baking soda, and salt until combined.
- In a small bowl, mix together the eggs, buttermilk, vegetable oil, and vanilla, stopping the mixer to scrape the sides of the bowl with a rubber spatula to combine all the flour mixture.
- Add the buttermilk mixture a little at time into the flour mixture and mix together until combined.
- Slowly add the melted chocolate mixture and mix until combined; stop the mixture and scrape the sides of the bowl with a rubber spatula to incorporate all of the chocolate mixture.
- Pour the batter into the prepared cake pans and bake for 30-35 minutes (mine were ready at about 28 minutes), or until a toothpick inserted in the center comes out clean. Cool cakes in their pans for about 20 minutes. While the cakes are cooling, you can prep whichever frosting you are using, or use my frosting recipe.
Marshmallow Frosting
- In a medium saucepan, bring the 1/3 cup of water, sugar, cream of tartar to a boil. Do not stir the sugar mixture as it will cause it to crystallize. Boil until you have thick clear bubbles ( should only take about 5 minutes and reads a temperature of 245 F). Be careful not to boil even 1 second longer. *(If a mistake happens and you do boil the sugar too long and end up with an amber colored sugar mixture, don’t throw it away. Add some heavy cream and you have an amazing caramel sauce. soon as it comes to a rapid bubble, because it will turn amber, and than you would have to quickly make a different recipe, and add heavy cream, which would be “caramel sauce”).
- In a metal bowl, add all the egg whites, and beat the egg whites until starts to get a little thick and forms soft peaks. Set your timer for 7 minutes. Now slowly (take care and do not let this boiling hot sugar syrup burn you) add the sugar syrup only a little at a time and beat on high speed for 7 minutes.
- On the last minute, beat in the vanilla extract. The frosting will be fluffy and light. My mom recommends adding a drop of food coloring if you want to be daring.
Assemble the cake
- Place the first layer of cake on a revolving cake stand. I like to have a layer of foil paper under the cake or even a cardboard round. The foil paper is just pieces of foil that can be pulled out easily without messing up the bottom of the cake when you’re done frosting.
- Spread about one cup of the frosting on the cake using an offset spatula. Spread it around evenly. Add a little more if needed until you like how thick the middle layer will be.
- Carefully place the second layer of cake on top. Use the offset spatula to spread on the rest of the frosting evenly around the sides and top of the cake. Make sure you evenly spread it around the sides of the cake. You could toss on some fresh raspberries on top (like I did)or even grate on some chocolate on top. Cake is best when served at room temperature.
Nutrition Disclaimer
Please keep in mind that the nutritional information presented below is an approximation and may vary depending on the exact ingredients used.
Notes
- Room Temperature Ingredients: Bring eggs, buttermilk, and butter to room temperature before baking for better incorporation and texture.
- Quality Ingredients: Use high-quality cocoa powder, chocolate chips, and espresso for a rich and flavorful cake.
- Proper Mixing: Mix the batter until just combined to avoid overmixing, which can result in a dense cake.
- Even Baking: Rotate the cake pans halfway through baking for even browning and rising.
- Cooling Technique: Allow cakes to cool in their pans for 20 minutes before removing to prevent crumbling.
- COCOA. There are two options for the cocoa powder: Dutch-process unsweetened cocoa or regular unsweetened cocoa powder. Usually I go with Dutch-process as it has such a lovely color and rich flavor. Go for the unsweetened cocoa powder if that's all you have on hand. The cake will be fantastic!
- OIL. I went with sunflower oil. Sometimes I use coconut oil. Another fantastic idea is olive oil (extra-virgin). It does have a stronger flavor and my kids aren't too crazy about it.
- COFFEE. I used fresh brewed espresso. You could use decaf if you don't need any extra caffeeine kick. Also, hot water is an option.
- LEFTOVERS: The cake is best served the same day. IF you have any leftovers, store in the fridge (up to 1 day). The marshmallow frosting IS NOT like a buttercream frosting. It stays fluffy and holds its shape the first day it's made and assembled. I do not recommend assembling cake a day ahead of time.



rebecca says
wow looks so good
Lora says
hi Rebecca-Thank you! It's a favorite! xx