Nothing beats a homemade Nutella Crostata! This delightful Italian pastry, also known as "crostatine alla Nutella," is a heavenly combination of a buttery, flaky crust and the rich, creamy goodness of Nutella. This is easy-to-follow, fail-proof recipe for making mini Nutella tarts, guaranteed to become an instant hit at your home!

There are the lovers and there are the haters of Nutella. When it is spread in all its lusciousness into the base of a buttery pastry crust, it's not that easy to say no to just a slice! You could make mini nutella crostata for your sweethearts this week and really surprise them!
You see, Nutella brings back memories of being a kid in Italy. There were many a summer I would be hanging out with some of my cousins, usually under an umbrella on the beach, and one of my aunts would cut open a wonderful, crusty bread and spread it with Nutella.
And there you go! That was our merenda: our afternoon snack! There was really nothing better to eat at that moment in the whole world. I see my sister-in-law sometimes offer it to the kids in the summer in Italy.
And I was just on the phone yesterday with my American expat friend that has lived in Italy for 15 years. Guess what she was making her 11 year old? Un panino con la Nutella (a Nutella sandwich).
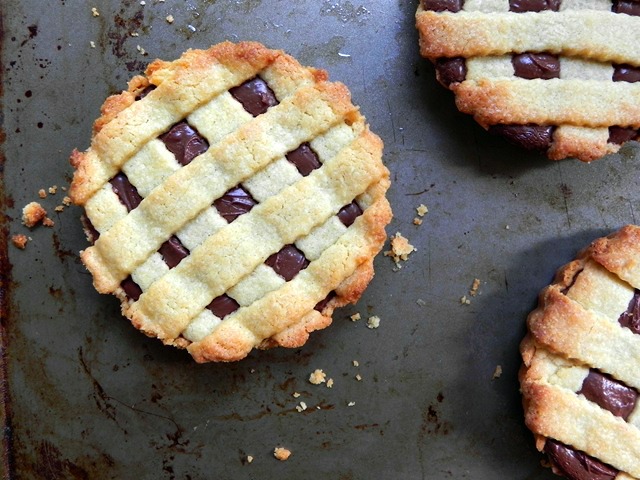
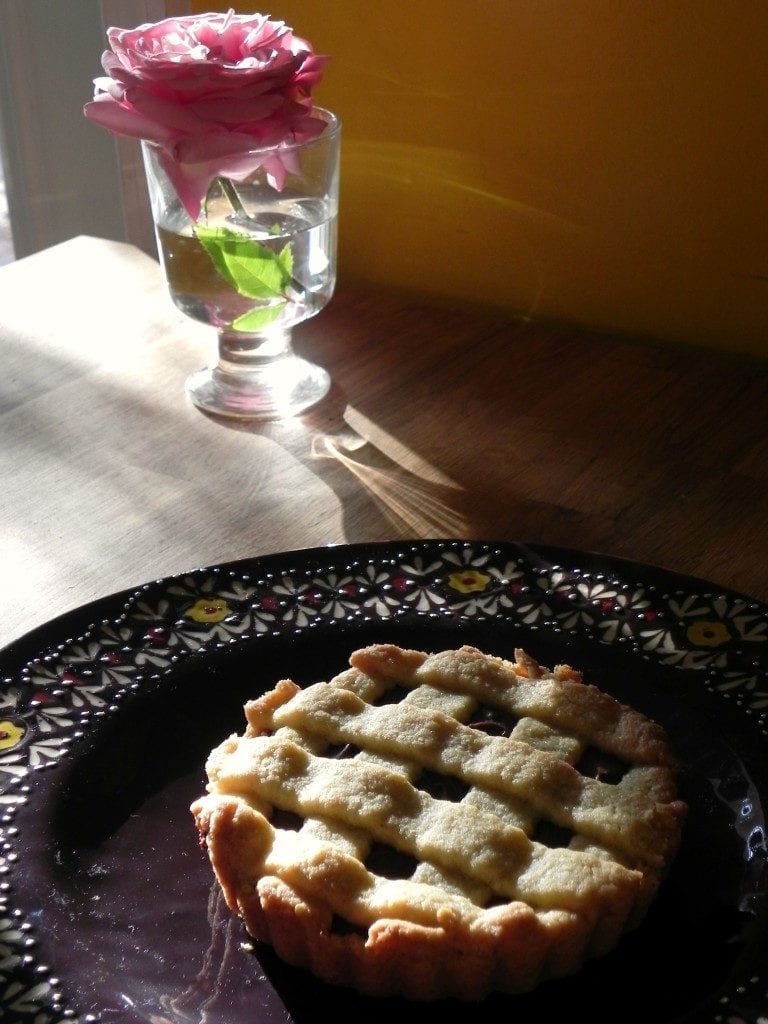
The dreamy and creamy Nutella is comfortably nestled between two buttery and flaky crusts. Well, the top crust is sliced into strips. But still, it is decadent and it is lovely. I made them mini size. They aren't that big at all and seriously, if you are looking for just a little decadent treat, have a couple bites, it may be all you need to get your Nutella fix.
Share one crostata with your sweetheart...it's perfect for two! Or, if you have been working out and really being good, enjoy one all by yourself! I'm sure you deserve this special treat!
Jump To
Why You'll Love This Easy Nutella Crostata
- Simple Ingredients: This recipe uses basic pantry staples, making it easy to whip up whenever the craving hits.
- Versatile: This homemade crostata is perfect for any occasion - a sweet breakfast treat, an afternoon snack, or a dessert to end a lovely meal.
- Personalized Portion: The mini size of these Nutella tarts makes them an excellent choice for portion control. Enjoy your treat without overindulging!
- Kid-approved: Kids absolutely love anything with Nutella. These mini crostatas are no exception, making them a surefire hit with the little ones.
- Fun to Make: The process of making the crostata with Nutella is fun and hands-on. It's a great activity to enjoy with your kids or friends.
Ingredients and Their Purpose
- Pastry Flour (300 grams): Gives the crust its light and flaky texture.
- Unsalted Butter (200 grams): Provides the rich, buttery flavor that sets the perfect base for the Nutella filling.
- Sugar (100 grams): Adds a touch of sweetness to the crust.
- Eggs (1 whole egg and 1 yolk): Acts as the binding agent for the dough.
- Nutella (1 26.5 ounce jar): The star ingredient! This creamy, chocolaty spread is the delectable filling for our crostata.
How to Make Easy Nutella Crostata
- In the bowl of a food processor, add the flour and sugar and process a few times to mix together.
- Next add the butter and pulse a few times until the mixture looks like wet sand.
- Add the egg and yolk and process a few seconds more until the dough forms . Be sure to not over process the dough.
- Dump the dough from the food processor bowl onto a lightly floured counter. Form the dough into four disks and chill in the refrigerator for about an hour.
- Preheat oven to 375°F with a foil-lined large baking sheet on middle rack.
- When the dough is nicely chilled, remove from the refrigerator. Roll out the first piece of dough between 2 sheets of plastic wrap into a 1/8-inch thick or slightly thicker. Keep other pieces of dough chilling while assembling the tarts one at a time.
- Spray a mini fluted tart pan with removable bottom with baking spray. Gently wrap the dough over the rolling pin and place it over the first mini tart pan (or an 11-inch fluted tart pan); release the rolling pin and let the dough fall into the tart pan. Press the dough softly into the bottom of the tart pan. If some of the dough breaks while you press it into the tart pan, that’s not a problem.
- Simply piece the dough together. Press the sides of the dough about 1/2 -inch up the side of the tart pan. The rim of the tart should be lined with a slightly thicker layer of pastry than the bottom (about 1/4-inch thick).
- Cut off the extra dough from the sides and keep these excess pieces to make the lattice topping.
- Repeat this process with the remaining 3 tart shells.
- Wrap the remaining dough in plastic wrap. Place the remaining dough and the tart pans in the refrigerator for about 30 minutes to chill.
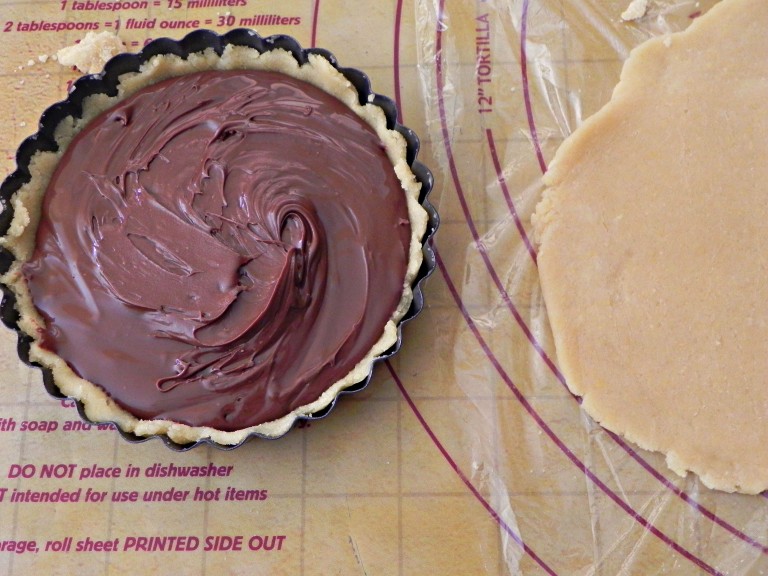
- When the tart shells are chilled, remove them from the refrigerator and prick the pastry bottoms with a fork a few times. Fill each tart shell with Nutella almost all the way to the top. Roll out the extra dough into lattice strips. Place the dough strips in a criss-cross pattern over the Nutella. Repeat the same process with the remaining three tart shells.
- Place the mini crostatas on a baking sheet and bake for about 25-30 minutes at 375 F, or until the crust is a light golden brown. *Check the crostata at 25 minutes. Every oven is different. The crust should not be too brown.

Expert Tips
- Ensure your butter is cold to achieve a flaky crust.
- Don't overwork your dough. It could lead to a tough crust.
- Chill the dough sufficiently. This helps prevent shrinking during baking.
- Always prick the dough with a fork before baking to prevent the crust from puffing up.
- Rotate your baking sheet halfway through for even baking.
Variations/Substitutions
- Chocolate-Hazelnut Spreads: If you don't have Nutella, any chocolate-hazelnut spread will work.
- Pastry Flour: You can substitute it with a mix of all-purpose flour and cake flour.
- Vegan Version: Use vegan butter and a flaxseed egg substitute, and opt for a vegan-friendly chocolate spread.

Making a homemade Nutella Crostata is a fantastic way to bring a piece of Italy into your kitchen. This mini crostata recipe offers a perfect balance of a crispy crust and a smooth, rich filling that is truly irresistible. Happy baking!
The pasta frolla dough is enough for one regular size tart pan if you don’t have the mini size pans. A fantastic dessert for Valentine’s day! You could prepare the dough ahead and let it chill in the refrigerate until you are ready to work with it (up to 7 days.) Buon Appetito!
Recipe FAQ'S
A crostata is a type of Italian tart or pie that typically has a flaky, pastry-like crust and is filled with fruit or jam. Crostatas can be round, square, or even rectangular in shape, and are usually baked in a shallow pan.
Yes, you can use a variety of different fillings for your crostata. If you're not a fan of Nutella, you could try using a fruit jam or even a chocolate hazelnut spread. Whatever filling you choose, make sure it is thick and not too runny, so that it doesn't drip out of the crust when you slice and serve the crostata.
Yes, you can prepare the dough up to 3 days in advance and refrigerate it, or freeze it for up to 2 months.
It's typically served as a dessert or afternoon snack, but can also be enjoyed for breakfast.
Keep it at room temperature in a cool area for 2-3 days, or refrigerate for 4-5 days.
Yes, you can freeze either the entire crostata or just the dough for up to 6 months.
Yes, the Italian version of Nutella contains less sugar than the one in other countries. Italian Nutella also includes skimmed milk powder which gives it a lighter and creamier texture. Additionally, Italian Nutella is made with 100% sustainable palm oil certified by The Roundtable on Sustainable Palm Oil (RSPO).
European Nutella is made with a different recipe than the one used for North American markets. Aside from containing less sugar, European Nutella is made with modified palm oil and hazelnuts from Piedmont that give it its unique flavor. Additionally, the cocoa beans that are used in Europe are sourced directly from Rainforest Alliance Certified farms to support sustainable farming practices.
Yes, the flavor of Nutella can be slightly different depending on the country. For example, some countries use more or less sugar than others and this can impact its taste.
Tarts and crostatas are both desserts made with a pastry dough, typically filled with fruit or custard. The main difference lies in the shape: tarts are cooked in fluted pans and have straight sides while crostatas appear more rustic as they are baked on baking sheets
Crostata is the Italian word for tart or pie. It’s derived from the Latin word ‘crustum’ which means crust. In English, crostata can also be referred to as a galette. This is a circular pastry with filling in the center surrounded by a free-form crust.
No, crostata can be stored at room temperature for 2-3 days. However, if you wish to keep it longer, it should be refrigerated for 4-5 days and covered tightly with plastic wrap. It can also be frozen for up to 6 months.
More recipes like this:
If you like BUNDTS, you should check out my Nutella Swirl Bundt Cake.
Chocolate Nutella Peanut Butter Fudge...yes, it exists and it's adapted from Giada!
Did you make this? Please RATE THE RECIPE below:)
Please Subscribe and give a follow on Instagram, Facebook, Pinterest, and TikTok xx
Easy Nutella Crostata Recipe
Equipment
Ingredients
- 300 grams 10.54 ouncespastry flour
- 200 grams 7.025 ounces unsalted butter
- 100 grams 3.512 ounces sugar
- 1 whole egg and 1 yolk 60 grams eggs
- 1 26.5 ounce jar of Nutella
Instructions
- In the bowl of a food processor, add the flour and sugar and process a few times to mix together. Next add the butter and pulse a few times until the mixture looks like wet sand. Add the egg and yolk and process a few seconds more until the dough forms . Be sure to not over process the dough.
- Dump the dough from the food processor bowl onto a lightly floured counter. Form the dough into four disks and chill in the refrigerator for about an hour.
- Preheat oven to 375°F with a foil-lined large baking sheet on middle rack.
- When the dough is nicely chilled, remove from the refrigerator. Roll out the first piece of dough between 2 sheets of plastic wrap into a 1/8-inch thick or slightly thicker. Keep other pieces of dough chilling while assembling the tarts one at a time.
- Spray a mini fluted tart pan with removable bottom with baking spray. Gently wrap the dough over the rolling pin and place it over the first mini tart pan (or an 11-inch fluted tart pan); release the rolling pin and let the dough fall into the tart pan. Press the dough softly into the bottom of the tart pan. If some of the dough breaks while you press it into the tart pan, that’s not a problem. Simply piece the dough together. Press the sides of the dough about 1/2 -inch up the side of the tart pan. The rim of the tart should be lined with a slightly thicker layer of pastry than the bottom (about 1/4-inch thick). Cut off the extra dough from the sides and keep these excess pieces to make the lattice topping. Repeat this process with the remaining 3 tart shells.
- Wrap the remaining dough in plastic wrap. Place the remaining dough and the tart pans in the refrigerator for about 30 minutes to chill.
- When the tart shells are chilled, remove them from the refrigerator and prick the pastry bottoms with a fork a few times. Fill each tart shell with Nutella almost all the way to the top. Roll out the extra dough into lattice strips. Place the dough strips in a criss-cross pattern over the Nutella. Repeat the same process with the remaining three tart shells.
- Place the mini crostatas on a baking sheet and bake for about 25-30 minutes at 375 F, or until the crust is a light golden brown. *Check the crostata at 25 minutes. Every oven is different. The crust should not be too brown.
Nutrition Disclaimer
Please keep in mind that the nutritional information presented below is an approximation and may vary depending on the exact ingredients used.


Maya says
Despite some minor trouble with making sure the dough stayed chilled enough to mold, and my lack of pastry tins, it was easy enough to work around and still create a delicious - albeit slightly unattractive - tarts. I topped them with some fresh berries and homemade whipped cream to lighten them up and they were fantastico. Highly recommend.
Lora says
Hi Maya-yes, it's important the dough is chilled enough. That's great you did it even without tins...did you make them free form? Thank you for letting me know!! XX Happy Baking!