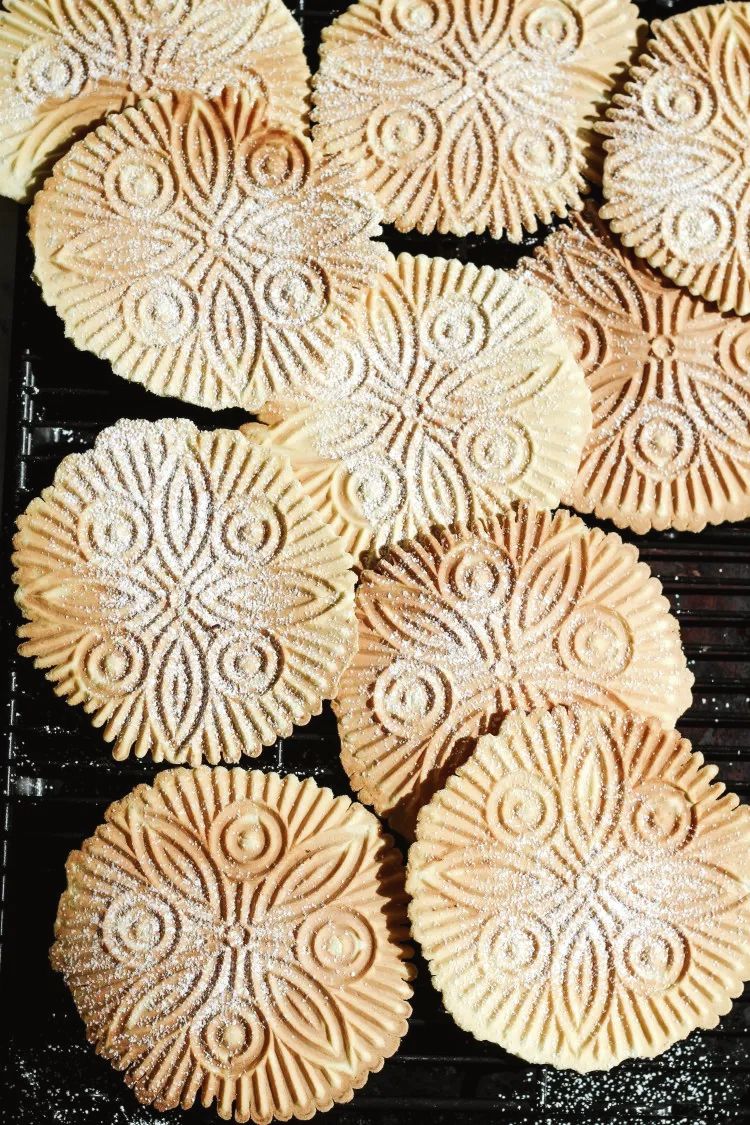
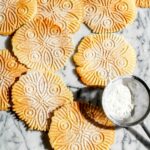
Thin and crisp Traditional Pizzelle Recipe (Italian Waffle Cookies) are a family favorite Christmas cookie. Flavored with vanilla and anise, and so easy to make. All you need is a pizzelle maker. This recipe is from the Abruzzo region of Italy and is perfect Italian holiday cookie that is perfect for that afternoon coffee break!
Why you'll love Italian Snowflake Cookies:
- Easy recipe: The simple to follow recipe makes this easy for beginning bakers to try. You can make the matter in just minutes!
- Great flavor: The combination of lemon zest, orange juice and anise extract creates a unique and delicious flavor.
- Light and crispy: The cookies bake up with a super light and crispy texture. Use regular milk or you could use almond milk as a dairy-free alternative makes this recipe suitable for those with dietary restrictions or preferences.
- There are options for customization with different extracts or liqueurs, allowing you to make this recipe your own.
- The use of almond flour offers a gluten-free alternative for those with dietary restrictions.
- Pizzelle cookies are versatile and can be enjoyed on their own, used as a garnish for desserts, or even as part of a cookie sandwich.
There are some cookies that bring back Christmas memories from my very Italian childhood. Pizzelle are that one cookie that was always around during the holidays.
No matter what Italian-American Christmas party we went to, there would be a section of pizzelle on the cookie table. My parents would receive containers of pizzelle from various Italian-American friends all throughout the years. It was that one special cookie I adored!
Jump To
- Why you'll love Italian Snowflake Cookies:
- What equipment do you need to make pizzelle ?
- Mrs. Pinciaro's Classic Italian pizzelle recipe
- Recipe for pizzelles-Preserving Italian family recipes
- What are Italian flat cookies ingredients:
- How do you make classic Italian pizzelle?
- Some expert tips for making the best classic Italian pizzelle
- Variations for flat waffles cookies:
- FAQ's
- How do you make crispy pizzelle cookies?
- How to serve pizzelle cookies?
- How to store classic Italian pizzelle and keep them crispy?
- Some other Italian cookie recipes:
- Easy Italian Pizzelle Cookie Recipe
- some expert tips for making the best classic italian pizzelle
This article contains affiliate links which support us at no extra cost to you.
What equipment do you need to make pizzelle ?
You do need a pizzelle maker to make these, but they are fairly inexpensive and available almost anywhere you can buy kitchen goods. My grandma's came from a local Italian grocery store, and this is the one I use now.

The batter does come together very easily. It is a classic and reliable recipe. I have made it 3 times in the last two weeks. They stay VERY crispy.
Just spray your iron with baking spray and carefully portion out the right amount of batter onto the hot iron. My iron clamps it down to shut it and it really takes about one minute per batch. You can experiment and see how much dough you want.
Depending how much you use will create thicker or thinner cookies. It always happens that by the time I'm on the last portions, the cookies look exactly how I want them to look.
Mrs. Pinciaro's Classic Italian pizzelle recipe
Mom was visiting and looking at the book and happened upon a Mrs. Pinciaro's Pizzelle. She said, "You have to make these pizzelle…this looks like a keeper recipe!". I had my own pizzelle recipe that is sort of similar to this one that mom gave me some years back.
I even shared my gluten-free pizzelle a couple years back. I had no clue who Mrs. Pinciaro was but imagined how special she must have been to be included in a NY Times cookbook.
Through a little research online, I found the original article and read the story of Mrs. Pinciaro. She was in her 70's in the early 1970's, so I figured she was born around 1900. She would be over a 100 years old today! I even tried to find her daughter, but could not find any info on her. Mrs. Pinciaro was quite a baker. It turns out the article that went with this recipe featured an aunt of a Miss Theresa Laudo.
The article explains that Miss Laudo was a language teacher in Brooklyn and she traveled to Abruzzo, Italy to stay with her aunt and learn some of her recipes. She traded authentic Abruzzi recipes for an apple pie recipe.
This actual pizzelle recipe came from the mother of a former student of Miss Theresa Laudo. The author of the article, Raymond Sokolov wrote, "Mrs. Constantino Pinciaro was born in Abbruzzi and uses a heavy handwrought iron with long handles."
Recipe for pizzelles-Preserving Italian family recipes
It was so important for Miss Theresa Laudo to preserve the recipes from the Italian heritage. She grew up in Brooklyn and her family's Italian grocery store was attached to the apartment. At the time when this article was written (the early 1970's), she was a teacher at Samuel J. Preston School in Harrison, NY and 90% of the student body was Italian.
The article was all about Miss Laudo's aunt in Abruzzi's recipes and then went on to share a Mrs. Pinciaro's pizzelle recipe. I'm not sure what happened to Mrs Pinciaro's daughter and if she is carrying on the collection of traditional recipes from her mother.
They may even all be long gone. At least some of them were preserved online by Raymond Sokolov and the NY Times. This is one of the recipes that were dear to her.
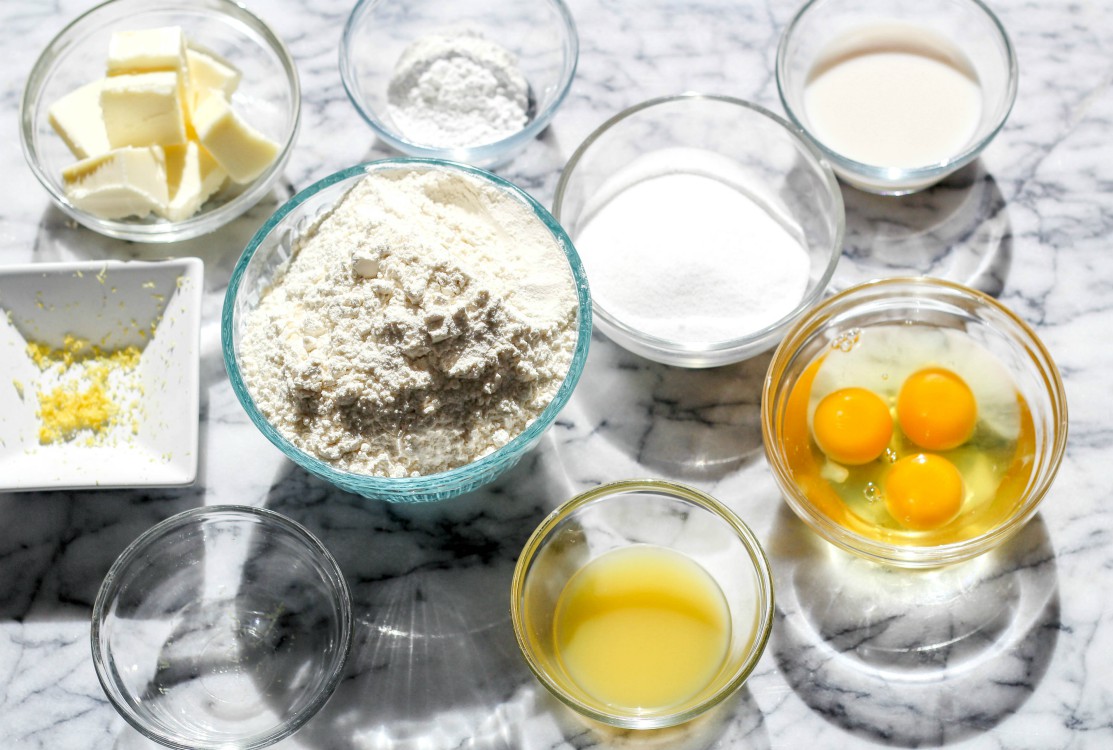
What are Italian flat cookies ingredients:
Here are the ingredients you need to make classic Italian pizzelle:
- All-purpose flour - used as the base dry ingredient for the pizzelle batter.
- Baking powder - added to help the cookies rise and give them a light, airy texture.
- Eggs - provide structure and richness to the batter.
- Granulated sugar - adds sweetness and also helps with browning of the cookies.
- Lemon zest - adds a bright citrus flavor to the cookies. Organic lemon zest is best to use.
- Almond and vanilla extracts - provide additional flavor to the cookies. Use one, use both.
- Unsalted butter - adds richness and tends to give a softer texture to the cookies. For dairy-free, you could use a butter alternative like Earth Balance, or whatever margarine you like.
- Orange juice - adds a hint of citrus flavor and also helps with browning.
- Milk - provides moisture to the batter for a better consistency. I used almond milk to go dairy-free, but feel free to use whatever milk you like. I have made these also with whole milk.
- Confectioner's sugar - used as a finishing touch for dusting the cookies. Overall, these ingredients work together to create a delicious and unique cookie that can be enjoyed on its own or with toppings such as fruit, whipped cream, or chocolate sauce.
You may come across recipes that use different ingredients that create a totally unique pizzelle.
Depending on the recipe source, it could vary slightly. The pizzelle from my childhood had a very strong anise flavor. And also I remember them tasting like a crispy butter cookie. Let's dive a little deeper into classic pizzelle ingredients.
- Butter: There are recipes (like the one I'm sharing) that use butter. You could use dairy-free margarine (like Earth Balance butter sticks) and some old recipes even use vegetable oil. I have seen some that even use olive oil.
- Alcohol: You may find some pizzelle recipes with a little booze. This recipe suggests using Strega. Some even use a touch of Sambuca. I find when making for the kids, they prefer the pizzelle without a strong boozy flavor. BUT if making as a gift for adults, you could add a touch of even brandy. This recipe has no booze in it (just some orange juice and a bit of milk).
- Anise: This recipe does have anise extract, which has a pretty strong flavor. You could play around with the portion, depending on how strong you like the flavor. Almond extract and vanilla extract do also work together very well in this recipe. Some nonna's like to add some anise seeds. My kids aren't too crazy about anise flavor, so I tend to make it more subtle.
- Lemon zest: This recipe uses lemon zest. You could also use orange zest. If you don't have any citrus on hand, you could omit it from recipe.
- Cocoa: Some people do like a chocolate flavored pizzelle. If you are replacing some flour for cocoa powder, you'll have to adjust the sugar too a little bit.
How do you make classic Italian pizzelle?
The first step is to gather all your pizzelle ingredients.
Nexst step, warm up a pizzelle iron.
In a medium bowl, whisk together flour and baking powder; set aside.
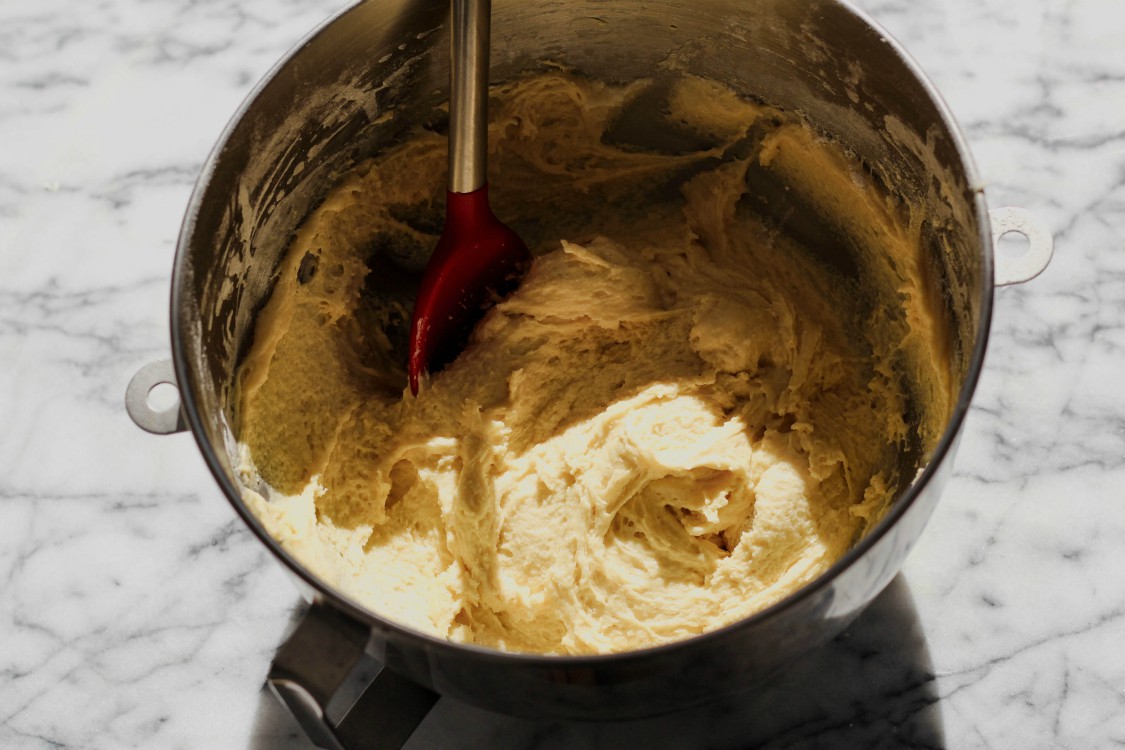
In a large mixing bowl or the bowl of an electric mixer fitted with the paddle attachment, beat the eggs and sugar until frothy and beginning to thicken (about 2-3 minutes).
On low speed, add the extracts and melted butter to egg mixture in a steady stream and mix for 30 seconds.
Slowly add the dry mixture to wet and blend just until combined. Your batter will resemble a soft and sticky dough.
Spray pizzelle iron lightly with baking spray.
Drop 1 tablespoon of batter on hot pizzelle press.
Close press and cook for about 1 minute or until light indicated cookies are done (cookies should be slightly golden).
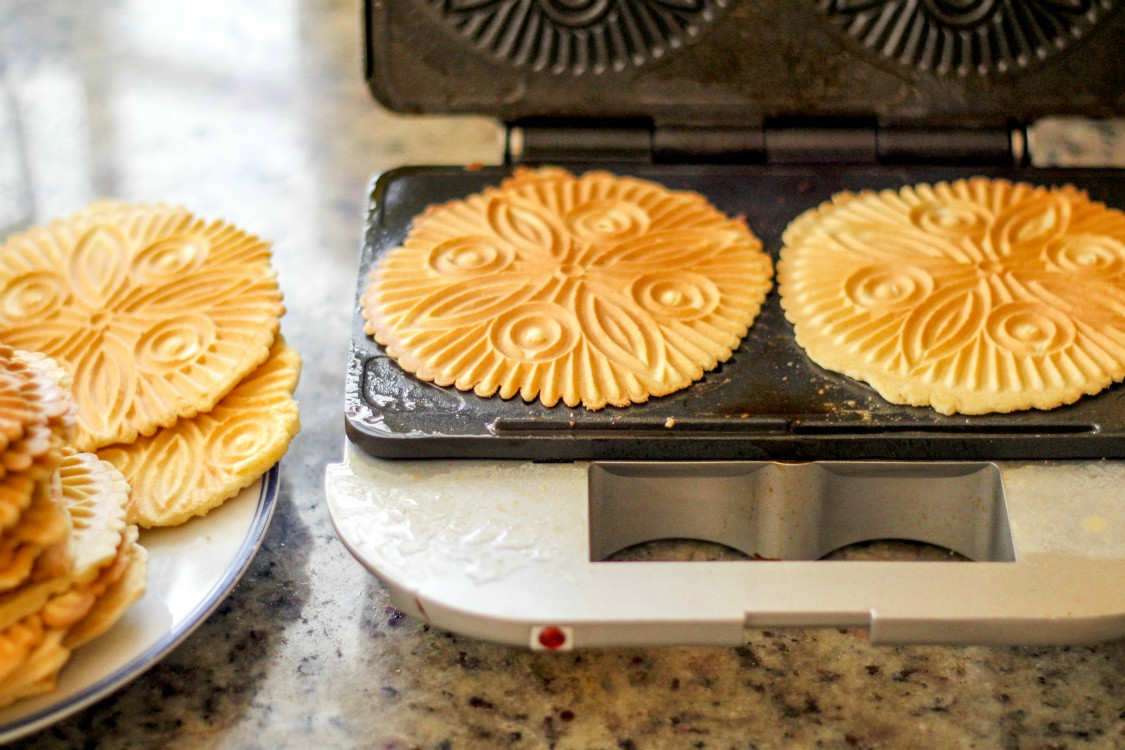
Use a fork to lift pizzelle off the press and transfer to a cookie rack or plate to cool down (keep in mind that they should lay flat. While they are hot, they will mold into another shape if they're not completely flat).
Spray iron again and repeat process until you finish all the batter.
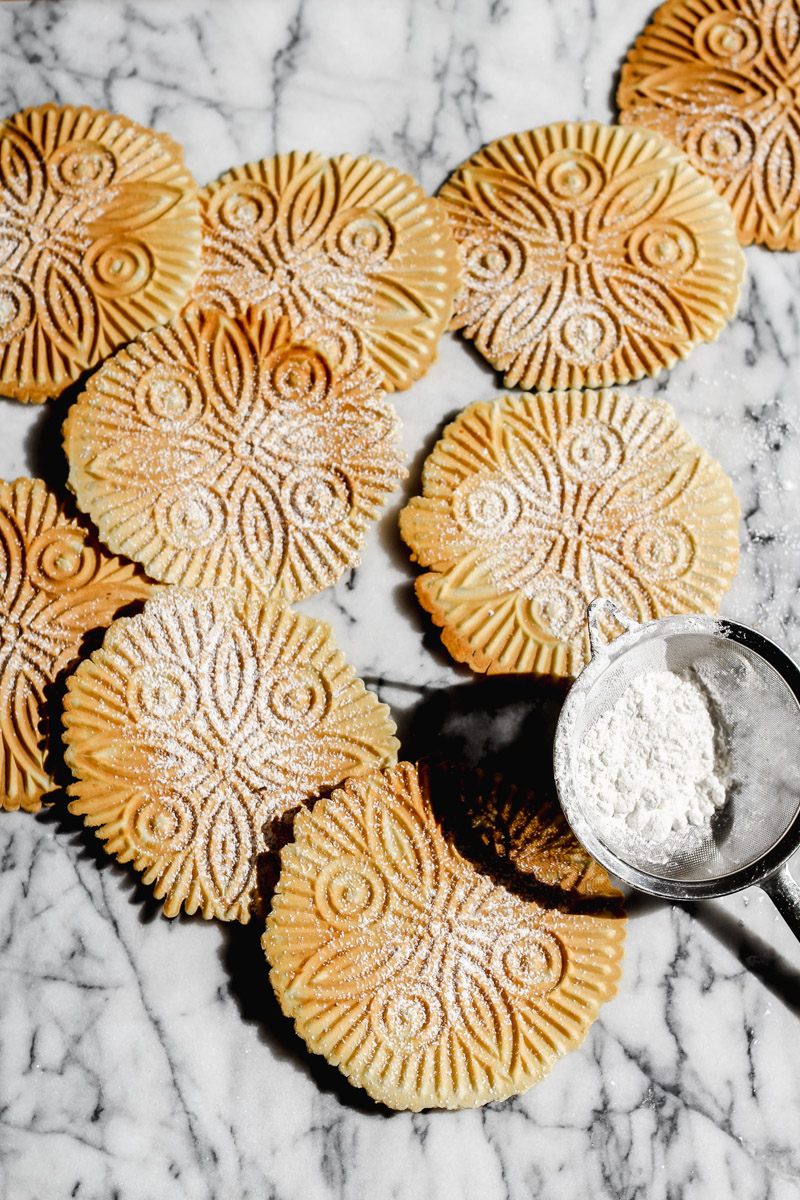
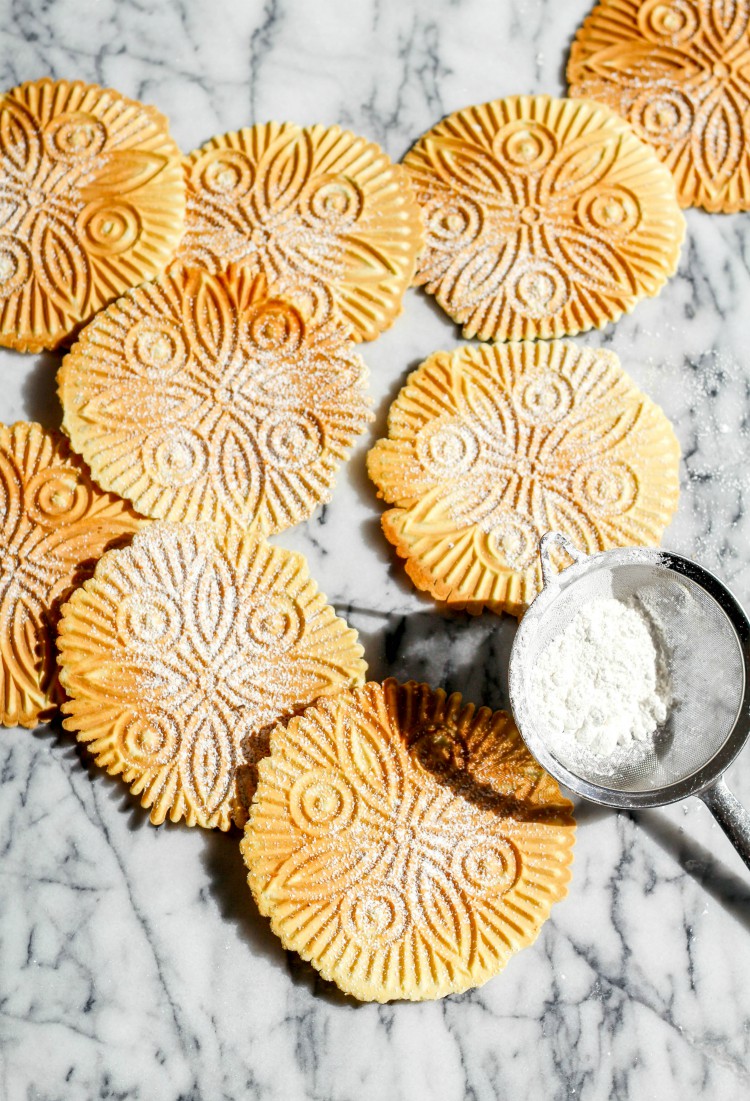
Dust with confectioner's sugar and ENJOY! My husband loves them with a drizzle of honey. I know also a spread of a chocolate-hazelnut cream is also a great idea!
Some expert tips for making the best classic Italian pizzelle
Even though you make pizzelle with an iron, there are some tricks to make them turn out really great!
- Beat the cookie batter: Use an electric mixer fitted with the paddle attachment to beat the eggs and sugar until frothy and thickened. This will help create the light and airy texture of the cookies. IF you don't have a mixture, you can make batter by hand (takes some arm work and a good wooden spoon!).
- Warm the pizzelle iron: Make sure to warm up your pizzelle iron before starting the recipe. This will ensure that your cookies cook evenly and have a nice golden color.
- Batter sticking: Use baking spray if you have a stainless steel iron. I usually spray a quick spritz of the spray before adding each batch of batter. I do not want to end up with a sticky stuck batter mess so that's how I prevent any chances of it happening.
- Batter dripping out the side: You may find in the beginning you will add too much batter. When you squeeze the top part of iron on the bottom part, you'll have batter oozing out the sides. And that is super messy to clean and the iron is very hot, so you have to carefully clean it. Make sure you spoon the batter right in the center and with the back of my spoon and even my clean finger, I shape it to cover all around and slightly above the center.
- Watch the pizzelle maker: Keep an eye on the light indicator on your pizzelle press to make sure the cookies are not overcooked. If you prefer a crispier cookie, increase the cooking time by a few seconds. For a softer texture, decrease the cooking time.
- Soggy Pizzelle: The pizzelle need the right environment to crisp up. If it happens to be a very humid day, once you make the pizzelle, lay them flat and store them in a very dry part of the house (a cold and damp basement would not be the right place to store them while they're drying and crisping up).
- Drying: Allow them to stay on the baking rack or even laying flat on a baking sheet, side by side (NOT stacked) until they cool and crisp up.
- Batter amount: Also, use the correct amount of batter. Using too much batter will end up with thick pizzelle that will not crisp up. IF you like thicker, pizzelle, than make them with more batter. ONE tablespoon of batter should be enough to make the cookie. IF it seems too small, add slightly more than 1 tablespoon. Depending on the design of your pizzelle iron, you may need a little more batter. It could take some trial and error with the first batches. The first ones maybe won't look as perfect as you imagine, but they will still be delicious!
- Enjoy warm or cooled down: These cookies are amazing hot off the iron. They are delicious as they cool down and crisp up.
Variations for flat waffles cookies:
- Different flavors or extracts to the batter, such as almond extract, cinnamon, or nutmeg.
- Cookie batter could be made with different types of milk, such as coconut milk or oat milk.
- A gluten-free flour blend instead of regular flour for those with dietary restrictions.
- For a mocha twist on traditional pizzelles, try adding in a tablespoon of coffee or espresso powder for a mocha twist on traditional pizzelles.
- Experimenting with different types of sweeteners, such as honey or maple syrup, for a healthier option.
- Using different shaped pizzelle irons, such as heart or snowflake shapes, for a fun twist on presentation.
- For the chocolate lovers, drizzling melted chocolate on top of the pizzelles is so delightful!
FAQ's
Yes! There is really no way to make pizzelle unless you have the iron. I have seen online affordable irons that make just one at a time. Using a pizzelle iron is the only way to make these cookies.
Yes! I did share gluten-free pizzelle here a while back. I find if you use your favorite 1-1 gluten-free flour, and I do love Bob's Red Mill or King Aruthur's. I find they both result with very crispy and delicious GF pizzelle. I am not experienced enough with gluten-free flours to create my own blend, so their blends are perfect!
When the pizzelle have cooled completely, you could place them in a zipped lock freezer bag (or any airtight storage container). They will keep for up to 3 months in the freezer. When ready to enjoy, thaw them out on the counter.
Pizzelle are Italian cookies from the Abruzzo region.
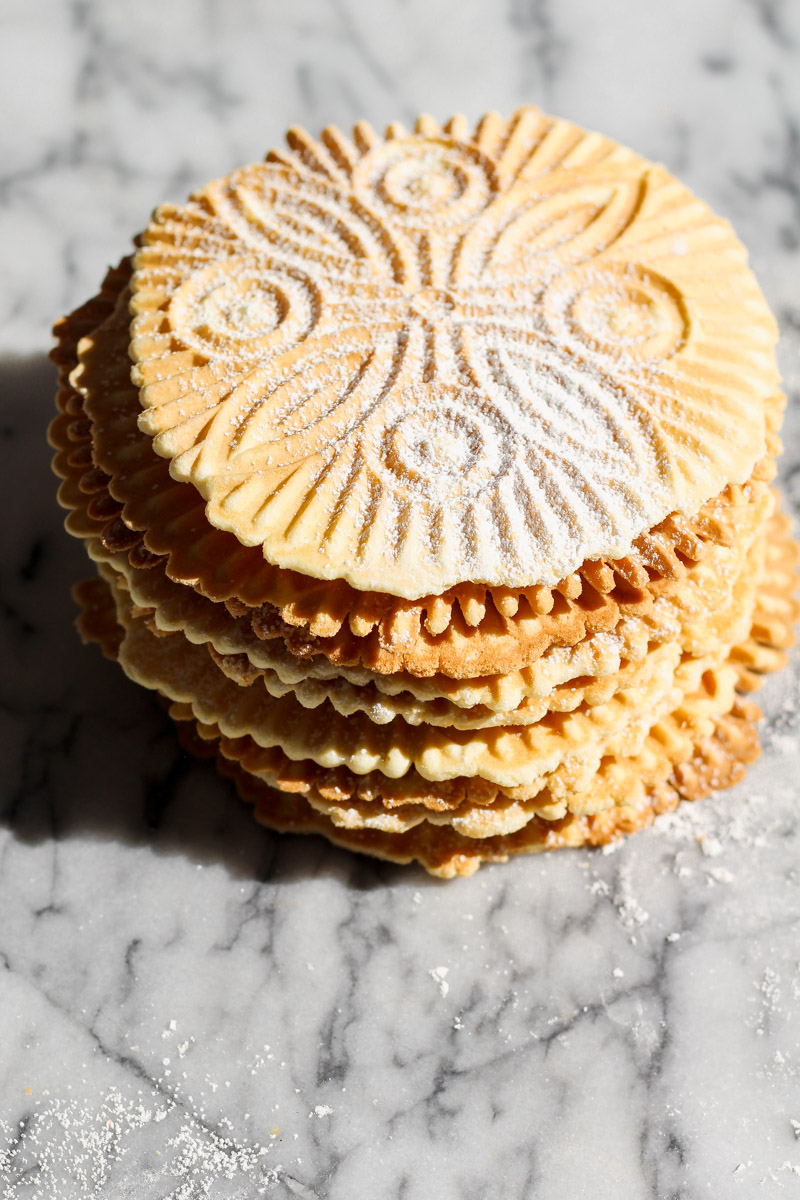
These are not soft cookies, they have a slight crunch and are nice and crispy.
Each cookie has roughly 10 calories.
Pizzelle cookies are a type of Italian waffle cookie made from flour, eggs, sugar, butter or vegetable oil, and flavoring such as vanilla or anise. They have a thin crunchy texture that can be enjoyed plain or sandwiched with ice cream, fruit jam, nutella and more.
You maybe didn't know (because I sure didn't!) that pizzelle are believed to be one of the oldest cookies in the whole world. Something from the ancient Roman times related to pizzelle is the crustulum, which was a sort of flatbread cooked in a pancake pan and on top of a craticula (like a barbecue grill grate). You can find variations with different names in Italy, like ferratelle in the Lazio region and cancelle in Molise.
Pizzelle cookies can also be topped with powdered sugar, nuts or chocolate chips. They are a traditional Italian treat that can be enjoyed for any occasion.
How do you make crispy pizzelle cookies?
Here are the tips you should follow to get the crispiest pizzelle:
- once you remove the pizzelle from the pizzelle maker, place them flat on a cooling rack or serving plate lined with parchment paper;
- very important to place them side by side. IF you stack them up while they're hot, they will not crisp up. The steam will keep them soft;
- the longer they stay on the plate or rack to cool, the crispier they will get. I usually leave them there a few hours to dry.
The pizzelle are thin and crisp and very delicate. When you remove the pizzelle from the iron plate you have only a few moments to roll into a different shape before they dry. Or you lay them flat like we did and dust with confectioner's sugar to enjoy them as simple and delicious as they are!
How to serve pizzelle cookies?
The beauty of these cookies is that while they're hot, you can shape them and serve them different ways!
- Roll them into a cannoli shape and fill with your ricotta filling.
- Perfect as a cone to hold gelato.
- Form them into a bowl and they're delicious topped with custard, jam or Nutella!!How to store pizzelle and keep them crispy?
How to store classic Italian pizzelle and keep them crispy?
- place in cookie or coffee tins;
- wrap in aluminum foil;
- place in paper bags.
- could also store in zipped lock bags.
The pizzelle can be stored in air tight container for up to 2-3 weeks (at least in Florida…maybe longer in a colder kitchen). I tend to avoid storing them in a plastic container.
Some other Italian cookie recipes:
- Italian Rainbow Cookies
- Cuccidati-Sicilian Fig Cookies
- Italian Lemon Knot Cookies
- Sicilian S Cookies
Easy Italian Pizzelle Cookie Recipe
Equipment
Ingredients
- 3 cups all‐purpose flour
- 2 teaspoons baking powder
- ¼ pound butter melted (you could use a butter alternative like Earth Balance to go dairy-free)
- ¾ cup sugar
- 3 large eggs at room temperature
- 1 large organic lemon zest (not the white part that is bitter), organic is best
- 1 teaspoon vanilla extract optional
- 2 teaspoons anise extract optional (or any liqueur like Strega)
- 3 Tablespoons fresh orange juice
- ¼ cup milk (use unsweetened almond milk to go dairy-free, but feel free to use whatever milk you like)
Instructions
- Warm up a pizzelle iron.
- In a medium bowl, whisk together flour and baking powder; set aside.
- In a large mixing bowl or the bowl of an electric mixer fitted with the paddle attachment, beat the eggs and sugar until frothy and beginning to thicken (about 2-3 minutes). Add in the lemon zest.
- On low speed, add the extracts and melted butter to egg mixture in a steady stream and mix for 30 seconds. Slowly add in the orange juice and milk.
- Slowly add the dry mixture to wet and blend just until combined. Your batter will resemble a soft and sticky dough.
- Spray pizzelle iron lightly with baking spray.
- Drop 1 tablespoon of batter on hot pizzelle press.
- Close press and cook for about 1 minute or until light indicated cookies are done (cookies should be slightly golden).
- Use a fork to lift pizzelle off the press and transfer to a cookie rack or plate to cool down (keep in mind that they should lay flat. While they are hot, they will mold into another shape if they're not completely flat).
- Spray iron again and repeat process until you finish all the batter.
- Dust with confectioner's sugar and ENJOY!
Nutrition Disclaimer
Please keep in mind that the nutritional information presented below is an approximation and may vary depending on the exact ingredients used.
Notes
some expert tips for making the best classic italian pizzelle
Even though you make pizzelle with an iron, there are some tricks to make them turn out really great!- Beat the cookie batter: Use an electric mixer fitted with the paddle attachment to beat the eggs and sugar until frothy and thickened. This will help create the light and airy texture of the cookies. IF you don't have a mixture, you can make batter by hand (takes some arm work and a good wooden spoon!).
- Warm the pizzelle iron: Make sure to warm up your pizzelle iron before starting the recipe. This will ensure that your cookies cook evenly and have a nice golden color.
- Batter sticking: Use baking spray if you have a stainless steel iron. I usually spray a quick spritz of the spray before adding each batch of batter. I do not want to end up with a sticky stuck batter mess so that's how I prevent any chances of it happening.
- Batter dripping out the side: You may find in the beginning you will add too much batter. When you squeeze the top part of iron on the bottom part, you'll have batter oozing out the sides. And that is super messy to clean and the iron is very hot, so you have to carefully clean it. Make sure you spoon the batter right in the center and with the back of my spoon and even my clean finger, I shape it to cover all around and slightly above the center.
- Watch the pizzelle maker: Keep an eye on the light indicator on your pizzelle press to make sure the cookies are not overcooked. If you prefer a crispier cookie, increase the cooking time by a few seconds. For a softer texture, decrease the cooking time.
- Soggy Pizzelle: The pizzelle need the right environment to crisp up. If it happens to be a very humid day, once you make the pizzelle, lay them flat and store them in a very dry part of the house (a cold and damp basement would not be the right place to store them while they're drying and crisping up).
- Drying: Allow them to stay on the baking rack or even laying flat on a baking sheet, side by side (NOT stacked) until they cool and crisp up.
- Batter amount: Also, use the correct amount of batter. Using too much batter will end up with thick pizzelle that will not crisp up. IF you like thicker, pizzelle, than make them with more batter. ONE tablespoon of batter should be enough to make the cookie. IF it seems too small, add slightly more than 1 tablespoon. Depending on the design of your pizzelle iron, you may need a little more batter. It could take some trial and error with the first batches. The first ones maybe won't look as perfect as you imagine, but they will still be delicious!
- Enjoy warm or cooled down: These cookies are amazing hot off the iron. They are delicious as they cool down and crisp up.

I love anything licorice flavored so I was immediately drawn to these cookies. So good and impressive too!
Your Pizzelle recipe is so good, I enjoyed making a bunch. Thanks for sharing.
My kids were so impressed by these cookies! They were delicious and looked great! Now, they want them every day! lol
Thanks for sharing this recipe.
My nonna used to make these pizzelle. I don't have her recipe, but this truly reminds me of hers.
This classic Italian recipe yields thin, crisp waffle-like cookies with delicate vanilla and anise flavor. Simple to make, wonderfully nostalgic, and a perfect holiday treat.
Such a beautiful post! I can practically hear the crisp snap of these just looking at the photos. They turned out so wonderfully light and delicious for me!
I was gifted a pizzelle maker last year and never used it--so glad I found your recipe. It was super easy to follow and the pizzelles turned out great!
I have always loved pizzelles. Thank you do sharing this recipe. They are not as hard as I thought to make. Easy to follow recipe.
Thank you!
Hi Magali-So happy you enjoyed the pizzelle recipe! THANK YOU!
Such a timeless treat! Your pizzelle look perfectly crisp and delicate—thank you for sharing this family favorite.
I've been following your recipe since you posted it. It's just like my nana made! They crisp up and they make a really lovely gift. Everyone always asks about these pizzelle cookies when it's Christmas time.