
This easy homemade dill pickles recipe uses a simple vinegar brine with garlic, peppercorns, and fresh dill. No canning - just refrigerator pickles ready in 24 hours.
If you love making your own pickles at home, also try my Homemade Giardiniera and my Easy Pickled Jalapeños - both use the same quick refrigerator method and keep for weeks.
This article contains affiliate links which support us at no extra cost to you.
Jump To
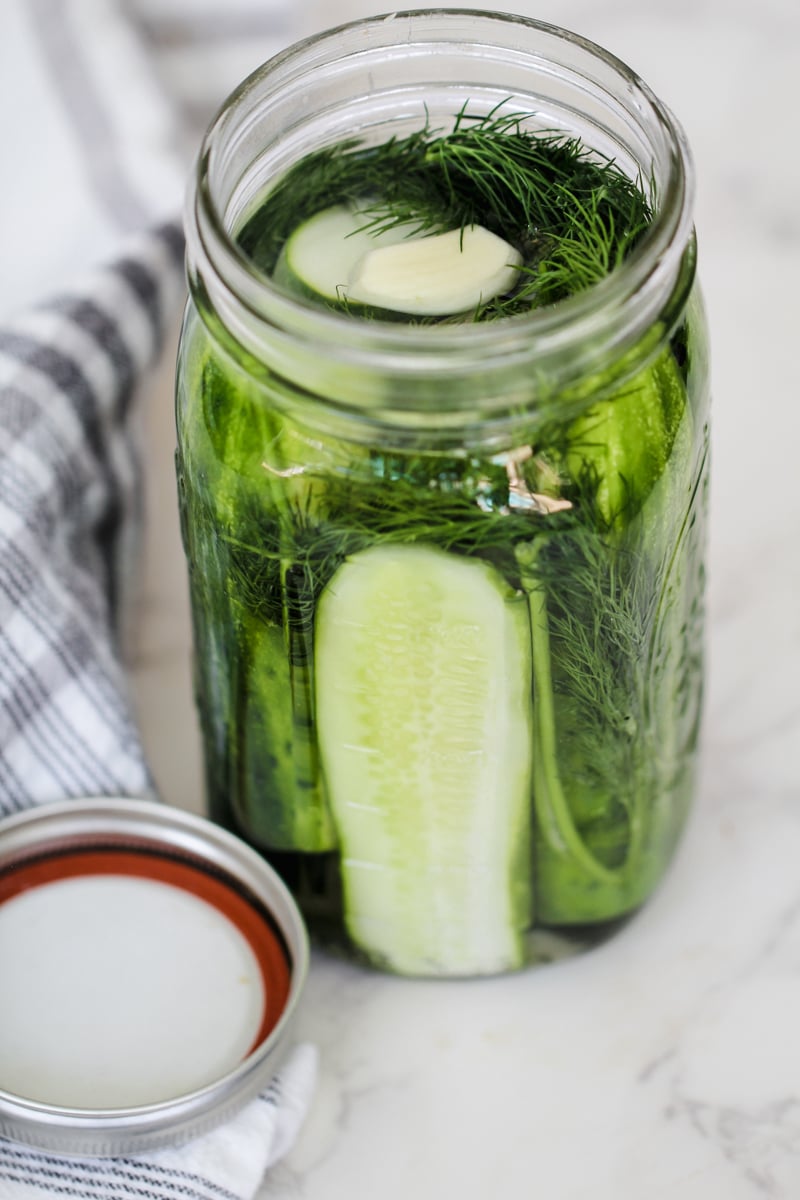
This homemade dill pickles recipe is one I come back to every summer when cucumbers take over the garden or the farmers market. These are my mom's refrigerator dill pickles. She finally gave me her handwritten recipe! No canning equipment, no water bath, no processing - just a simple dill pickle brine poured over cucumbers with garlic and fresh dill, sealed in jars, and left in the refrigerator.
The pickles are ready to eat in 24 hours if you slice them into chips, and they only get better over the following week as the brine works its way through.
The brine is straightforward: equal parts water and white vinegar, sea salt, a small amount of sugar for balance, and whatever aromatics you want to build on. Mom's version uses smashed garlic, whole peppercorns, and fresh dill. A pinch of red pepper flakes is optional but gives the pickles a pleasant, slow heat that makes them hard to stop eating. Mom's recipes are always a winner!
If you have been curious about pickling but found the idea of canning intimidating, refrigerator pickles are the perfect entry point. The process takes about 20 minutes of active time. You can make pickled Thai chili peppers or pickled watermelon rind using the same method.
What Makes a Good Dill Pickle?
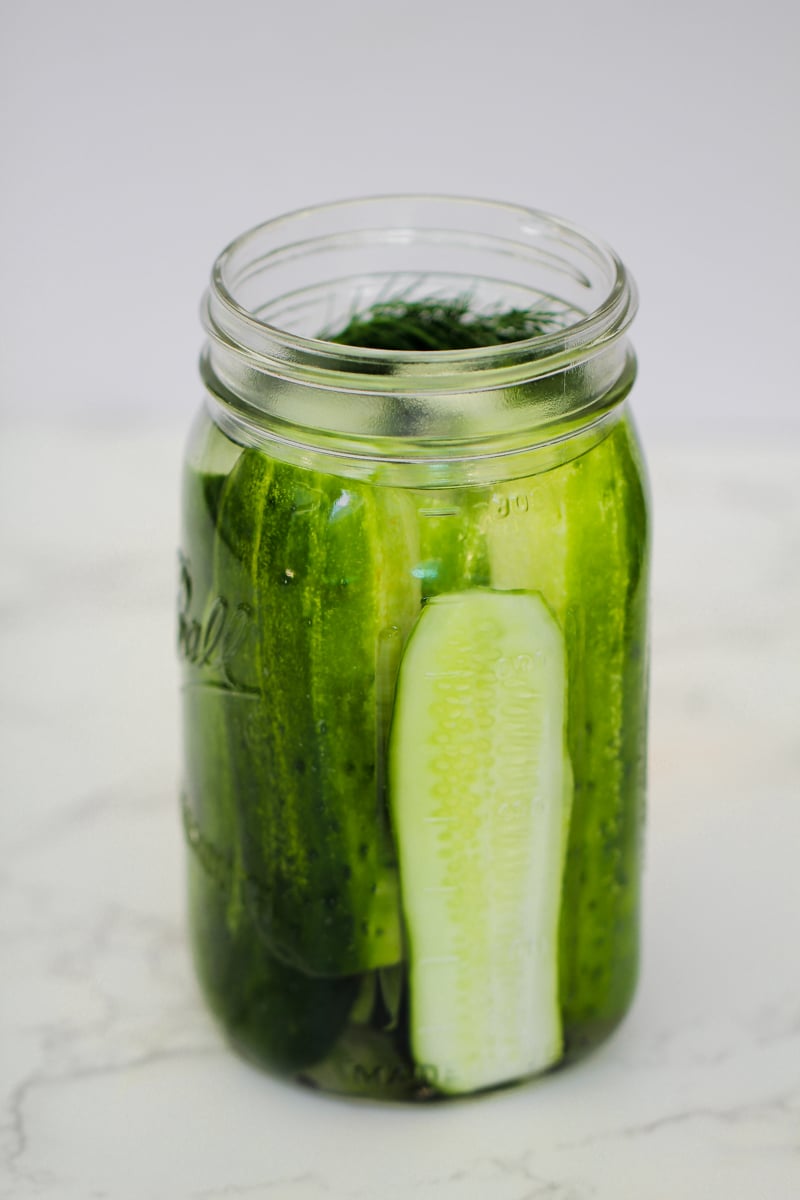
There are three things that separate a great dill pickle from a mediocre one: crispness, brine balance, and cucumbers.
- Crispness: This comes from the cucumber variety, the cut, and keeping them cold throughout. Pickling cucumbers (Kirby cucumbers) are far better than regular slicing cucumbers - their thinner skin and denser flesh hold up to the brine without going soft. Trimming the blossom end (the end opposite the stem) removes an enzyme that can cause softening.
- Brine balance: The best dill pickle brine is tangy from the vinegar, well-seasoned from the salt, and has enough aromatics to taste like more than just acid. Most commercial pickles overload on sugar; a proper dill pickle should be sharp, garlicky, and herby - not sweet.
- Cucumbers: Persian cucumbers work well for this recipe if you cannot find Kirby. Avoid English cucumbers (the long, seedless kind). They are too watery and will turn soft quickly in the brine.
What's in Dill Pickle Brine?
A simple dill pickle brine has four base components: vinegar (the acid that pickles and preserves), water (which dilutes the vinegar to a balanced strength), salt (which seasons and draws out moisture), and a small amount of sugar (which softens the sharp edge of the acid without making the pickles sweet). The aromatics - garlic, dill, mustard seeds, peppercorns - are what give each homemade batch its own character.
This recipe uses a 1:1 water-to-vinegar ratio, which produces a crisp, tangy, properly tart dill pickle. The salt level is calibrated to season without being overly briny. The sugar is just enough to round out the brine without pushing it toward sweet territory.
Ingredient Notes
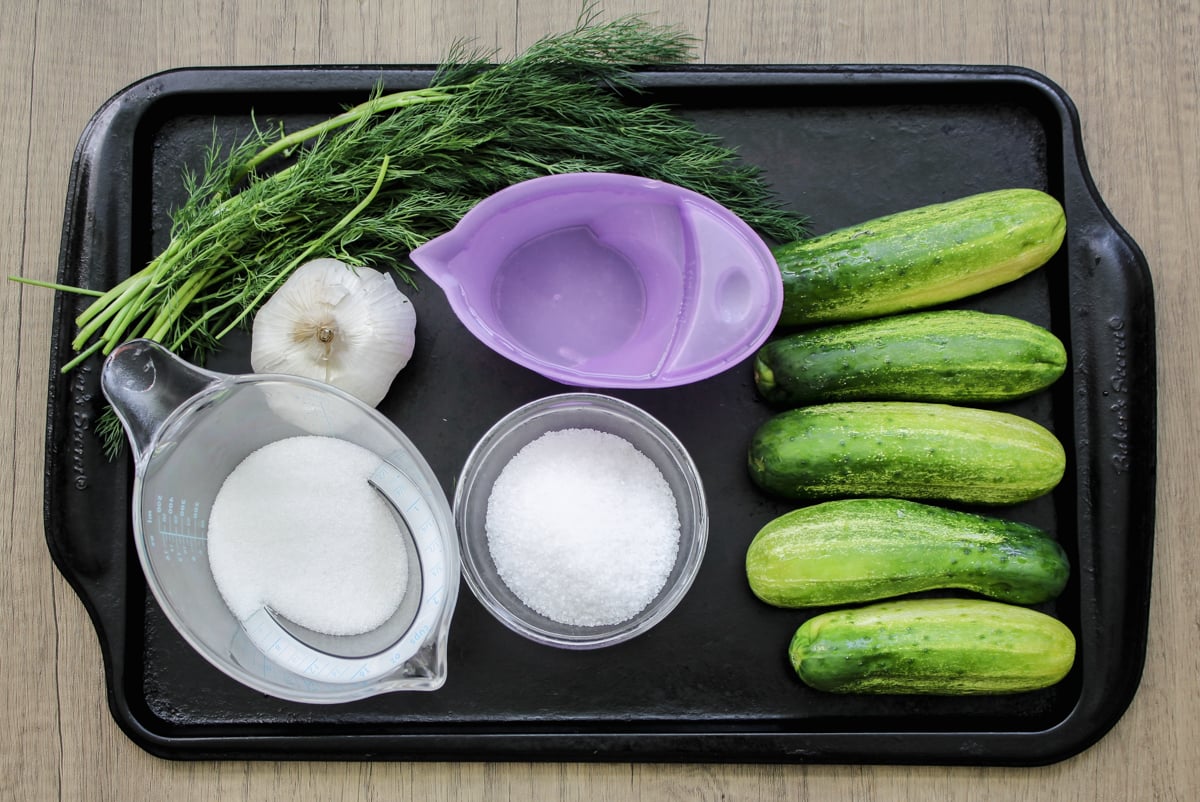
- Kirby cucumbers: Also called pickling cucumbers. Small, bumpy-skinned, and firm. They are the best for pickling, as they have fewer seeds and less water than slicing cucumbers, which means they stay crisp in the brine. Wash them well and trim both ends (especially the blossom end) before slicing. Persian cucumbers are an excellent substitute. Do not use English cucumbers. They are way too watery.
- Garlic: Smash the cloves with the flat side of a knife and peel them. Smashed garlic releases its flavor into the brine more readily than whole cloves. Four cloves for two quart jars gives a pronounced garlic flavor, which is exactly right for a dill pickle.
- Black peppercorns: Whole peppercorns infuse the brine slowly and add a background warmth. Do not use pre-ground pepper, which clouds the brine. I didn't get them in the photo of ingredients. Mom reminded me after when we made these that she always tosses in some peppercorns in the pickle jars.
- Red pepper flakes: Optional but worth adding. They give the pickles a gentle, building heat that develops more over the first few days. Start with ½ teaspoon for a mild heat. Add up to 1 teaspoon for something with more kick.
- Fresh dill: Fresh dill is essential. I would not recommend using dried dill, it would give the pickles a noticeably flatter, less vibrant flavor. Use the feathery fronds and tender stems. If fresh dill is unavailable, dill seeds (1 teaspoon per jar) are a better substitute than dried dill weed.
- Bay leaves: (optional)One per jar. Bay leaves contain tannins that help keep pickles crisp during brining. A small addition with a meaningful result.
- Water: Use filtered or bottled water if your tap water is heavily chlorinated. Chlorine can interfere with the pickling process and affect the flavor.
- Distilled white vinegar: Use vinegar with 5% acidity - this is standard and is printed on the label. The 5% acidity is what makes the brine both safe (for refrigerator pickling) and correctly sharp. It helps preserve the pickles while giving them their signature tangy flavor. Do not substitute apple cider vinegar here; it changes the color and adds a sweeter, fruitier flavor that does not work as well for a classic dill pickle.
- Sea salt or kosher salt: Do not use iodized table salt. Iodine can discolor the brine and affect fermentation. Use fine sea salt or Diamond Crystal kosher salt. Morton kosher salt is denser - use 1½ tablespoons instead of 2 if substituting.
- Sugar: The goal is to balance the acidity of the vinegar and the saltiness of the brine, not sweetness. The sugar softens the sharp edge of the vinegar without turning these into bread-and-butter-style pickles.
How to Make Homemade Dill Pickles
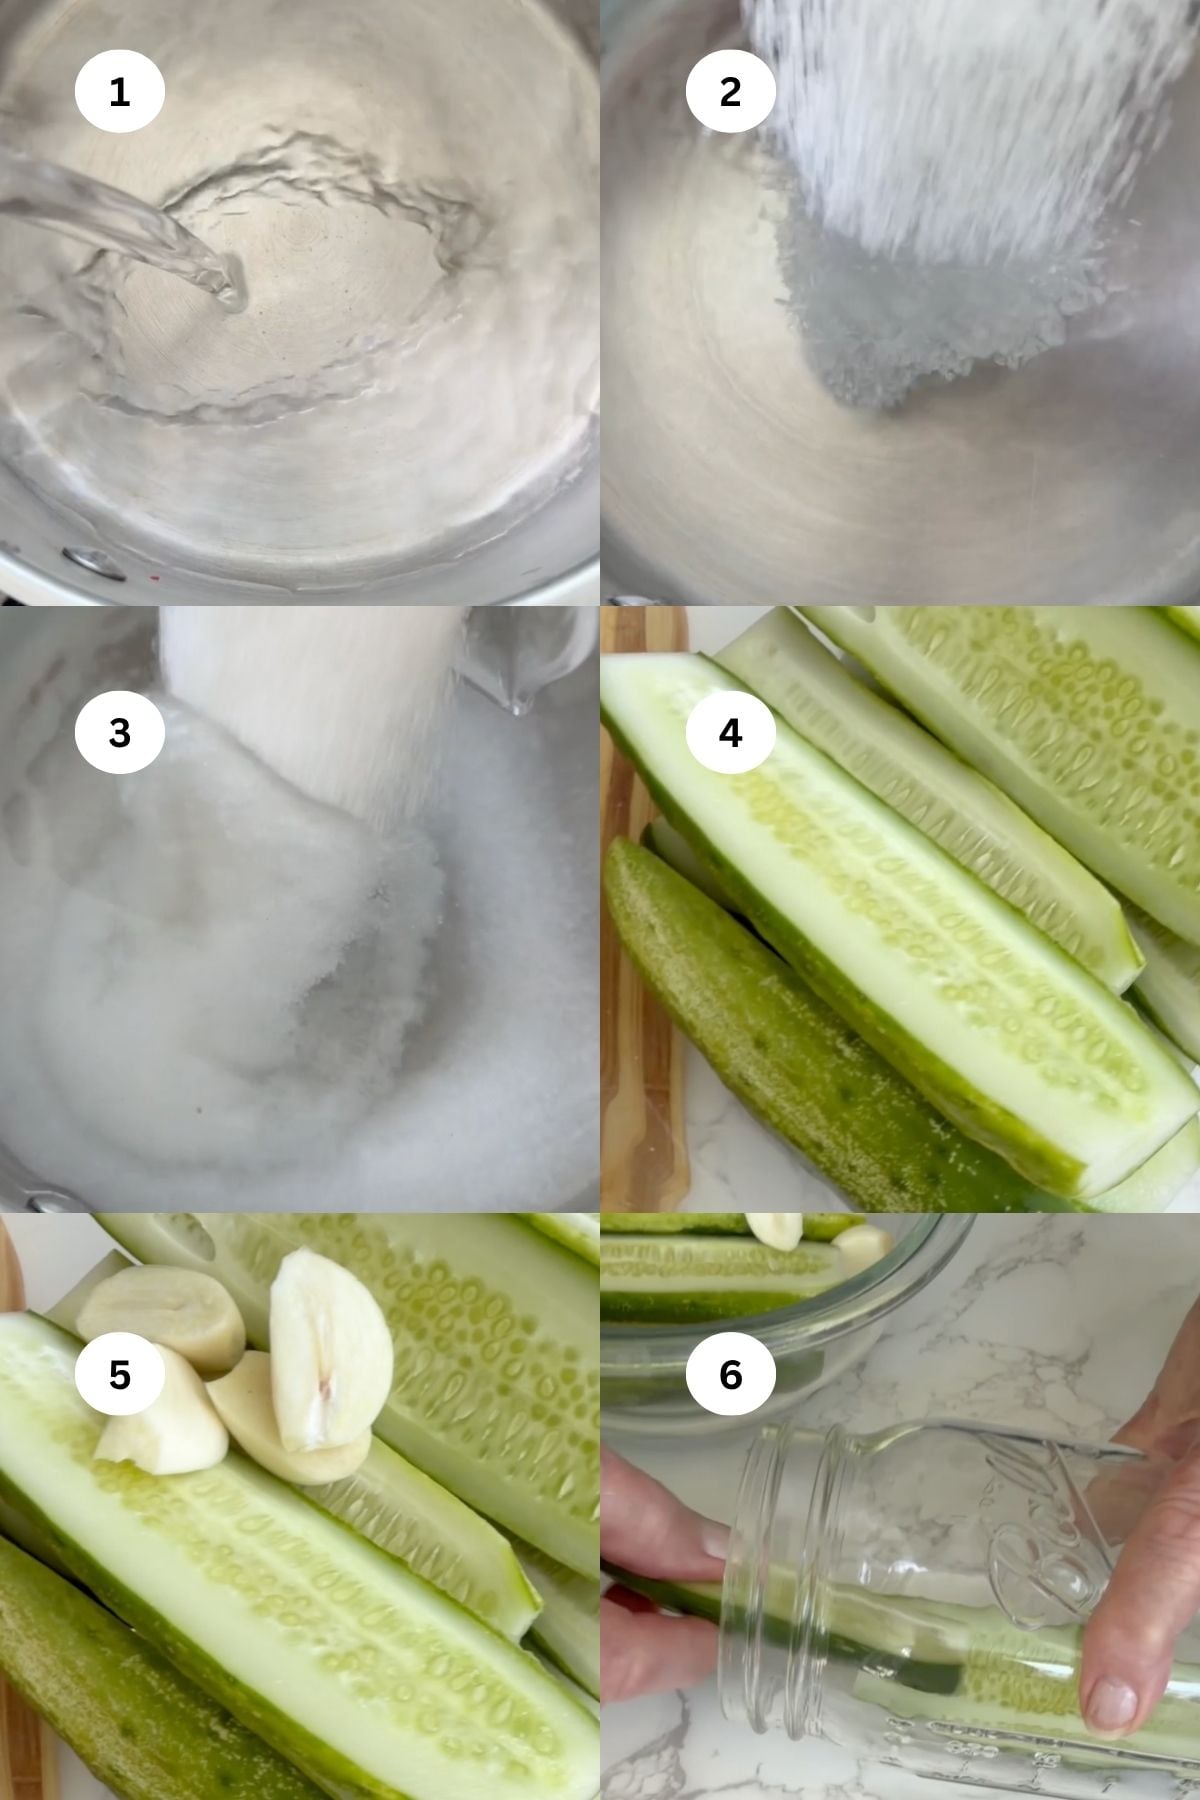
- Wash the cucumbers thoroughly and trim both ends. For dill pickle spears: slice each cucumber lengthwise into quarters or sixths depending on size. For dill pickle chips: slice horizontally into ¼-inch rounds.
- Divide the garlic, peppercorns, red pepper flakes (if using), dill sprigs, and bay leaves (if using) between the clean jars. Pack the cucumber spears or chips tightly into the jars on top of the aromatics.
- Combine the water, vinegar, salt, and sugar in a medium saucepan over medium heat. Stir until the salt and sugar dissolve completely, about 1 to 2 minutes. Remove from heat and let the brine cool for 5 to 10 minutes - it should still be warm but not boiling hot when you pour it over the cucumbers.
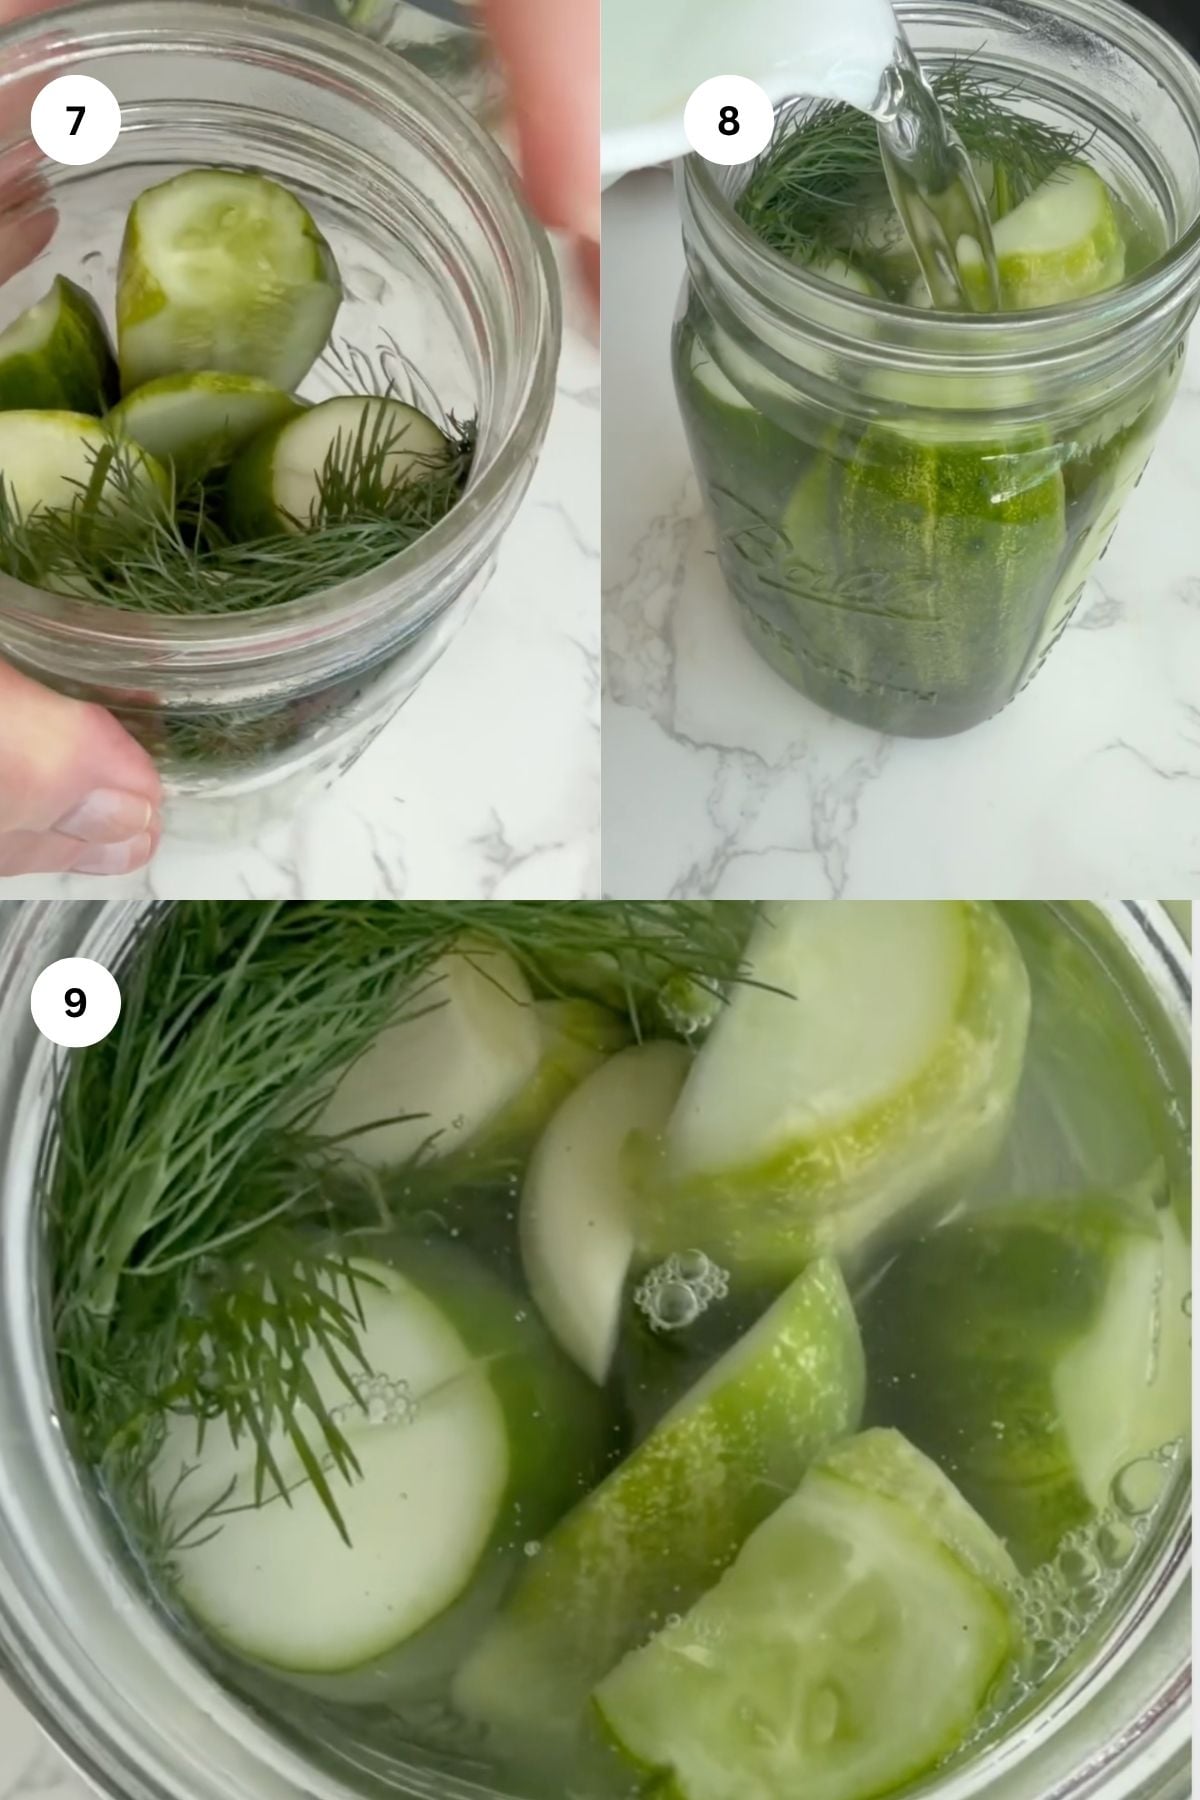
- Pour the warm brine over the cucumbers, making sure the cucumbers are fully submerged. Tap the jars gently on the counter to release any air bubbles. Let the jars cool to room temperature (about 30 minutes), then seal with lids and refrigerate.
- Pickle chips: Lightly pickled in 24 hours. Best flavor from day 3 onward.
- Pickle spears: Lightly pickled in 48 hours. Best flavor from day 5 to 7, when the brine has fully penetrated the thicker cut.
Dill Pickle Spears vs. Dill Pickle Chips
The cut you choose changes the timeline and the texture of the finished pickle. Spears take longer to pickle because the brine has to work through a thicker cross section - but the interior stays crunchier and meatier than a chip. Chips pickle faster and get a more evenly distributed brine flavor all the way through because of their thin profile. They are also better for sandwiches and burgers.
You can make both in the same batch - just use separate jars and label them. The brine recipe is the same for both cuts.
Tips for the Best Dill Pickles
- Trim the blossom end. The small, slightly rougher end of the cucumber (opposite the stem) contains enzymes that break down the pectin and soften pickles over time. Trim a thin slice off this end before cutting to keep your pickles crisp longer.
- Pack the jars tightly. Cucumbers float and shift if there is too much empty space in the jar. Packing them in snugly keeps them submerged in the brine and ensures even pickling.
- Do not pour boiling brine over the cucumbers. Let it cool for 5 to 10 minutes after heating. Pouring scalding brine directly onto the cucumbers can soften them before they even start to pickle.
- Use fresh dill. Fresh dill makes a noticeably more vibrant pickle than dried. If dill is not available, use 1 teaspoon of dill seeds per jar - they are a better substitute than dried dill weed.
- Wait at least 24 hours. It is tempting to taste immediately, but the brine needs time to penetrate. Chips pickled for only a few hours taste like vinegary cucumbers. Give them a full day minimum, and a few more if you can wait.
More Pickling Recipes
- Homemade Giardiniera - An Italian pickled vegetable mix with cauliflower, carrots, peppers, and celery in a spiced brine.
- Easy Pickled Jalapeños - Quick refrigerator pickled jalapeños ready in 24 hours.
- Easy Pickled Thai Chili Peppers - Fiery pickled peppers that work on everything from noodles to pizza.
- Pickled Watermelon Rind - A sweet and tangy refrigerator pickle that uses the part of the watermelon most people throw away.
- Easy Pickled Cucumbers - A quick cucumber pickle with a lightly sweet brine.
Did you make this and love it? Please RATE THE RECIPE below:)
I would LOVE IT if you can leave me a star rating and a review down below and let me know your thoughts! It means the world to me to hear how you liked it.
Please Subscribe and give a follow on Instagram, Facebook, Pinterest, and TikTok xx
Easy Homemade Dill Pickles (Refrigerator Pickle Recipe)
Equipment
- 4 Canning Jars one quart
Ingredients
For the pickling brine
For the pickles
- 20 pickling cucumbers
- 1 head garlic
- Fresh dill
- peppercorns
Instructions
Prepare the jar
- Wash and dry your canning jars. For extra cleanliness, run the jar and lid through the dishwasher before using.
Add the dill
- Arrange the fresh dill lengthwise around the inside edges of the jar so the sprigs run up the sides.
Prepare the cucumbers
- Wash the pickling cucumbers well, then slice them in half lengthwise.
Pack the jar:
- Place the cucumber halves upright inside the jar, rotating them so some face cut-side inward and others face cut-side outward. Pack them snugly, but leave enough space for the brine to flow around each cucumber.
Make the brine
Add the brine
- Carefully pour the warm brine over the cucumbers until they are fully submerged. Gently tap the jar against the counter to release any trapped air bubbles, then add more brine as needed.
Cool and refrigerate
- Let the jar cool slightly, then cover it tightly and refrigerate.
Let the flavors develop
- The pickles can be eaten once chilled, but they taste best after at least 24 hours. For a stronger pickle flavor, refrigerate them for several days before serving.
- Keep the cucumbers submerged in the brine and store them in the refrigerator. For the best quality, enjoy them within 4 to 6 weeks.
Nutrition Disclaimer
Please keep in mind that the nutritional information presented below is an approximation and may vary depending on the exact ingredients used.
Video
Notes
- Yield: This full recipe makes about 4 one-quart / 1-liter jars and uses about 20 small pickling cucumbers. Be sure to use a clean glass jar with a tight-fitting lid.
- Smaller batch: For smaller batch, use 5 small pickling cucumbers, 1 1-quart jar, 2 cups water, 2 tablespoons sugar, 2 tablespoons coarse salt, kosher salt, or pickling salt, ¼ cup vinegar. Follow rest of recipe.
- Cucumbers: Pickling cucumbers work best because they stay firmer and crunchier than regular cucumbers.
- Spices: You can add yellow mustard seeds, coriander seeds, dill seeds, or a bay leaf for extra flavor. I usually keep it simple because the fresh dill, garlic, peppercorns, and brine already give the pickles plenty of flavor. And that's what mom does!!
- Dill: Arrange the dill along the sides of the jar so the flavor spreads throughout the brine. Packing: Pack the cucumbers snugly, but do not crush them or block the brine from flowing around them.
- Brine: Heat the brine only until the sugar and salt dissolve. It does not need to boil. Submerging: Keep all the cucumbers fully covered with brine to help them stay fresh.
- Flavor: The pickles are ready once chilled, but the flavor improves after at least 24 hours.
- Storage: These are refrigerator dill pickles, not canned pickles. They are not shelf-stable and must be stored in the refrigerator. Keep the jar tightly covered in the refrigerator. Keep the cucumbers fully covered in brine while storing. Use a clean fork each time you remove pickles from the jar.
- Shelf life: For the best texture and flavor, enjoy the pickles within 4 to 6 weeks.
Nutrition
FAQ
What is the best brine for dill pickles?
The best dill pickle brine uses a 1:1 ratio of water to white vinegar at 5% acidity, seasoned with enough salt to taste well-seasoned without being overpoweringly salty, and very little sugar - just enough to balance the acid without making the pickles sweet. Garlic, fresh dill, mustard seeds (optional), and peppercorns round out the brine. The exact amounts depend on how bold you want the flavor, but this is the base every good homemade dill pickle brine starts from.
Do you have to boil the brine for refrigerator pickles?
You do not have to bring it to a full boil - you just need to heat the brine enough to dissolve the salt and sugar completely, which takes about 1 to 2 minutes of stirring over medium heat. The warm brine also helps the cucumbers begin to absorb flavor faster than a cold brine would. Let it cool slightly before pouring it over the cucumbers - hot brine straight from the stove can soften them prematurely.
How long do homemade dill pickles last?
Stored in sealed jars in the refrigerator, homemade dill pickles last up to 2 months. The flavor actually improves over the first two to three weeks as the brine continues to develop. After that they are still safe to eat but can start to lose their crunch over time.
Can I reuse the dill pickle brine?
You can reuse the brine once to make another batch of refrigerator pickles - it will have a slightly milder flavor from the first use but still works. Add fresh cucumbers and a few fresh aromatics (a new garlic clove, a fresh dill sprig) to the jar, top off with the reserved brine, and refrigerate again. Do not reuse brine more than once since the acidity and salt concentration will be too diluted to pickle effectively.
Made these pickles and they are perfect! Really crunchy and excellent flavor!
These homemade dill pickles were such a fun and easy recipe to try! Crisp, tangy, and perfect for keeping in the fridge.
Homemade dill pickles is delicious I made it taste better than the storebought one.
Made these with fresh cukes from my garden and they came out fantastic. Nothing like a homemade pickle!
This was how my mom made her pickles, but I never got her recipe! It worked perfectly and was a big hit with my crew!
I tried this recipe, and the pickles turned out perfectly crisp and flavorful. They're so much better than store-bought!