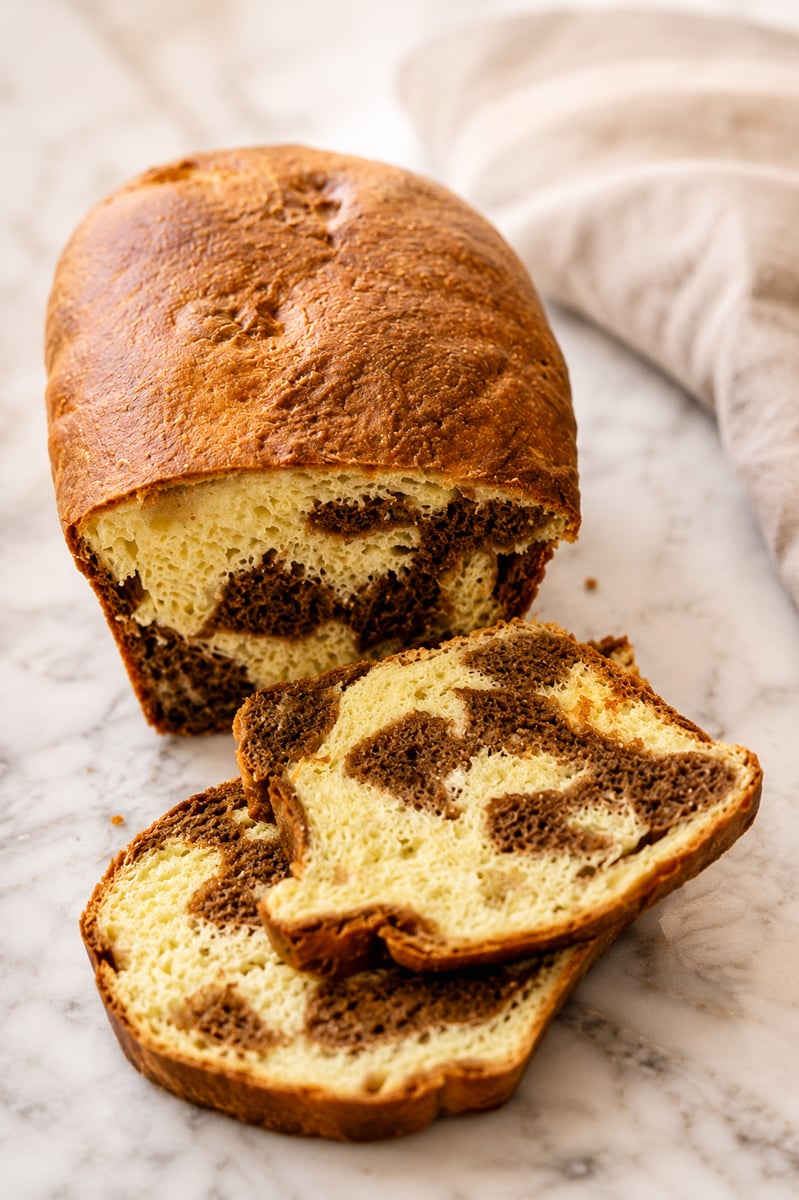
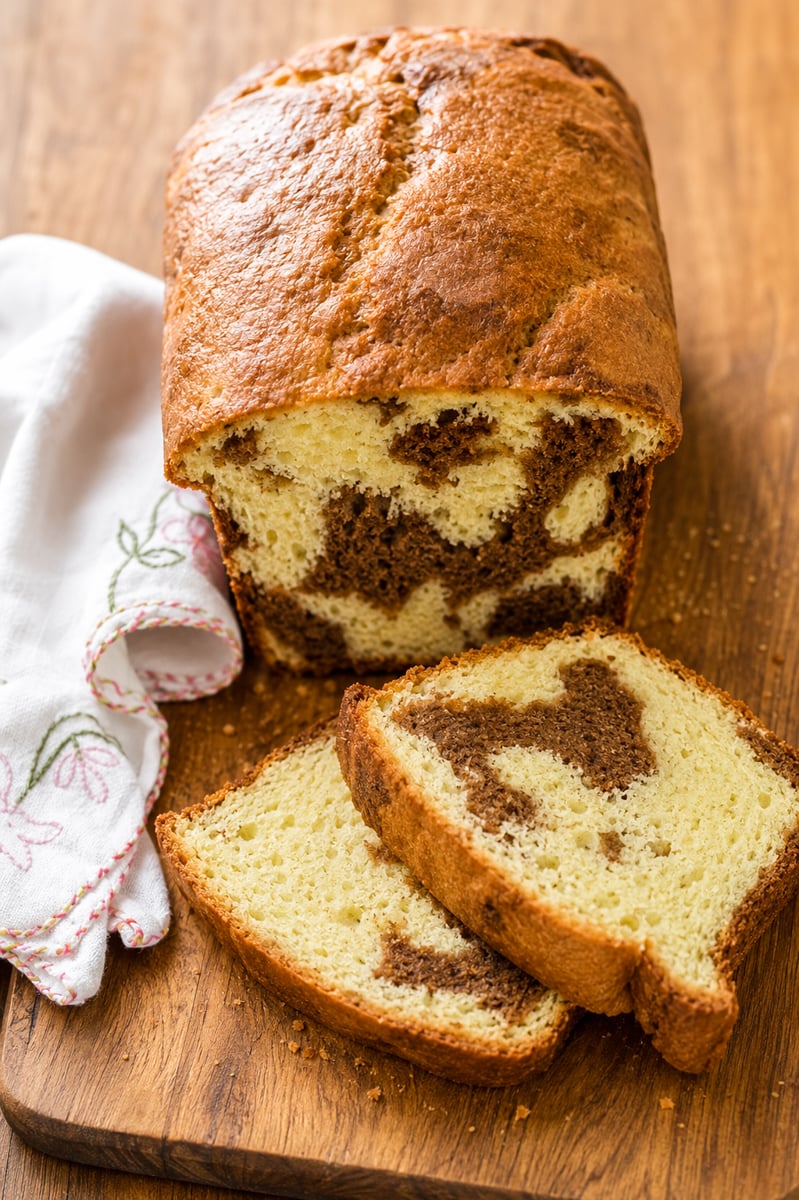
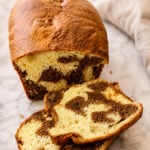
This marbled chocolate brioche loaf is one of the most beautiful and rewarding breads I have ever baked. The crumb is impossibly fluffy and buttery, the swirl of dark chocolate runs through every slice, and the scent of cinnamon, chocolate, and lemon zest fills the whole house while it bakes. It is a project, but it is absolutely worth it.
If you love baking with chocolate, you will also want to try my Banana Bread with Chocolate Chips and my Cherry Almond Focaccia for more from-scratch baking inspiration.
This article contains affiliate links which support us at no extra cost to you.
Jump To
I first made this recipe from Nick Malgieri's The Modern Baker, and I have been thinking about it ever since. It came to mind when I was dreaming of the chocolate brioche that Zio Antonio makes at his pastry shop in the Aosta Valley. His are flawless. Mine came out pretty wonderful too, and I am not ashamed to say so.
The original recipe calls for a food processor, which I followed, but I much prefer using a KitchenAid mixer. Either way works. What matters most is patience: do not rush the rises, do not skip the resting steps, and do not worry when the dough looks like a sticky mess. It comes together.
Why You'll Love This Bread
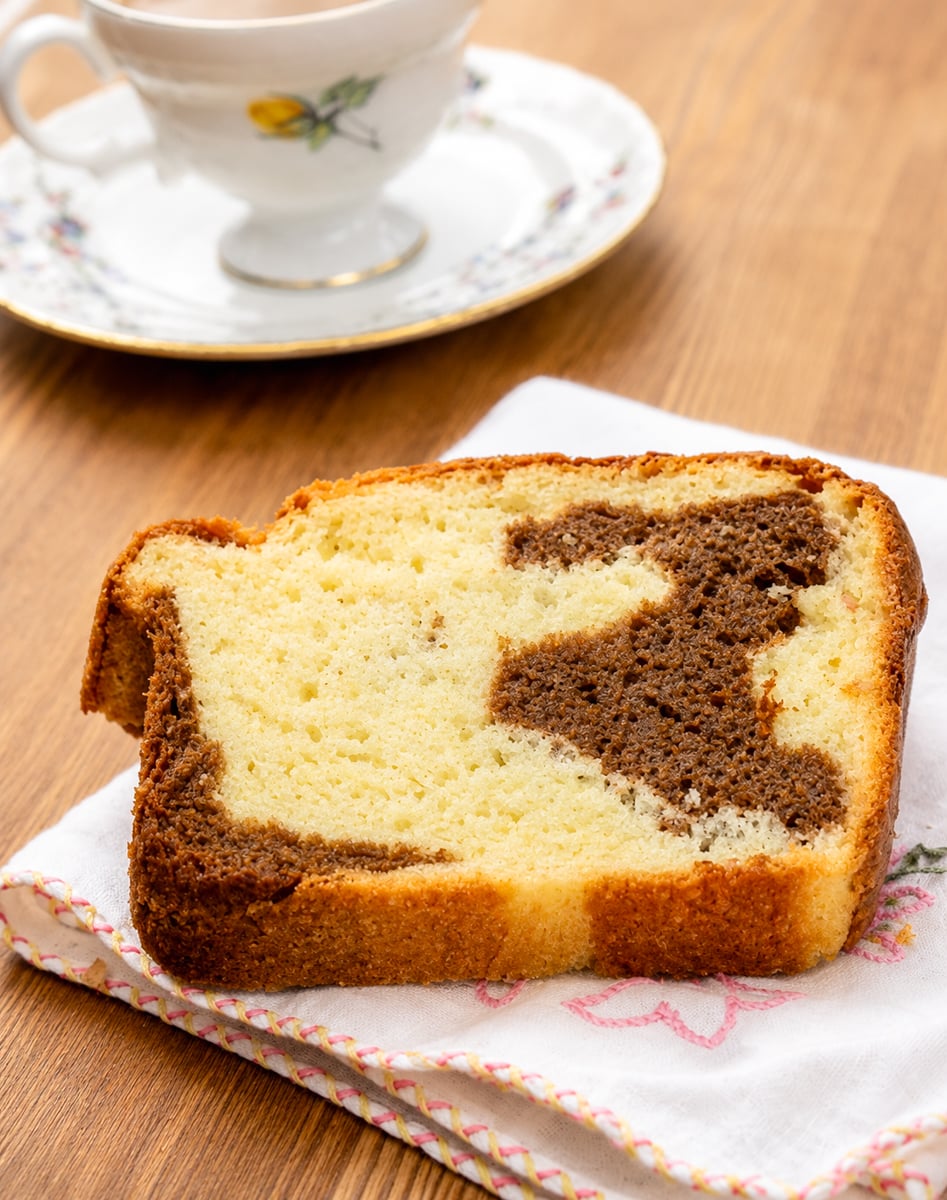
- Stunningly beautiful slices. Every slice reveals a swirl of dark chocolate running through soft, golden brioche crumb. It looks professional and is completely handmade.
- Incredibly fluffy texture. The enriched brioche dough with eggs, butter, and whole milk produces a crumb that is tender and light, almost like a soft cloud.
- The chocolate is balanced. The dark chocolate enrichment is flavored with cinnamon and a touch of baking soda, which deepens the color and flavor without making the whole loaf sweet. It is elegant, not cloying.
- The house smells incredible. Chocolate, cinnamon, and lemon zest while it bakes. The smell lingers all afternoon.
- Great for gifting and special occasions. This is exactly the kind of loaf you bring to a special brunch or wrap up as a gift. It looks like it came from a bakery.
Ingredient Notes
Here is what you need and a few notes on each:
For the Brioche Dough:
- Whole milk: Warmed to about 110 degrees F. Too hot will kill the yeast, too cold and it will not activate. Whole milk produces a richer, more tender crumb than low-fat.
- Rapid rise dry yeast: One standard envelope (2 and a half teaspoons). Rapid rise yeast works beautifully here and keeps the process moving.
- All-purpose flour: The recipe uses 2 and a half cups total, divided into two additions. The first cup is used to make the starter sponge; the remaining 1 and a half cups go into the main dough.
- Unsalted cold butter: Seven tablespoons cut into half-inch cubes. Cold butter is important for the food processor method. If using a stand mixer, slightly softened butter works better.
- Granulated sugar: Just a quarter cup for a lightly sweet, enriched dough.
- Sea salt: Half a teaspoon. Essential for flavor balance.
- Egg and egg yolks: One whole egg plus two extra yolks. The yolks add richness and give the crumb its gorgeous golden color.
- Lemon or orange zest: Two teaspoons finely grated. This is a classic Italian brioche touch. The citrus brightens the whole loaf without being obvious. I love lemon here.
- Light or dark rum: Just one tablespoon. It adds a subtle depth and is very traditional in Italian enriched breads. You can substitute with vanilla extract if preferred.
For the Chocolate Enrichment:
- Dark chocolate: 40 grams (about 1 and a half ounces) of good quality dark chocolate, or 4 tablespoons of dark chocolate chips. The better the chocolate, the better the flavor in the final loaf.
- Baking soda: Half a teaspoon added to the melted chocolate. This is an old baking trick that deepens the color of the chocolate and gives it a more dramatic, almost black swirl.
- Ground cinnamon: Half a teaspoon stirred into the chocolate enrichment. It is subtle but adds warmth that pairs beautifully with dark chocolate.
- Water: Just one tablespoon to loosen the chocolate mixture and help it incorporate into the dough.
- All-purpose flour: Three tablespoons added to the chocolate dough piece to bring it to the right consistency after the chocolate is incorporated.
- Room temperature butter: One tablespoon spread gently over the top of the shaped loaf before the final rise.
How to Make This Marbled Chocolate Brioche Loaf
1. Prepare a 9 x 5 x 3 inch loaf pan by greasing it generously with butter and lining the bottom of the pan with either parchment paper or wax paper.
2. Heat the milk in a small saucepan until lukewarm (about 110˚F). In a small bowl, whisk together the yeast and lukewarm milk. With a large spatula (or spoon), stir in 1 cup of the all-purpose flour (you'll have 1 ½ cups of flour left) . You will have a very sticky ball. Scrape whatever dough is left off of your spoon or spatula. Cover with plastic wrap and set aside to rise for about 20 minutes. This mixture will become a little bubbly and rise just a bit.
3. After the 20 minutes of waiting for the flour mixture to rise, cut the butter into ½ inch chunks and place it in the food processor bowl with the sugar, salt, egg, egg yolk, lemon (or orange zest) and rum. Pulse about 5-7 times, or until the butter has been processed into the liquid. The mixture may look a bit separated-not a problem-it will come together when you add the flour).
4. With a spatula, scrape out the sticky dough to the wet ingredients in the food processor and pulse until the liquid is incorporated into the dough. Dump in the remaining 1 ½ cups all-purpose flour to the bowl and process until you get a smooth mixture; about 8-10 times. Leave the lid of processor on and let this dough rest for 10 minutes.
5. While it's resting, place the chocolate in a medium bowl and place on top of a sauce pan with simmer water. Stir until melted. (If you prefer to melt the chocolate in a microwave, go ahead. I don't own a microwave.) Set the chocolate aside to cool. 
6. After 10 minutes, pulse the dough in the processor 10 times and then dump the dough onto a floured surface. Fold and gently knead the dough 5 or 6 times, adding pinches of flour if needed, to get an elastic dough. Give your chocolate a stir.
7. Divide the dough in 3 pieces and place one of the pieces of dough in the food processor, while covering the other two with a towel or plastic wrap. 
The Chocolate Part:.
8. Add baking soda, cinnamon, and water to the melted chocolate and stir to incorporate. Spoon out the chocolate mixture into the food processor bowl and pulse it together with the one piece of dough that was already in it about 3-4 times to incorporated. Add the 3 tablespoons of flour and pulse until it is smooth. 
9. Carefully scrape the chocolate mixture out of the processor onto a floured surface and knead, adding pinches of flour if necessary, until it becomes slightly more elastic.
10. On a floured cutting board, press the chocolate dough into a 7" square. Uncover the other two doughs and press those into 7" squares as well. Make a sandwich with the doughs placing the chocolate dough in between the two white doughs.

11. Cut the dough sandwich into three even pieces (the stacking doesn't have to be precise. some of my chocolate middle was sticking out and that's ok).

12. Cut ⅓ of the dough into ½ inch strips. Repeat with the other strips of dough.

13. Carefully scoop up the dough and place in a large bowl. Sprinkle about a teaspoon of water over the dough strips and gently toss the dough together like you're mixing a salad. Once the dough is moist and slightly sticky, gather the dough up and press and squeeze the dough into a solid ball. This is the part where you have to be careful. It is one big sticky mess. *Here is where I added a few pinches of flour to the dough so I could make it into a nice ball of dough. It doesn't matter where the chocolate is ending up while you form this ball of dough.
You just don't want it to be sticky and you don't want to form it for too long. Then flat the ball into a thick 4 x 8 inch rectangle. Place in the prepared loaf pan and gently press down to fill the pan completely. Cover with buttered plastic wrap. 

14. Gently form the ball on top of a floured surface into 4 x 8 inch rectangle. Place in the prepared loaf pan and gently press down to fill the pan completely. Gently pat a little softened butter on top of the loaf. Spray plastic wrap with non-stick spray and place on top of the loaf. 
15. Let the dough rise for about 2 hours, or until the loaf has risen about an inch above the loaf pan. About 15 minutes before the loaf is completely risen preheat the oven to 350˚F. 
16. Holy DOUGH! Look how this rose! Let the dough rise for about 2 hours, or until the loaf has risen about an inch above the loaf pan. This is what my dough looked like at exactly 2 hours. About 15 minutes before the loaf is completely risen preheat the oven to 350˚F.

17. Bake the loaf in the preheated oven until the top of the loaf is deep golden brown, about 35 to 40 minutes. Let the loaf cool in the pan for about 5 minutes, and then unmold while still warm, and put on a cooling rack sideways so it doesn't become a hard bread.
Enjoy with a nice cup of tea or coffee. Happy baking!:)
Storing
Wrap the cooled loaf tightly in plastic wrap or store in an airtight bag at room temperature for up to 2 days. For longer storage, wrap well and refrigerate for up to 5 days. To refresh, warm slices in a 300 degree F oven for 5 minutes or toast lightly.
To freeze: wrap the fully cooled loaf tightly in plastic wrap, then in aluminum foil, and freeze for up to 2 months. Thaw at room temperature overnight. Individual slices can also be frozen and toasted directly from frozen.
Did you make this and love it? Please RATE THE RECIPE below:)
I would LOVE IT if you can leave me a star rating and a review down below and let me know your thoughts! It means the world to me to hear how you liked it.
Please Subscribe and give a follow on Instagram, Facebook, Pinterest, and TikTok xx
Marbled Chocolate Brioche Loaf
Equipment
- 9 x 5 x 3 inch loaf pan
Ingredients
- ½ cup whole milk
- 2 ½ teaspoons 1 envelope rapid rise dry yeast
- 2 ½ cups all-purpose flour divided
- 7 tablespoons unsalted cold butter cut into ½-inch pieces
- ¼ cup granulated sugar
- ½ teaspoon sea salt
- 1 large egg
- 2 large egg yolks
- 2 teaspoons finely grated lemon or orange zest
- 1 tablespoon light or dark rum or ½ teaspoon vanilla extract
Instructions
- Grease a 9 x 5 x 3 inch loaf pan with butter and line the bottom with parchment. Warm the milk to about 110 degrees F. Whisk together the yeast and warm milk, then stir in 1 cup of flour until a sticky ball forms. Cover and let rest 20 minutes.
- Place the cold butter, sugar, salt, egg, egg yolks, zest, and rum in the food processor. Pulse 5 to 7 times. Scrape in the starter dough and pulse to incorporate. Add the remaining 1 ½ cups flour and process until smooth, about 8 to 10 pulses. Leave the lid on and rest 10 minutes.
- While the dough rests, melt the chocolate in a heatproof bowl over simmering water. Remove from heat, stir in baking soda, cinnamon, and water. Set aside to cool slightly.
- Pulse the rested dough 10 more times, then turn onto a floured surface. Fold and knead 5 to 6 times until elastic. Divide into 3 equal pieces.
- Place one dough piece in the food processor. Add the chocolate mixture and pulse 3 to 4 times to incorporate. Add the 3 tablespoons flour and pulse until smooth. Turn out and knead gently until it holds together. Cover the plain dough pieces while you work.
- Press each dough piece into a rough 7-inch square. Stack them with the chocolate dough in the middle. Cut the sandwich into 3 strips, then cut the strips into ½-inch pieces.
- Place all pieces in a large bowl, sprinkle with 1 teaspoon of water, and gently toss together. Press and squeeze into a solid ball, adding a pinch of flour if too sticky. Do not overwork. Flatten into a rough 4 x 8 inch rectangle, place in the prepared pan, and press down to fill evenly.
- Spread the softened butter over the top. Cover loosely with buttered plastic wrap and let rise for about 2 hours until the loaf rises about 1 inch above the rim of the pan.
- Preheat the oven to 350 degrees F about 15 minutes before the rise is complete. Bake for 35 to 40 minutes until the top is deep golden brown. Cool in the pan for 5 minutes, then unmold onto a wire rack. Cool on its side to preserve the shape.
Nutrition Disclaimer
Please keep in mind that the nutritional information presented below is an approximation and may vary depending on the exact ingredients used.
Notes
- Sticky dough is correct. Brioche dough is meant to be tacky at every stage. Add flour sparingly or the final loaf will be dense.
- Stand mixer works great. Use the dough hook on medium speed for 8 to 10 minutes if you prefer not to use a food processor.
- Do not over-marble. When pressing the dough strips together, stop as soon as they form a ball. Too much mixing blends the colors and loses the swirl effect.
- Cool on its side. The brioche crumb is delicate right out of the oven. Cooling on its side on a rack prevents the bottom from becoming gummy.
- Make ahead: Shape the loaf, cover, and refrigerate overnight for a slow cold rise. Bring to room temperature for 30 to 60 minutes before baking.
What a gorgeous load of bread! It looks perfect =)
I love a good brioche, and have not tried a marbled brioche before. It looks so good that I really could just eat it on it's own. You know, I never quite know how bake the marble effect and now I know. I love all the step by step photos and instruction here. Now I can make myself a delicious brioche. oOO, might stash some aside, so I could make Chocolate Vanilla Bread pudding ;p. xoxo
Oh goodness that looks and sounds heavenly!
This bread looks amazing!! I have been wanting to try brioche, I will have to give this recipe a try! 🙂
I love brioche, and have always wanted to attempt it. I may as well go ahead and make this my first attempt... looks amazing!
Now this is a special brioche! It is beautiful, and I love the idea of marbling! I wish I could enjoy a slice of this tonight!
Love Yeast marbled bread Lora. This looks delicious and I love the method very different than any chocolate in a bread that I bake! 🙂
looks perfect..delicious recipe..I am definitely saving this one
Mireille
http://gourmetglobal.blogspot.com
Look at that lovely bread! I think brioche breads are one of my favorites...such a lovely rise and such amazing flavor. Thank you for sharing with me, sweet girl. I hope you are doing well.
Look at the rise on that baby! It's beautiful, Lora, and I'm SO SO glad you submitted it to my BBD. People are going to go nuts over it. 4 people who saw the round-up in my drafts last night, went gaga for it.
As for YA love stories, nooo, I could never fictionalize to that extent. Just journaling a memory 🙂
A lot of work but it looks delicious. I am so pleased to have a food processor recipe for brioche as I don't want to overwork my new Kitchen Aid.
What I wouldn't give for a slice of that bread right now:) It's a beauty!
Oh this is just downright torture for me it looks so amazing Lora. I'm not sure I have the patience right now but I have to come back to this bread and give it a try one day.