
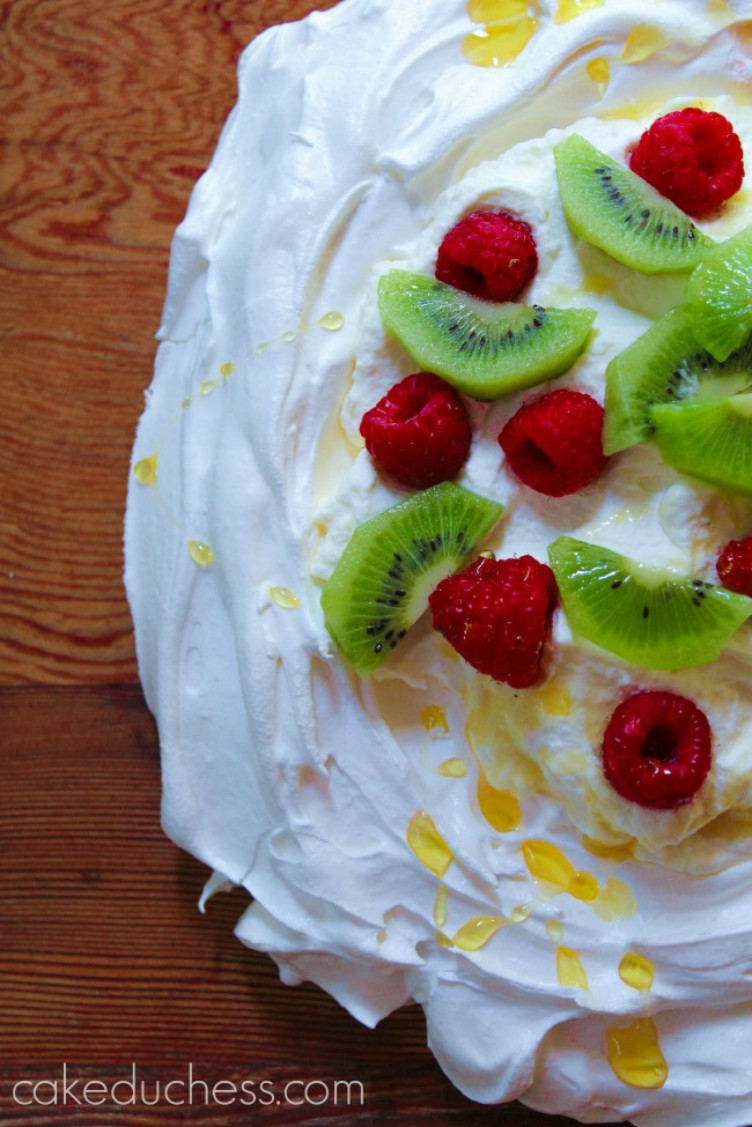
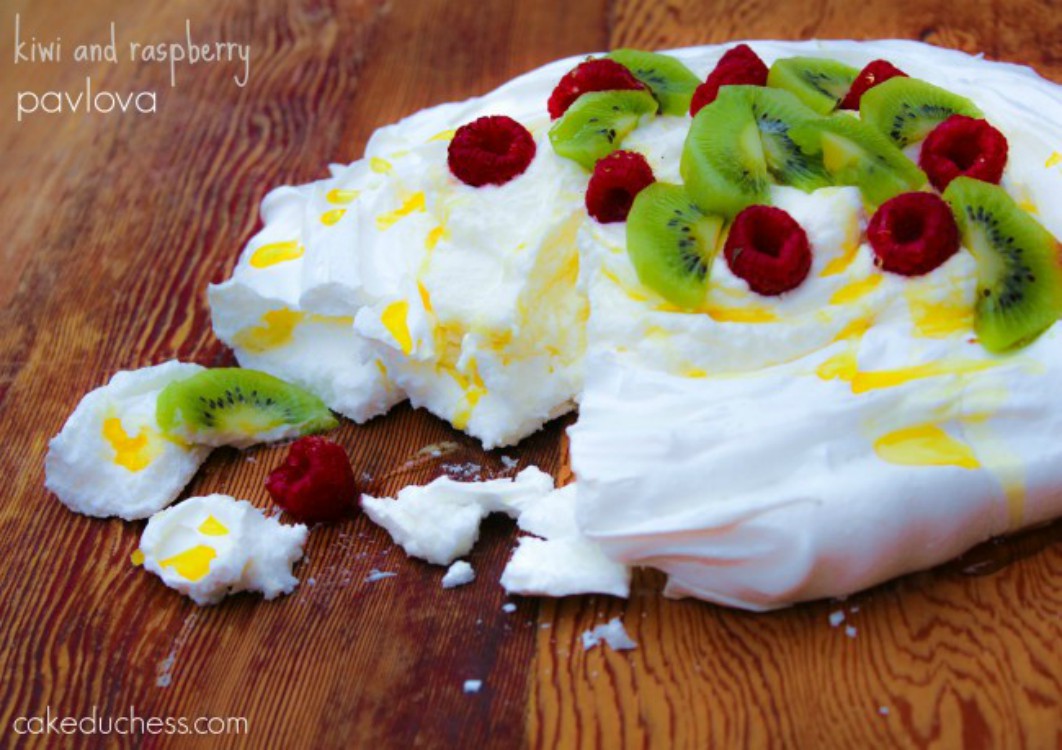
Kiwi and Raspberry Pavlova is a delicious and decadent dessert made with egg whites. Totally gluten-free topped with whipped cream, sweet raspberries, kiwi and a drizzle of honey.
If I really want to impress my friends and family, I make a pavlova! They are just so pretty look at and they are not as complicated to make as you may think!
Making a pavlova is pretty easy and relatively fool-proof! The results: crunchy on the outside and as fluffy as a marshmallow inside. Topped with luscious whipped cream and gorgeous kiwis and raspberries...this is a dessert to IMPRESS!!
You could decorate your pavlova with whatever you prefer: fresh berries, cooked pears or apples (very fall!). For the chocolate lovers: you could add cocoa powder to the meringue and top with chocolate and cream...a chocolate pavlova delight!
The pavlova is as fluffy as a cloud and very delicate! Be super careful (it's very fragile!) when you remove it from the parchment paper.
Important to remember: When the egg whites have quadrupled in volume, that is the time to add the sugar just a little bit at a time and keep on beating! and adding them slowly while whipping the mixture continuously. Even more important, when they are whipped to perfection...don't wait to bake them. It's important to get them shaped on your pan and put in the oven. No hesitating.
My very important tip for you: let it cool completely on the pan before transferring to your serving plate. I didn't wait the most recent time I baked it and my pavlova did break apart a bit before I had a chance to decorate it. Luckily, nobody complained! Even not so perfect to look at...it was perfection to taste!
What is the difference between a meringue and a pavlova?
A meringue is a mixture of whisked egg whites and sugar and a pavlova is a type of meringue. Pavlovas have a marshmallow-like center from the cornstarch.
How Do I Know My Pavlova Is Done?
The pavlova will look dry and pale when it is perfectly baked. When you insert a skewer into the meringue it will have a sticky almost like marshmallow consistency.

Sheet Pan Mojo Chicken
Ingredients
- ¼ cup or about 6- 8 cloves of garlic, peeled and minced
- 1 teaspoon sea salt
- 1 tablespoon fresh or dried oregano
- 1 teaspoon ground cumin
- ¼ cup chopped cilantro lightly packed
- ¼ lemon juice
- ¼ cup lime juice freshly squeezed
- ½ cup plus 1 Tablespoon extra-virgin olive oil divided
- ½ cup orange juice freshly squeezed
- 2 pounds bone-in skin-on chicken pieces (I used a mix of thighs and drumsticks, be sure to trim excess skin off thighs)
- 1 teaspoon salt
- ¼ teaspoon ground black pepper
- 1 small yellow or white onion peeled and sliced
- Orange and lime slices for garnish optional
Instructions
- MOJO MARINADE:
- In a large mortar with pestle (you could pulse it in a food processor or chop the garlic up by hand), add the garlic, salt, oregano, cumin, cilantro, lemon and lime juice. Use the pestle to twist the garlic until it is smashed.
- In medium bowl, add the crushed garlic mixture with the 1/2 cup olive oil and orange juice. Use a fork to mix it all up.
- Drizzle the remaining tablespoon of olive oil on the chicken.
- Sprinkle salt and pepper on the chicken pieces.
- Transfer the chicken pieces to a zipped lock bag or air-tight container.
- Add the marinade to the bag or container with the chicken pieces.
- If you have the chicken in a zipped lock bag, seal it and massage the chicken with the marinade to completely coat.
- If it’s in a container, use your hands to massage it all over the chicken (use disposable gloves if you have on hand).
- Place the bag or container in the fridge and marinate for at least three hours. Even better, marinate overnight. Realistically, if you have 30 minutes-1 hour, and that is fine too!
- ROAST CHICKEN:
- Preheat oven to 425F. On a foil paper lined baking sheet, add the chicken pieces (skin side down) and the marinade. Place the onion slices, orange and lime around the chicken.
- Transfer baking sheet to the oven and cook for 30 minutes.
- Spoon the marinade all over the chicken and turn over chicken pieces to skin side up.
- Lower temperature to 375F. Bake until the chicken is completely cooked through and the skin is nice and crispy; about another 30-45 minutes. Total cook time is about 1 hour-1 hour and 15 minutes. Let chicken rest 10 minutes tented with foil paper before serving.
Nutrition Disclaimer
Please keep in mind that the nutritional information presented below is an approximation and may vary depending on the exact ingredients used.
Notes
*If you’re making chicken breasts: The safe internal temperature for chicken breasts is 165 degrees Fahrenheit.
*If you’re making a chicken thighs and legs (like I did), you should check by inserting an instant-read thermometer into the thickest part of the thigh and temperature should read 185F.

Leave a Reply